Mockarty Quick Start Guide
Get up and running with Mockarty in 20 minutes. This guide walks you through installation, creating your first mock, testing it, and exploring the key features.
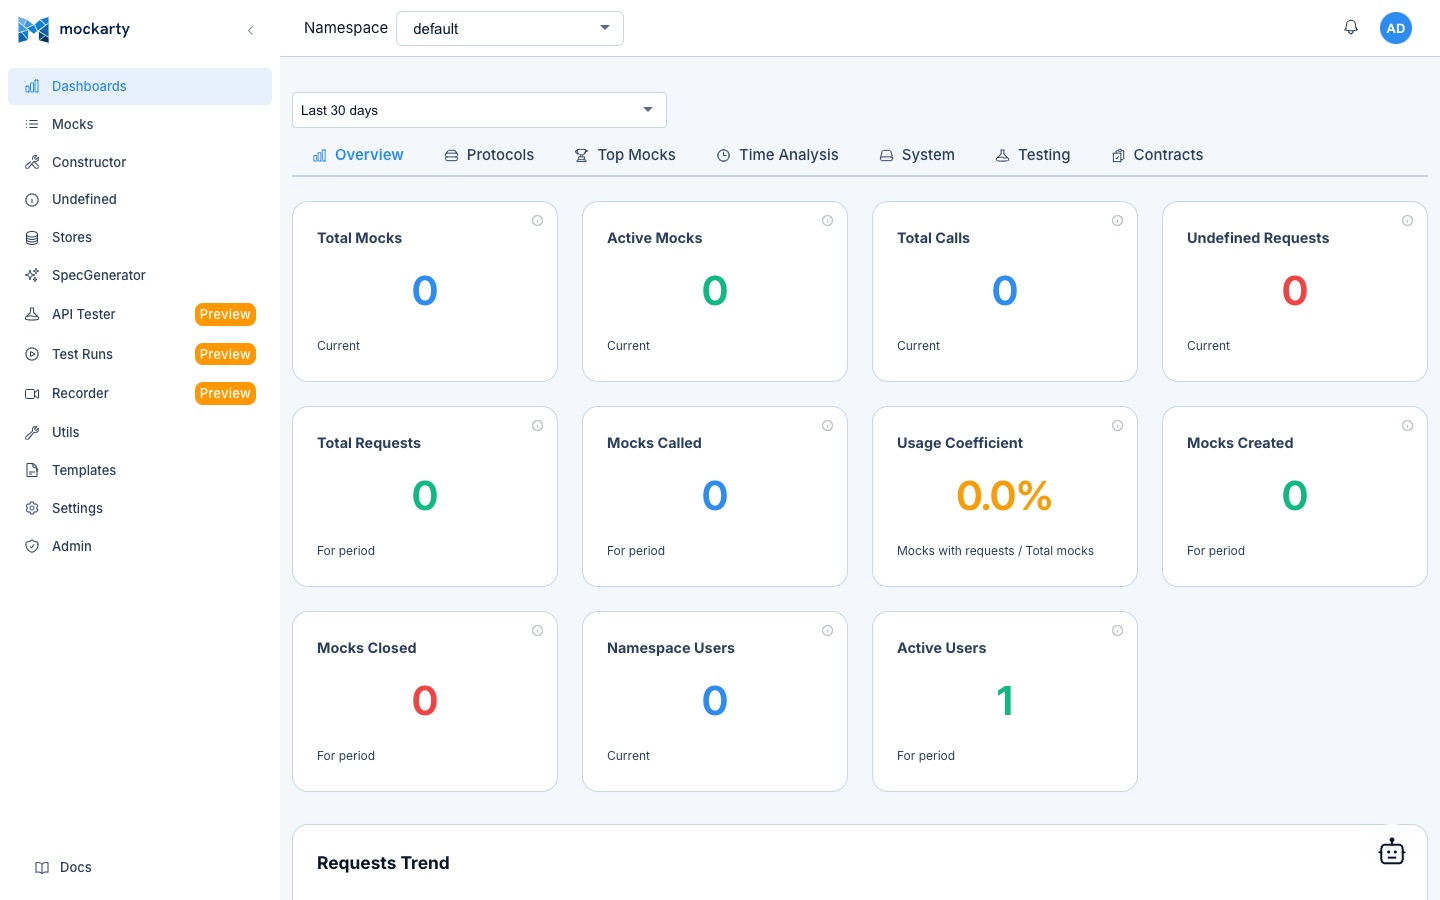
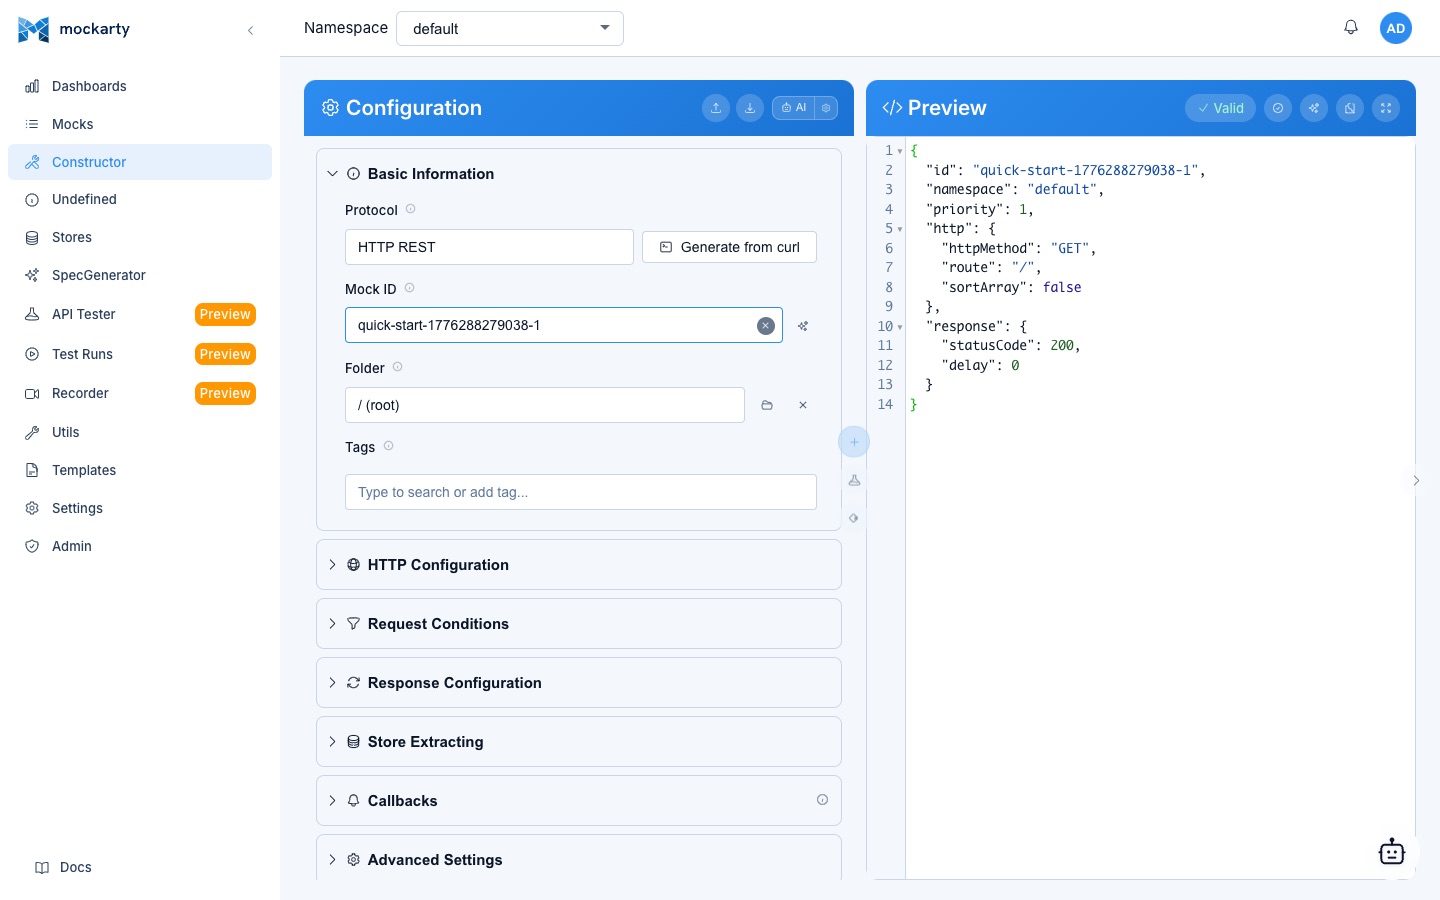
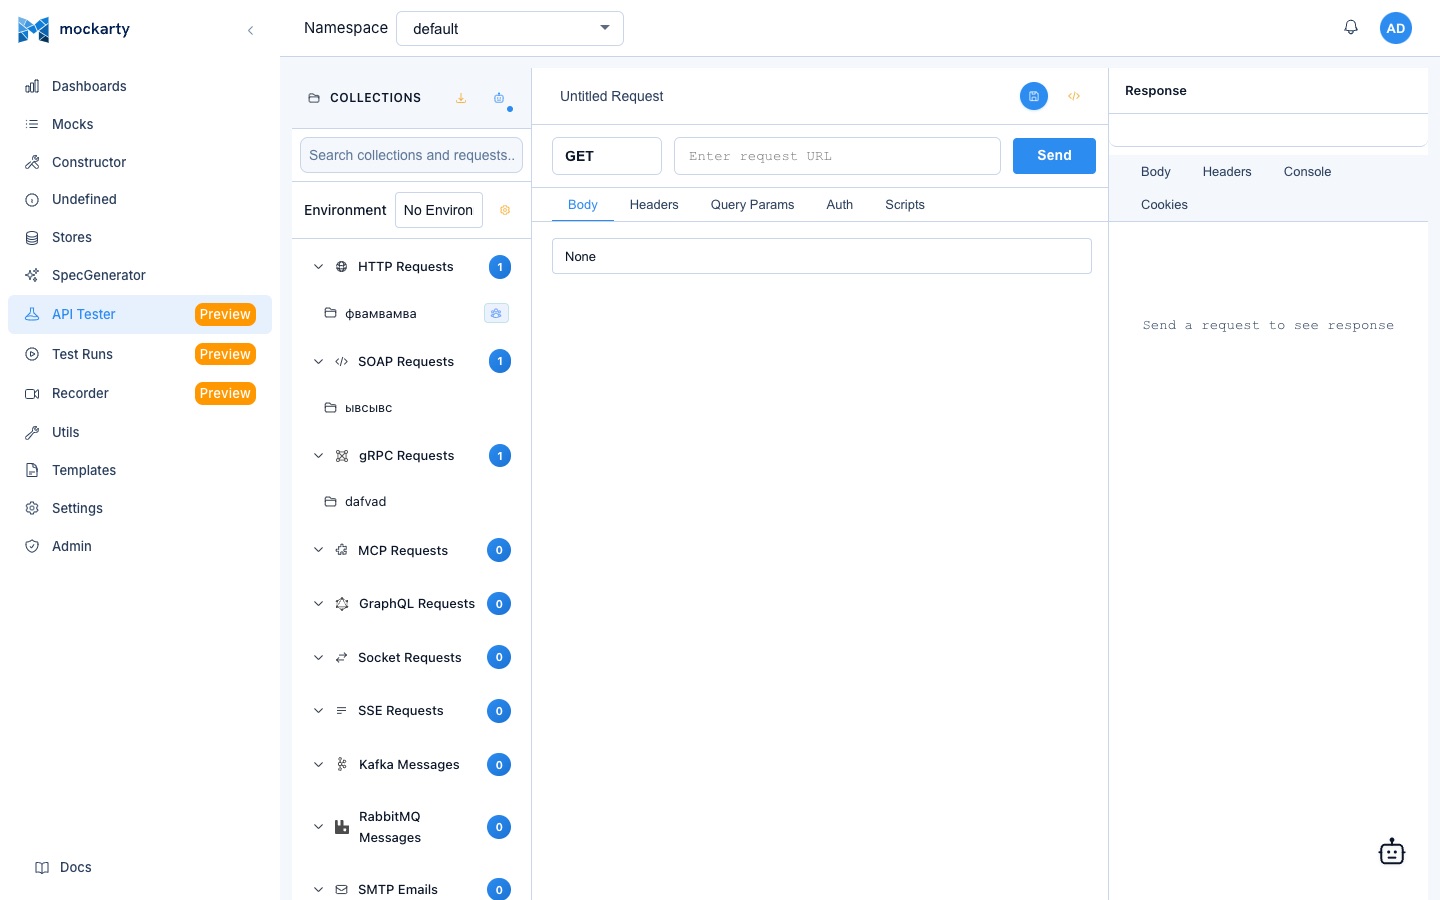
Table of Contents
- What is Mockarty
- Installation
- First Launch
- Understanding Namespaces
- Create Your First Mock
- Test Your Mock
- Use Faker for Dynamic Responses
- Add Conditions
- Import from OpenAPI
- API Testing
- Traffic Recorder
- Performance Testing
- Fuzzing
- Generate Standalone Server
- AI Assistant
- Next Steps
What is Mockarty
Mockarty is a complete backend testing platform — from API mocking to load testing, fuzzing, chaos engineering, contract validation, and test case management — all in one tool. Teams use it to replace fragmented toolchains (Postman + WireMock + k6 + TestRail + Jira + …) with a single platform that covers the entire testing process lifecycle.
Supported protocols:
Direct protocols — served by the Mockarty node at /stubs/{namespace}/...:
- HTTP / REST — Full REST API mocking with route parameters, headers, query params, and body conditions
- GraphQL — Query and mutation detection with flexible response mocking
- SOAP — WSDL-based service mocking
- SSE — Server-Sent Events for real-time data streams
- MCP — Model Context Protocol tools, resources, and prompts
Generated server protocols — mocks are created in the UI, but traffic is served by a standalone server built with mockarty-server-generator (see Server Generator Guide):
- gRPC — Unary and streaming mock responses from
.protofiles - WebSocket — Bidirectional communication mocking
- Kafka — Topic-based message mocking with consumer/producer simulation
- RabbitMQ — Queue and exchange mocking with message routing
- TCP / UDP — Raw socket communication mocking
Key features:
- Web UI with visual Mock Constructor — no code required
- AI Assistant — describe what you need in natural language and let the agent create mocks for you
- Faker engine — generate realistic dynamic data (names, emails, UUIDs, addresses, dates, and more)
- JsonPath interpolation — extract values from requests and use them in responses
- Store system — maintain state across requests with Global, Chain, and Mock stores
- Condition matching — route requests to different responses based on body, headers, query params
- Proxy mode — forward requests to real services while adding delay, modifying headers, or logging
- OpenAPI / Swagger import — generate mocks from your existing API specs
- API Tester — built-in Postman-like tool for testing your mocks and real APIs
- Fuzz testing — built-in fuzzer to discover vulnerabilities in your APIs
- Code generators — generate standalone gRPC, MCP, Kafka, RabbitMQ, and other servers
- Chaos engineering — inject faults (pod kills, latency, resource stress) into Kubernetes clusters to test resilience
- Contract testing — validate mocks against OpenAPI specs, detect API drift, and run consumer-driven contract tests (Pact-compatible)
- Test Case Management (TCM) — full TMS: case folders, versioned steps, shared steps, review workflows, external tracker links (Jira, GitHub, Linear)
- Test Plans — orchestrate any combination of functional, load, fuzz, chaos, and contract tests into a DAG workflow with schedules, gates, and CI/CD triggers
- Multi-node architecture — scale with resolver nodes and runner agents
Key Terms
If you are new to Mockarty, here are a few terms you will see throughout this guide:
- Namespace — an isolated workspace (like a project folder). Each namespace has its own mocks, stores, and test collections. Different teams or services can use separate namespaces without interfering with each other.
- Store system — a mechanism for keeping state across requests. Mockarty has three store types: Global Store (shared state within a namespace), Chain Store (state shared across a chain of related mocks), and Mock Store (temporary state that exists only during a single mock call).
- Mock resolution — the process by which Mockarty selects which mock to use for an incoming request. It evaluates routes, methods, conditions, and priorities to find the best match.
- VU (Virtual Users) — in performance testing, a VU is a simulated user that sends requests concurrently. For example,
vus: 10means 10 users are hitting your API at the same time.
Self-Hosted or Local Dev
Mockarty runs as a server you control. Pick the setup that fits before you start:
| Mode | Server URL | Who manages it | Best for |
|---|---|---|---|
| Self-hosted | https://mockarty.<your-corp> |
Your administrator | Teams, regulated environments, on-prem requirements |
| Local dev | http://localhost:5770 (CLI default) |
You, on your laptop | Plugin development, offline tinkering, trying Mockarty |
If you only need to try Mockarty (run a few mocks, exercise the CLI), run it locally: mockarty-cli targets http://localhost:5770 by default — start a local instance and you’re ready. Skip ahead to Open the Web UI.
If you need a self-hosted instance (corporate compliance, air-gapped network), follow the Installation section below, then point mockarty-cli at it once:
mockarty-cli config set-context corp --server https://mockarty.your-corp.example
mockarty-cli config use-context corp
For local development, run the admin server locally and target it via env var:
export MOCKARTY_SERVER=http://localhost:5770
mockarty-cli auth login
Full details — including the four-step precedence chain flag > env > file > cloud default — live in Connect to a Server.
Installation
Already deployed? If Mockarty is already running in your organization (deployed by your administrator on a corporate server or Kubernetes), you do not need to install anything. Skip directly to Accessing the Web UI. You will need the Mockarty URL and your login credentials from your administrator.
Option A: CLI Installer (recommended)
The mockarty-cli install command is the fastest way to get Mockarty running. It auto-detects your platform, resolves the latest version, and downloads the correct binary — no manual URL assembly needed.
First, download and install the CLI itself:
# Download the latest mockarty-cli binary
curl -fsSL https://mockarty.ru/download/latest/mockarty-cli-$(uname -s | tr '[:upper:]' '[:lower:]')-$(uname -m) -o mockarty-cli
chmod +x mockarty-cli
sudo mv mockarty-cli /usr/local/bin/
SQLite mode — development, single binary, zero dependencies, starts instantly:
mockarty-cli install mockarty --mode sqlite
Docker Compose mode — generates docker-compose.yml + .env with PostgreSQL + Redis:
mockarty-cli install mockarty --mode docker-compose
docker compose up -d
Kubernetes mode — runs helm install with Bitnami PostgreSQL/Redis sub-charts:
mockarty-cli install mockarty --mode kubernetes --namespace mockarty --admin-password <your-password>
CRD Operator mode — installs the MockartyCluster CRD and creates a cluster resource:
mockarty-cli install --mode operator --namespace mockarty
All modes at a glance:
mockarty-cli install mockarty --mode sqlite          # dev / quick start
mockarty-cli install mockarty --mode docker-compose   # generates compose files
mockarty-cli install mockarty --mode kubernetes       # helm install to cluster
mockarty-cli install --mode operator                  # CRD + operator
mockarty-cli install --all                            # download all binaries
Note:
--mode sqliteis for development and quick start only. For production, use--mode kubernetesor--mode docker-composewith PostgreSQL.
Option B: Download Binary Manually
Prefer the CLI installer (Option A). If you need a direct download, grab the binary for your platform from GitHub Releases:
- macOS (Apple Silicon):
mockarty-darwin-arm64 - macOS (Intel):
mockarty-darwin-amd64 - Linux (x86_64):
mockarty-linux-amd64 - Linux (ARM64):
mockarty-linux-arm64 - Windows (x86_64):
mockarty-windows-amd64.exe
Make the binary executable and run it (macOS/Linux):
chmod +x mockarty-darwin-arm64
DB_USE=sqlite ./mockarty-darwin-arm64
Note:
DB_USE=sqliteis for development only. For production, use PostgreSQL (see Option D or E).
Option C: Docker (official image)
docker run -d --name mockarty -p 5770:5770 \
  -e HTTP_BIND_ADDR=0.0.0.0 \
  -e DB_USE=sqlite \
  -e COOKIE_SECURE=false \
  mockarty/mockarty:latest
Option D: Docker Compose with PostgreSQL
For production-like setups with PostgreSQL. Generate the compose files with the CLI (mockarty-cli install mockarty --mode docker-compose) or create this docker-compose.yml manually:
# docker-compose.yml
services:
  mockarty:
    image: mockarty/mockarty:latest
    ports:
      - "5770:5770"
    environment:
      HTTP_BIND_ADDR: "0.0.0.0"
      DB_DSN: "postgres://mockarty:mockarty@postgres:5432/mockarty?sslmode=disable"
      CACHE_TYPE: redis
      REPO_REDIS_HOST: redis
      REPO_REDIS_PORT: "6379"
      FIRST_ADMIN_LOGIN: admin
      FIRST_ADMIN_PASSWORD: "${FIRST_ADMIN_PASSWORD:-change_me}"
    depends_on:
      postgres:
        condition: service_healthy
      redis:
        condition: service_healthy

  postgres:
    image: postgres:16-alpine
    environment:
      POSTGRES_USER: mockarty
      POSTGRES_PASSWORD: mockarty
      POSTGRES_DB: mockarty
    volumes:
      - pgdata:/var/lib/postgresql/data
    healthcheck:
      test: ["CMD-SHELL", "pg_isready -U mockarty"]
      interval: 5s
      retries: 10

  redis:
    image: redis:7-alpine
    healthcheck:
      test: ["CMD", "redis-cli", "ping"]
      interval: 5s
      retries: 10

volumes:
  pgdata:
docker compose up -d
Option E: Kubernetes (Helm)
Recommended: Use the CLI installer (mockarty-cli install mockarty --mode kubernetes) — it handles repo setup, dependency build, and Helm install in one command.
Manual Helm install (if you prefer to control every step):
Prerequisites: Kubernetes 1.24+, Helm 3.10+
# 1. Add Bitnami repo (PostgreSQL and Redis sub-charts)
helm repo add bitnami https://charts.bitnami.com/bitnami
helm repo update

# 2. Navigate to the Helm chart (included in the Mockarty repository)
cd deploy/helm/mockarty

# 3. Build sub-chart dependencies
helm dependency update

# 4. Install — minimal profile (single admin node + PostgreSQL + Redis)
helm install mockarty . \
  -f values.minimal.yaml \
  --set admin.secrets.FIRST_ADMIN_PASSWORD="<your-password>" \
  --set postgresql.auth.password="<db-password>" \
  --namespace mockarty --create-namespace
Cluster profile (HA: 2 admin, resolvers, runners, orchestrator):
helm install mockarty . \
  -f values.cluster.yaml \
  --set admin.secrets.FIRST_ADMIN_PASSWORD="<your-password>" \
  --set postgresql.auth.password="<db-password>" \
  --namespace mockarty --create-namespace

# 5. Access the UI
kubectl port-forward svc/mockarty -n mockarty 5770:5770
open http://localhost:5770/ui/
Components deployed (cluster profile): Admin Node (Web UI + API), Mock Resolver (horizontal scaling), Runner Agent (test execution), Orchestrator (code generation), PostgreSQL, Redis. Token bootstrap Job creates integration tokens automatically.
CLI Management:
# Check cluster status
mockarty-cli cluster status

# Scale resolvers
mockarty-cli cluster scale resolver --replicas 5

# Upgrade cluster image tag
mockarty-cli cluster upgrade --tag 1.3.0

# Stream pod logs
mockarty-cli cluster logs <pod-name> --follow
Option F: CRD Operator (GitOps)
For GitOps workflows, a MockartyCluster custom resource definition is available. The operator watches for MockartyCluster CRs and reconciles the full stack.
Recommended: mockarty-cli install --mode operator
Manual install:
kubectl apply -f deploy/operator/bundle.yaml
kubectl apply -f mockartycluster.yaml
See Deployment Guide and Scaling Architecture for full details.
Docker notes:
HTTP_BIND_ADDR— By default, Mockarty binds tolocalhost(127.0.0.1), which is unreachable from outside the container. When running in Docker, always setHTTP_BIND_ADDR=0.0.0.0so the server listens on all interfaces.COOKIE_SECURE— If you access Mockarty over plain HTTP (no TLS), setCOOKIE_SECURE=false. Otherwise, authentication cookies will not be sent by the browser and login will silently fail.DB_USE=sqliteis for development and quick start only. For production, use PostgreSQL (Option D or E).
First Launch
Important — Mockarty is a server-side application. The API Tester, recorder, webhooks, and performance runs all dispatch traffic from the Mockarty process itself, not from your browser. By default these server-side components refuse to reach private, loopback, or link-local addresses (
127.0.0.1,localhost,10.x.x.x,192.168.x.x,::1, etc.) to prevent SSRF. If you want to point Mockarty at a service running on the same machine (a local backend, a dev API, another container on your laptop), setALLOW_PROXY_TO_PRIVATE_IPS=truebefore starting the binary. For remote / corporate deployments the default is correct — leave it off.
# Local development: allow requests to localhost / private networks
ALLOW_PROXY_TO_PRIVATE_IPS=true DB_USE=sqlite ./mockarty-darwin-arm64
The simplest way to start is with the built-in SQLite database — no external dependencies required.
Start with SQLite
DB_USE=sqlite ./mockarty-darwin-arm64
Mockarty will:
- Create a SQLite database at
~/.mockarty/data.db - Run all migrations automatically
- Create a default admin user (login:
admin, password:admin) - Create a default namespace called
sandbox - Start the HTTP server on port 5770
You should see output similar to:
INFO  Starting Mockarty ...
INFO  Using SQLite database: ~/.mockarty/data.db
INFO  Migrations applied successfully
INFO  HTTP server listening on :5770
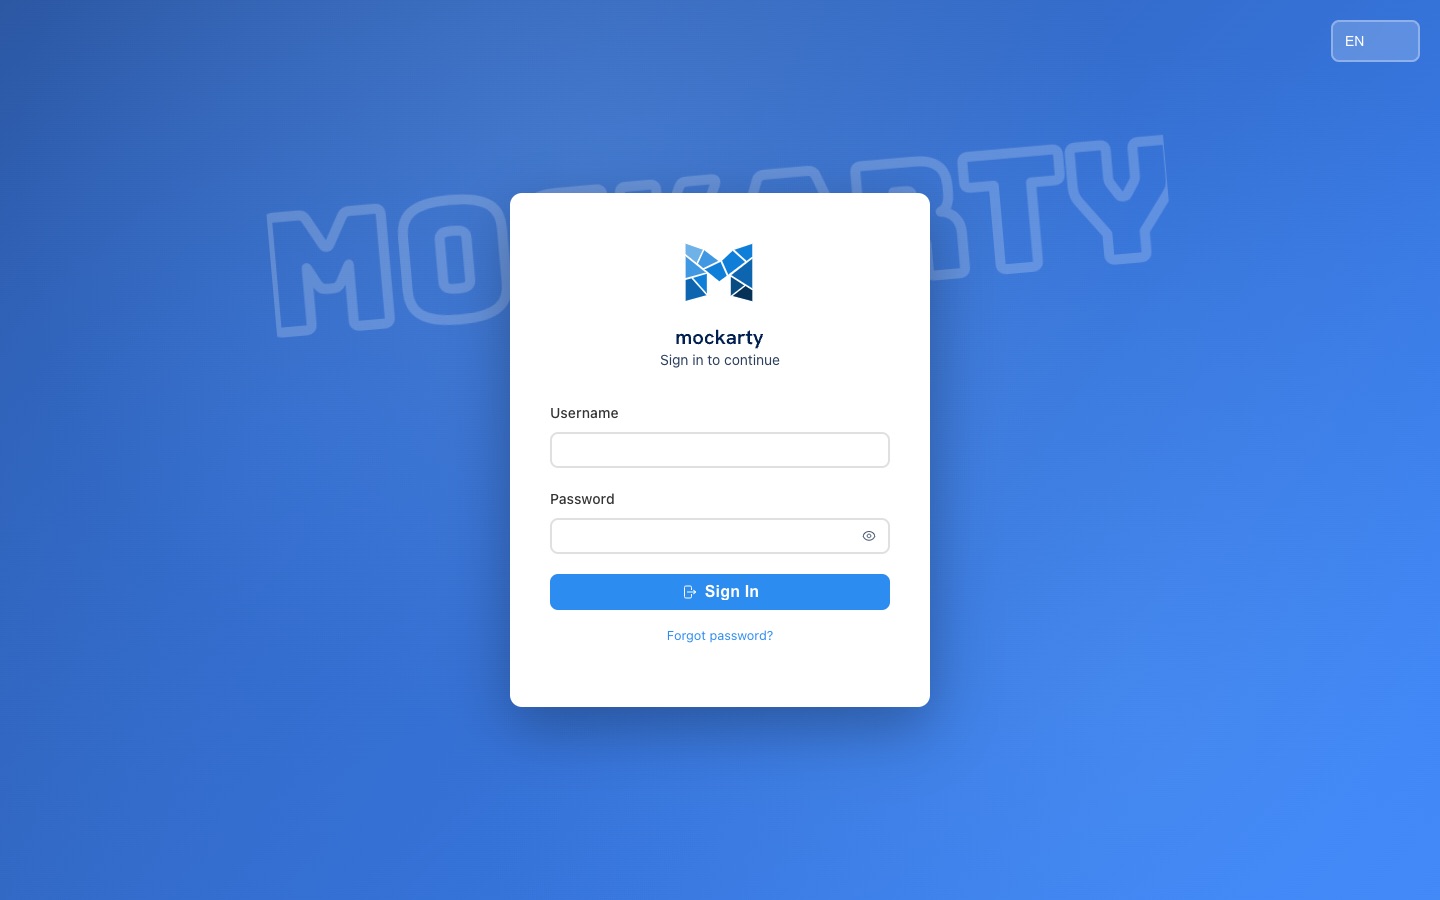
Open the Web UI
Open your browser and navigate to:
http://localhost:5770/ui/
You will see the Mockarty login page. Log in with the default credentials: admin / admin.
After logging in, you will see the main dashboard with the sidebar navigation.
Security note: Change the default admin password after your first login. Go to Settings in the sidebar to update your credentials.
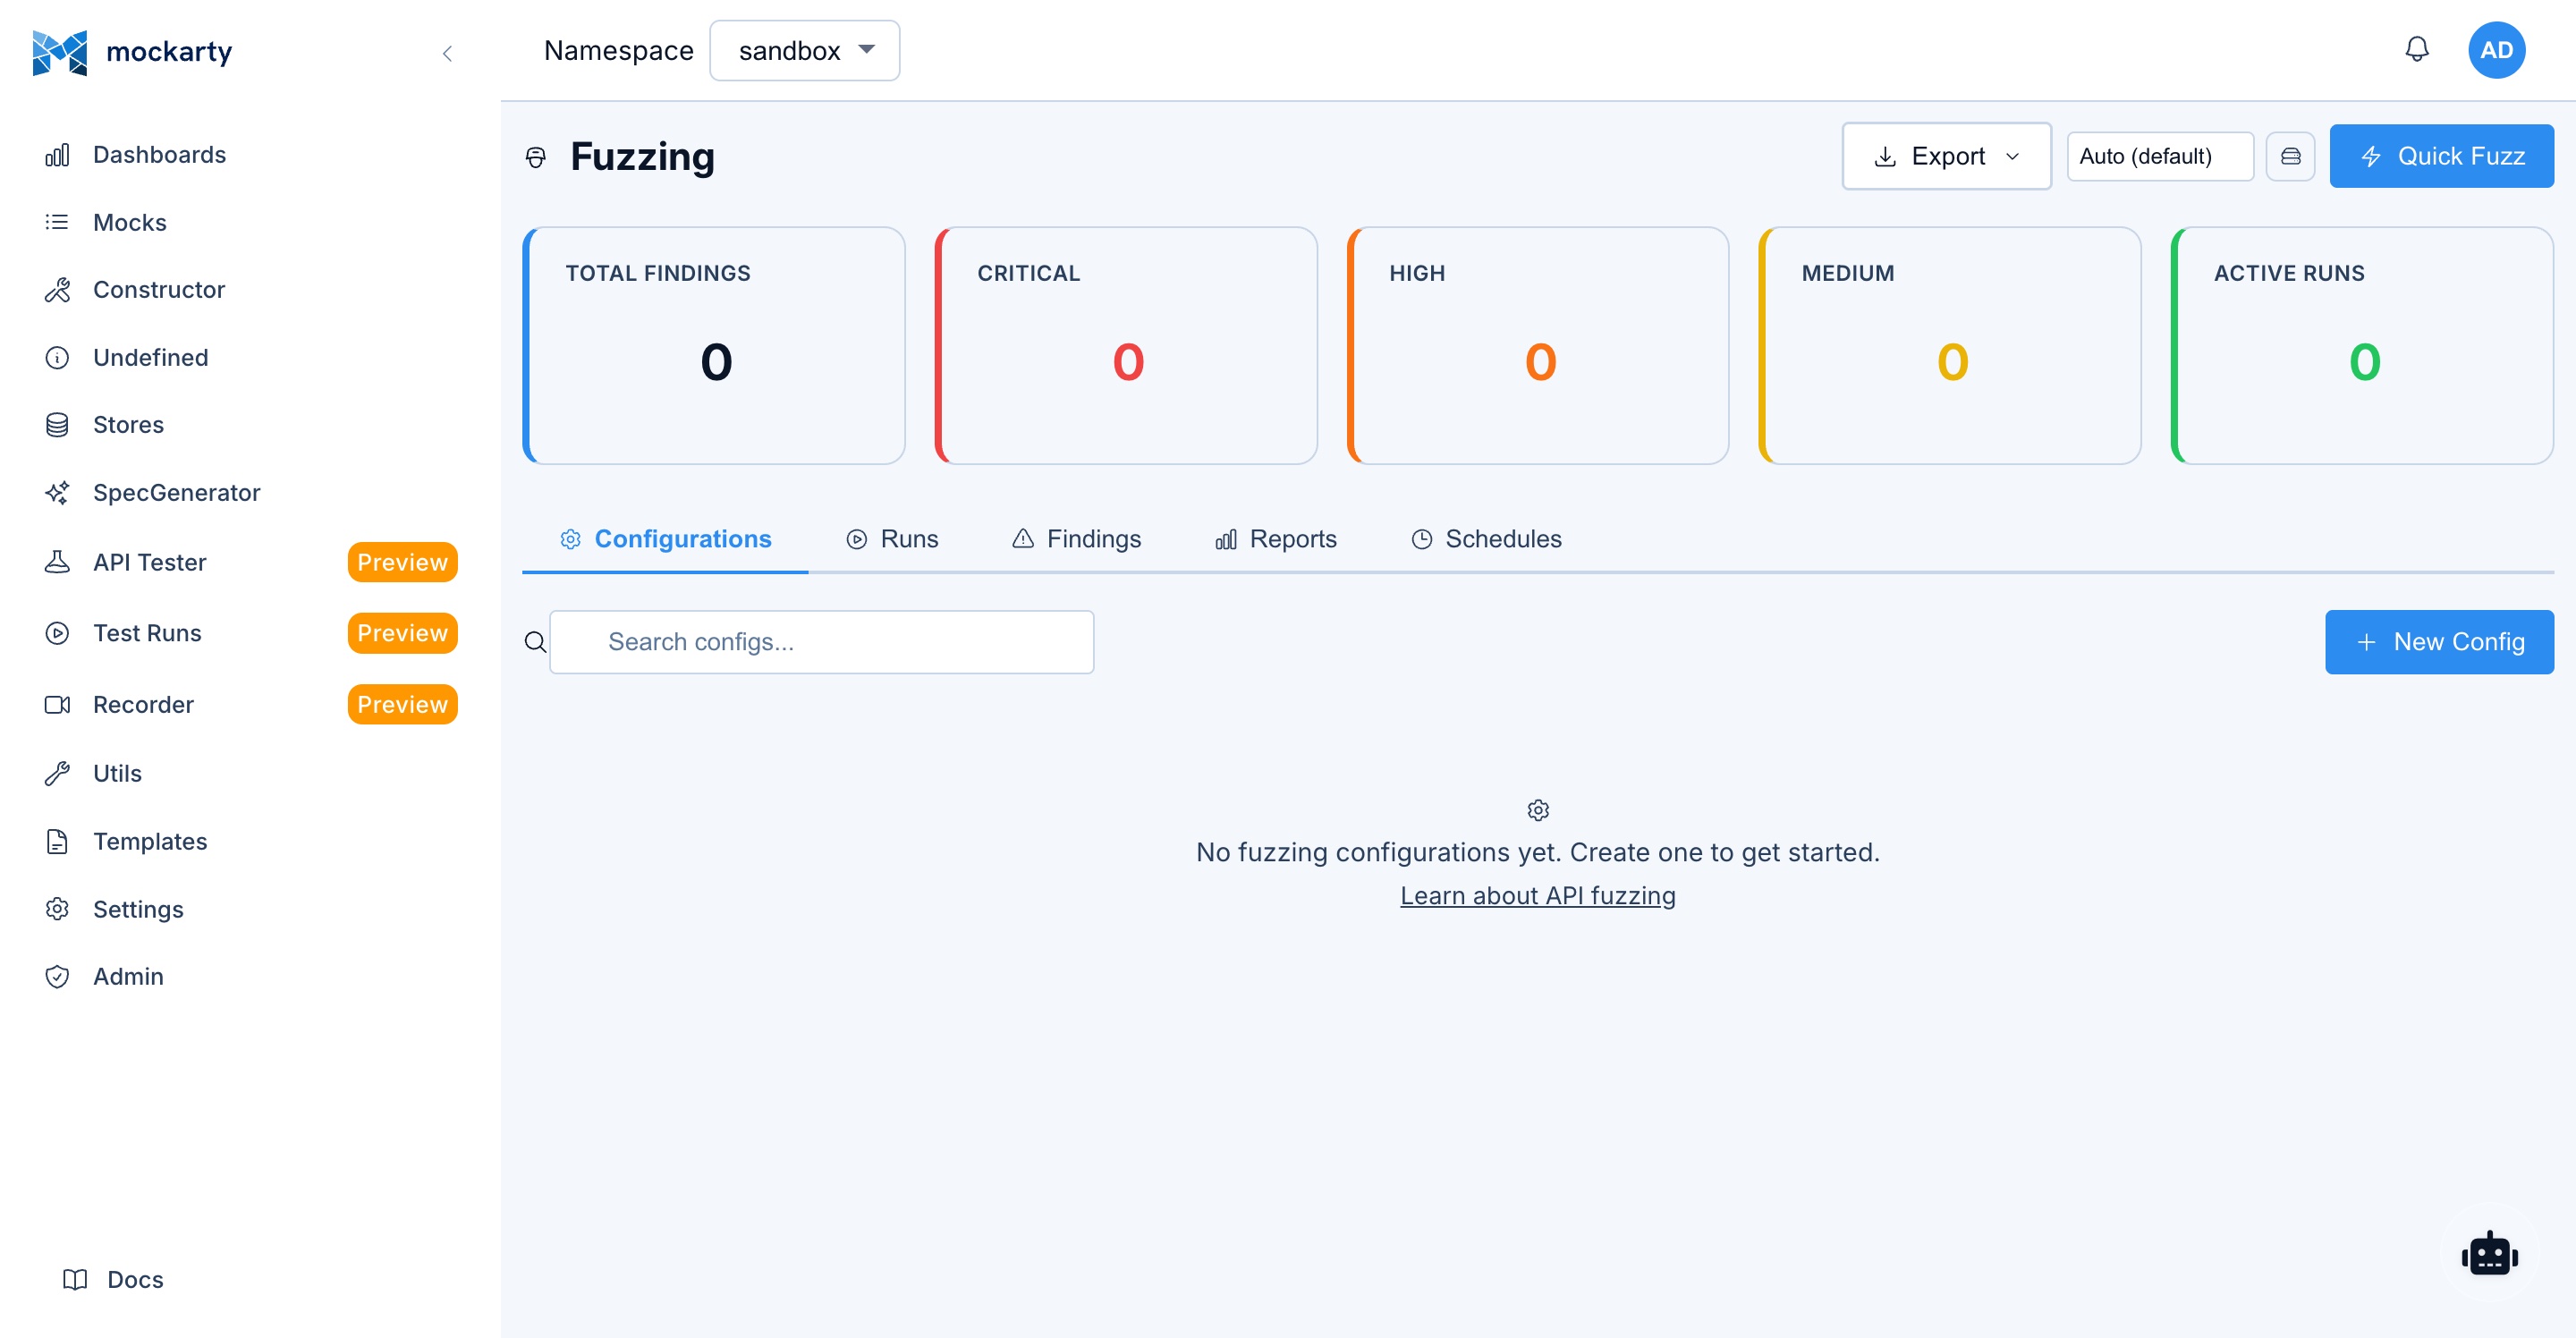
Trial License: On first launch, Mockarty starts with a 7-day trial license granting access to all features with 3 seats per feature. The only restriction is that you are limited to the
sandboxnamespace — creating custom namespaces requires a commercial license. To unlock namespace creation and remove the expiry, apply a license key in Administration → License.
Joining an Existing Deployment
If Mockarty was deployed by your administrator, you do not need to install anything. Ask your administrator for:
- Mockarty URL — for example,
https://mockarty.company.com - Login credentials — username and password, or SSO/LDAP/OAuth access details
Open the provided URL in your browser, log in, and proceed to Understanding Namespaces to start creating mocks. All examples in this guide use localhost:5770 — replace it with the URL of your Mockarty instance (see Understanding URLs below).
Understanding URLs in This Documentation
Throughout this documentation, examples use localhost:5770 as the Mockarty address. This is the default for local development. In real deployments, replace localhost:5770 with the actual address of your Mockarty instance.
Here is how URLs look depending on your deployment:
| Deployment | Example Base URL | When to Use |
|---|---|---|
| Local binary | http://localhost:5770 |
Development on your machine |
| Docker (same machine) | http://localhost:5770 |
Docker with -p 5770:5770 |
| Docker (remote server) | http://192.168.1.50:5770 or http://mockarty.internal:5770 |
Docker on another machine in your network |
| Corporate server | https://mockarty.company.com |
Shared team instance behind a reverse proxy (Nginx, Traefik) |
| Kubernetes | https://mockarty.k8s.company.com |
Helm-deployed cluster with Ingress |
| Demo / Cloud | https://demo.mockarty.ru |
Hosted demo environment |
Example: if your Mockarty instance is deployed at https://mockarty.staging.company.com, then instead of:
curl http://localhost:5770/api/v1/mocks
you would use:
curl https://mockarty.staging.company.com/api/v1/mocks
Important for server-side features (Recorder, Fuzzer, Performance Testing): These features run on the Mockarty server, not in your browser. When the Recorder proxies traffic, the proxy port (e.g.
8085) is opened on the server where Mockarty is running. If Mockarty runs on a remote server at192.168.1.50, your application must send traffic tohttp://192.168.1.50:8085, nothttp://localhost:8085. See the Traffic Recorder documentation for detailed network setup.
Tip: When using the SDKs (Go, Python, Java), you set the base URL once in the client constructor. All subsequent calls use that URL automatically. See the SDK Guide.
Understanding Namespaces
Mockarty organizes all resources into namespaces. A namespace is an isolated workspace — each namespace has its own mocks, stores, and test collections. This is a core concept you need to understand before creating mocks.
What is a Namespace?
Think of a namespace as a project folder. If you have multiple teams or microservices, each can have its own namespace with independent mocks that do not interfere with each other.
On first launch, Mockarty automatically creates a namespace called sandbox — a shared sandbox environment available to all users. Administrators and Support users (system roles) can create new namespaces. The Owner of a namespace (namespace role) can add users to their namespace.
The URL Pattern
All mock requests are routed through namespaces. The URL pattern is:
{MOCKARTY_URL}/stubs/{namespace}/{your-route}
For example, if you create a mock with route /api/users in the sandbox namespace:
| Deployment | Mock URL |
|---|---|
| Local | http://localhost:5770/stubs/sandbox/api/users |
| Corporate server | https://mockarty.company.com/stubs/sandbox/api/users |
| Kubernetes | https://mockarty.k8s.company.com/stubs/sandbox/api/users |
If you later create a namespace called payments and add a mock with route /api/invoices, you would call it at:
http://localhost:5770/stubs/payments/api/invoices
Note: Throughout this guide, examples use
localhost:5770. Replace with your actual Mockarty address if running on a remote server (see Understanding URLs above).
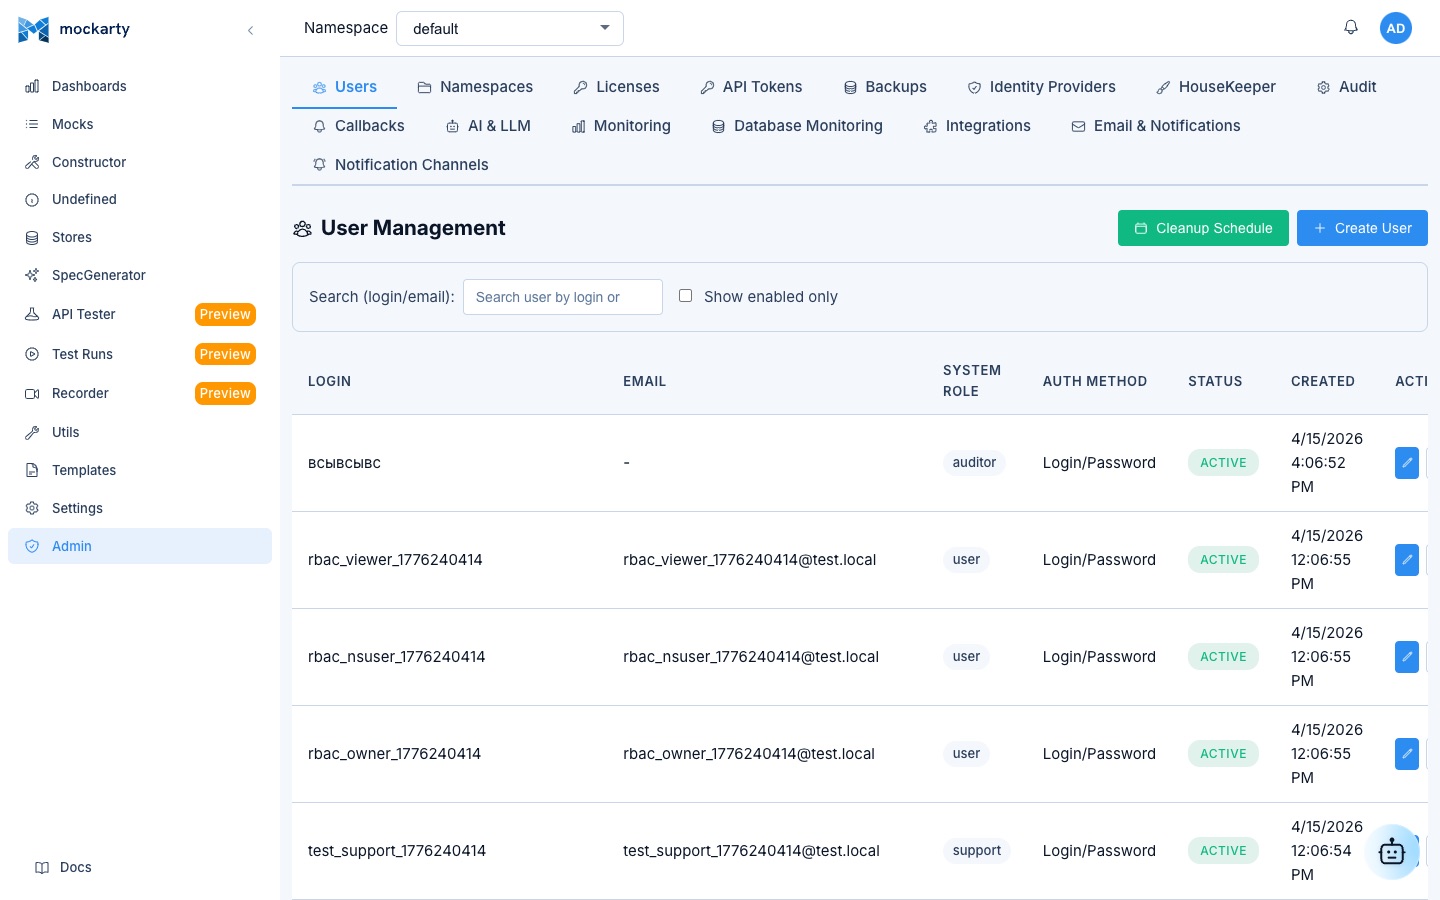
Managing Namespaces
You can create and manage namespaces in the Admin section of the sidebar. Each namespace can have:
- Its own set of mocks
- Assigned users with specific roles
- Independent Global and Chain stores
- Separate test collections and environments
For this Quick Start guide, we will use the sandbox namespace that is created automatically.
Create Your First Mock
Let’s create a simple HTTP mock that returns a list of users.
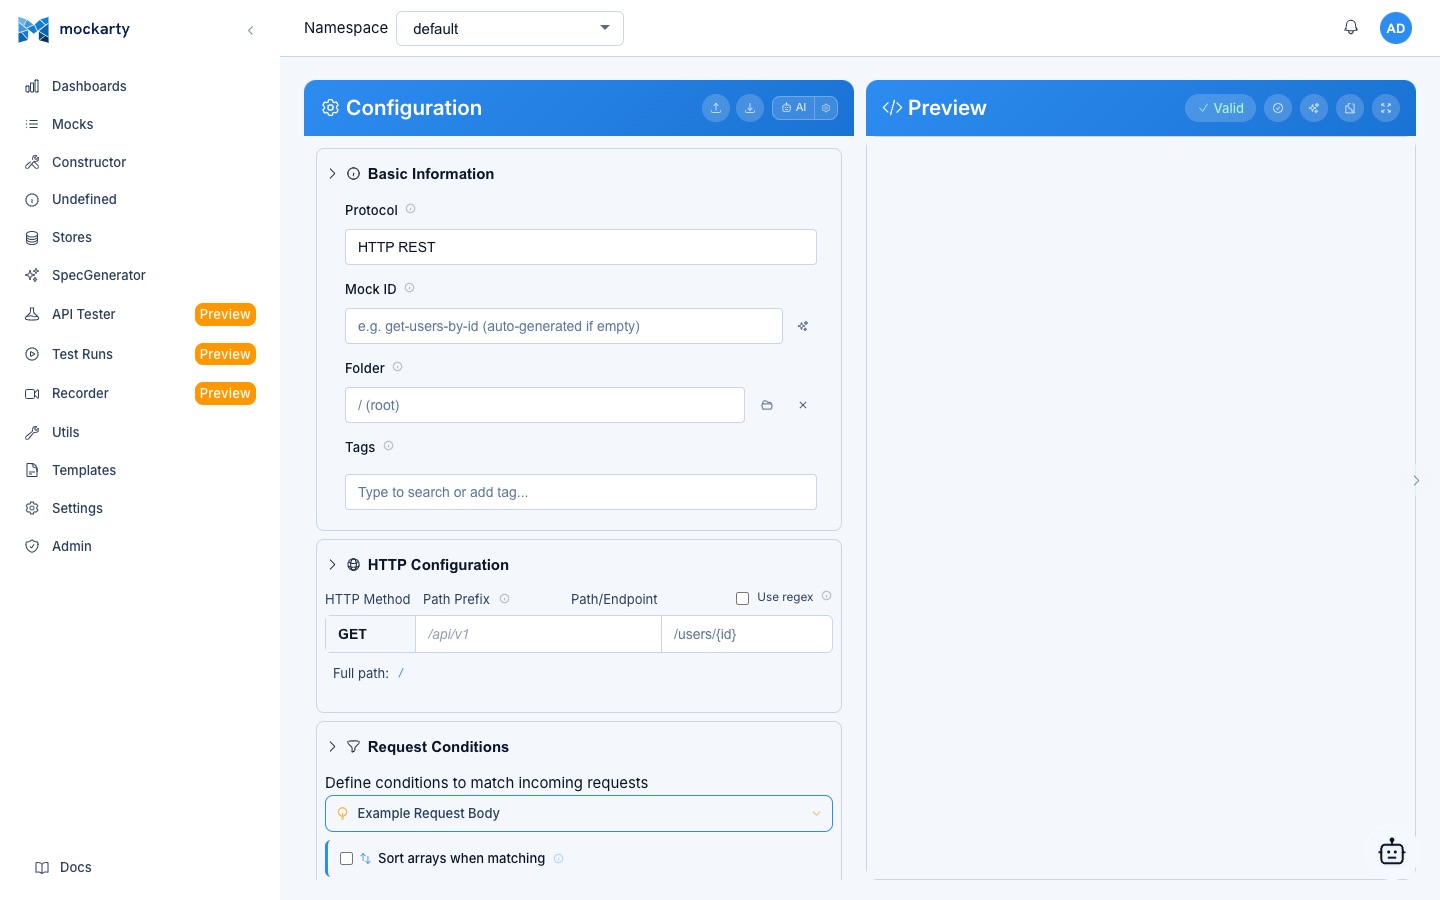
Step 1: Open the Constructor
Click Constructor in the sidebar menu. This is the visual mock builder.
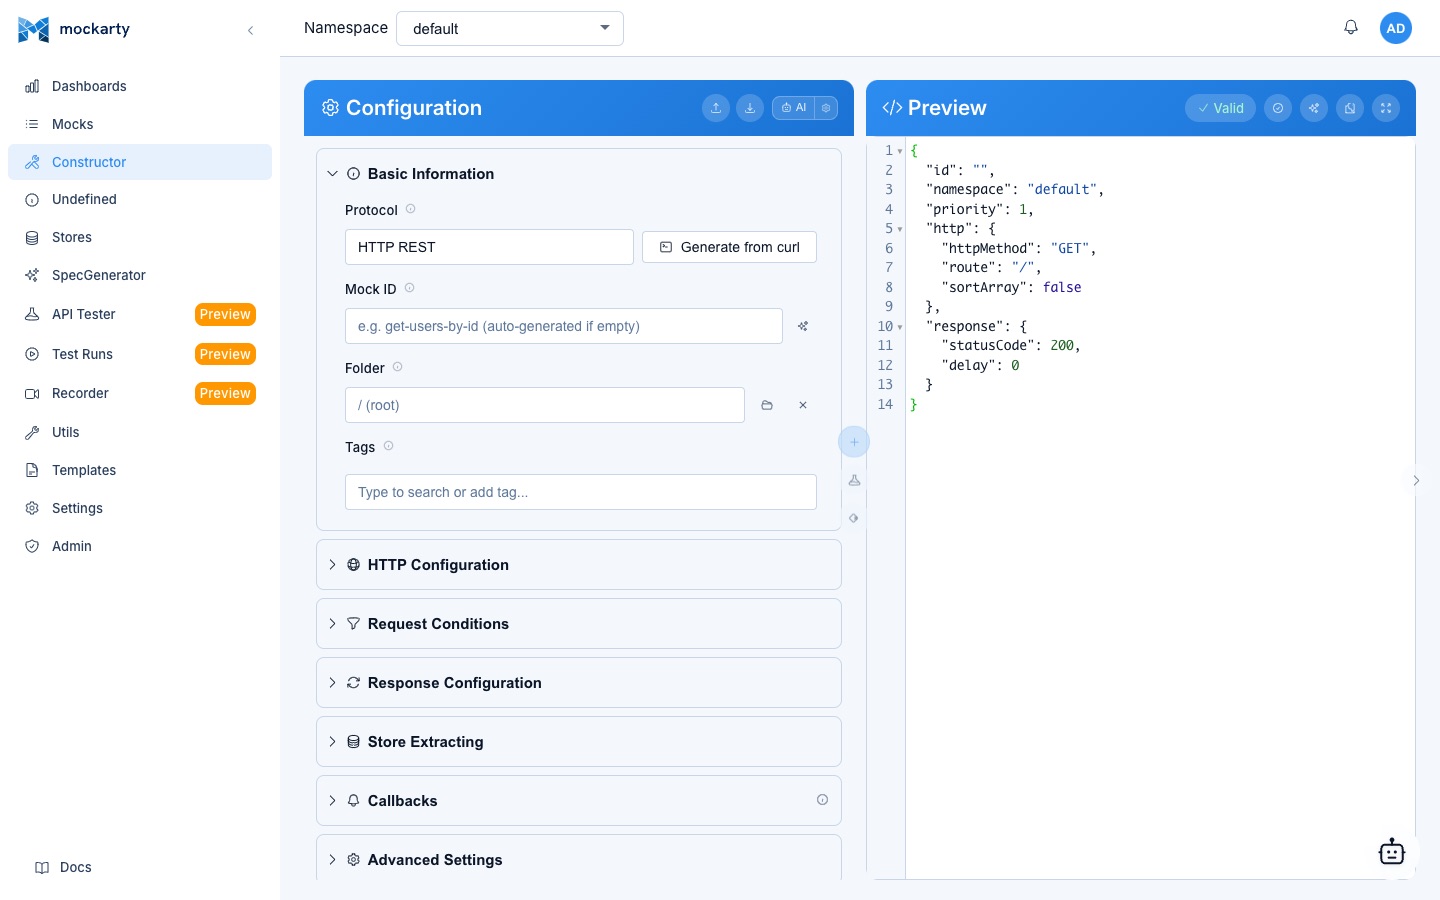
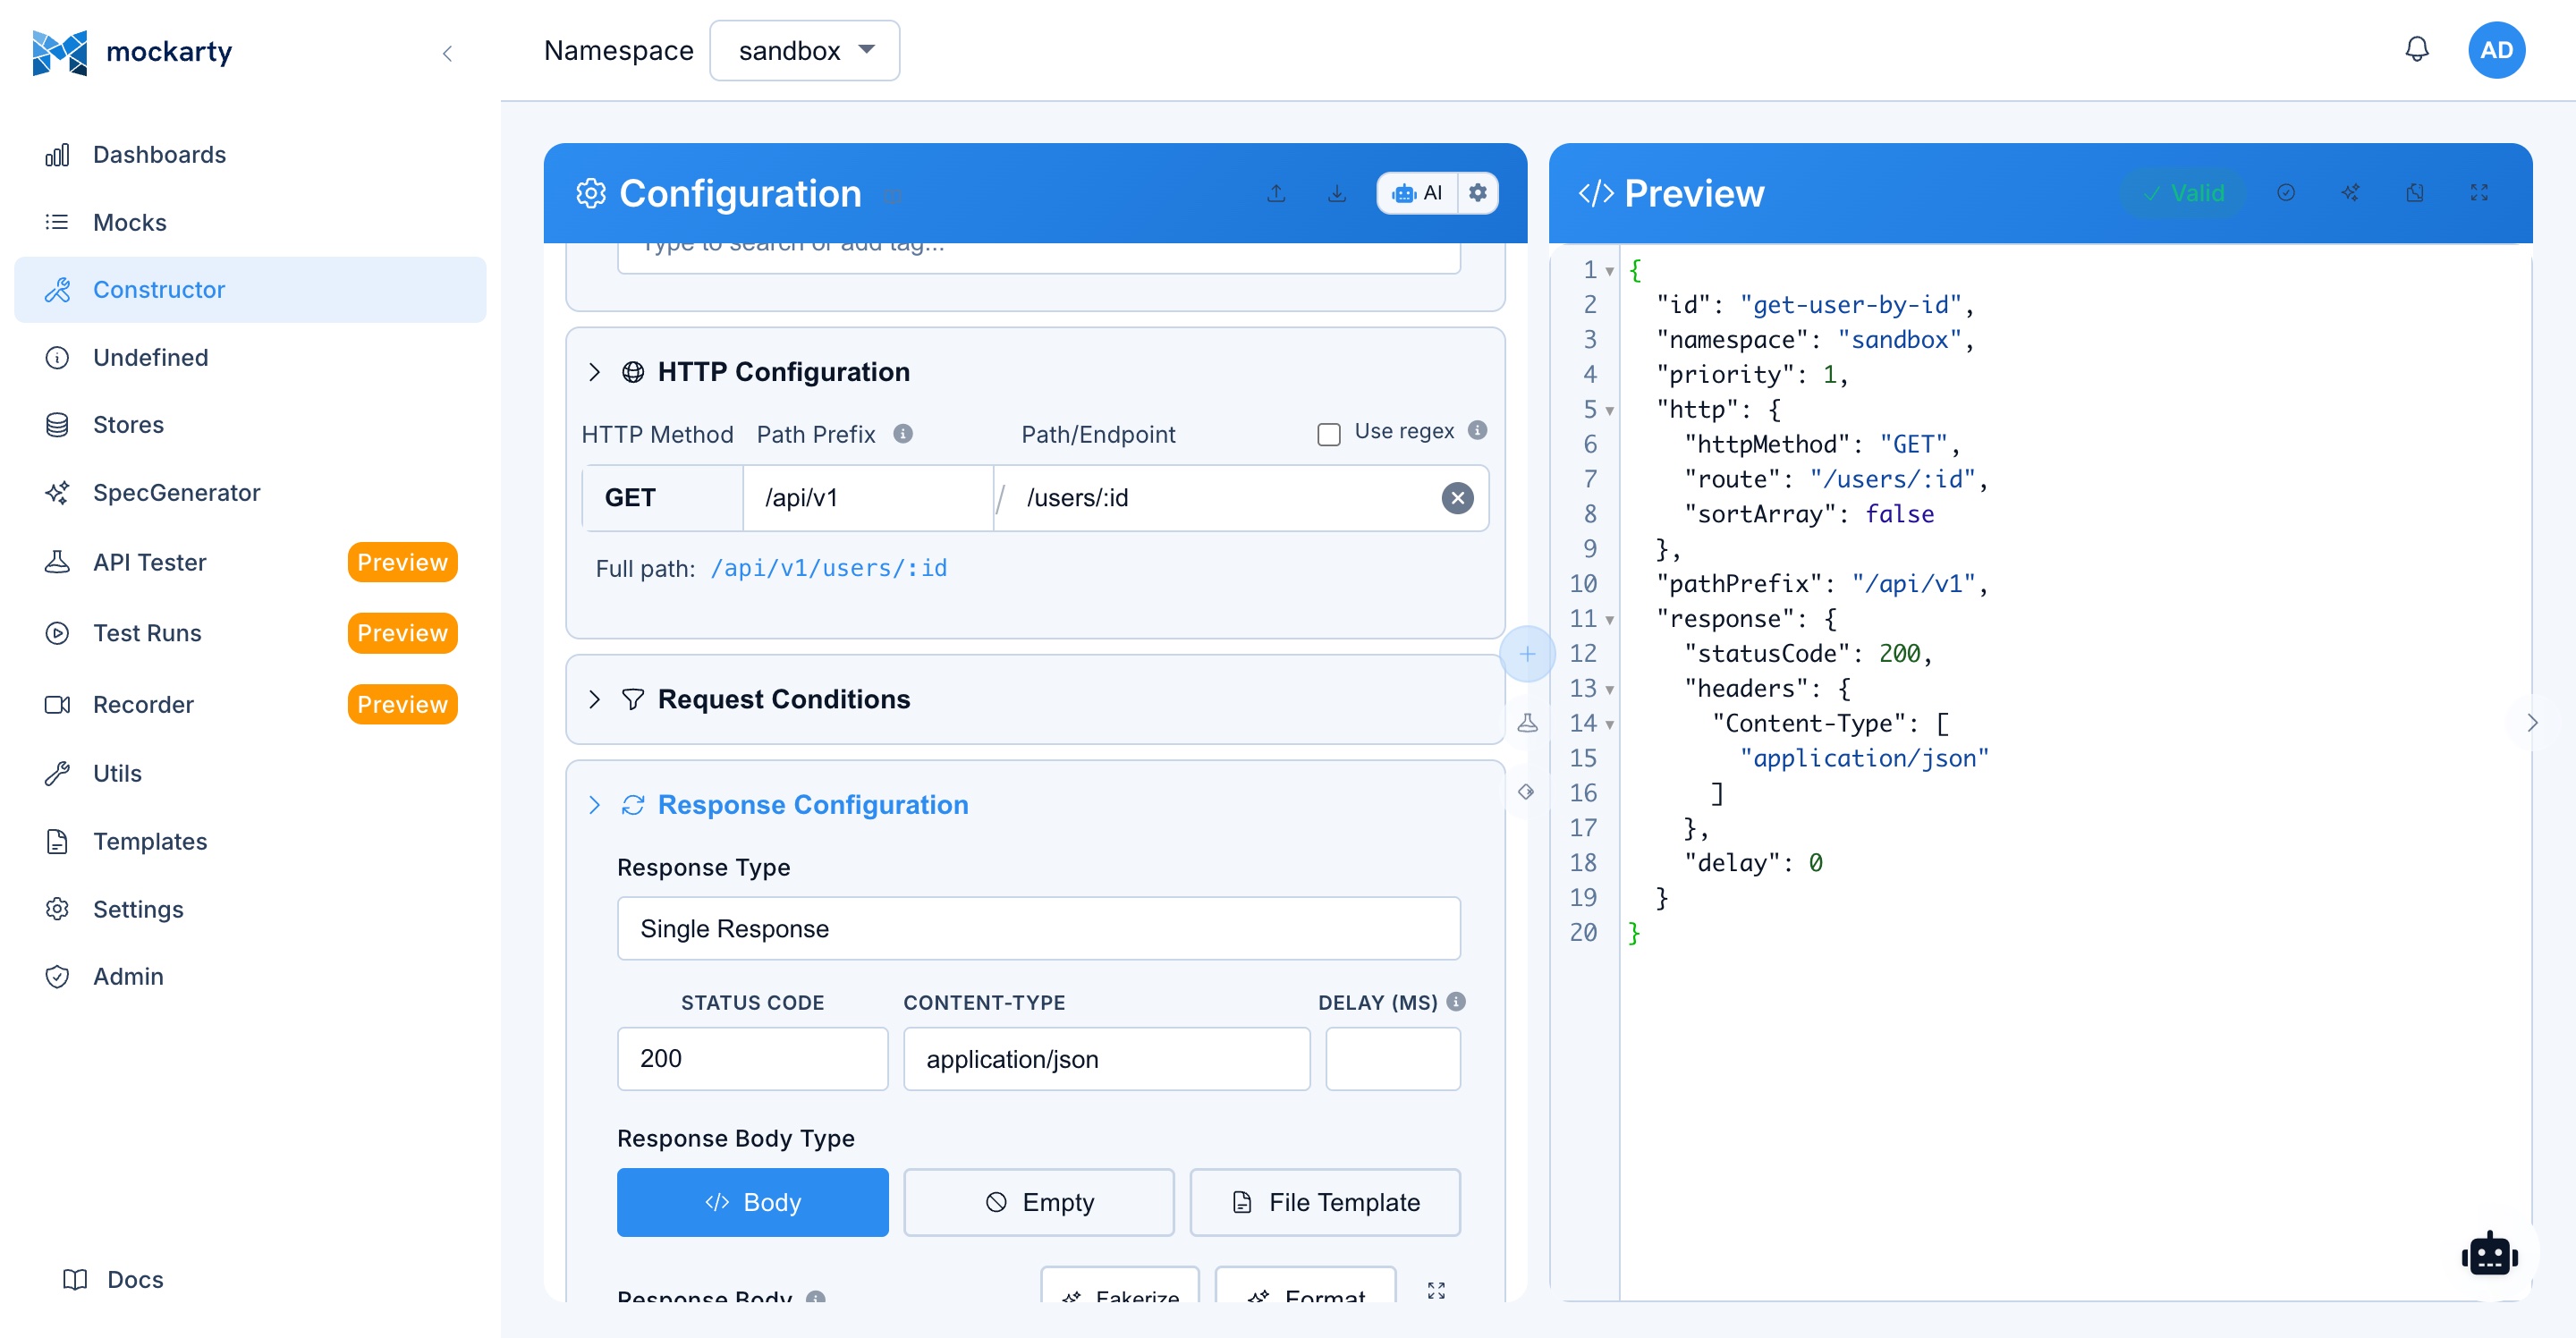
Step 2: Configure the Route
Fill in the basic mock settings:
| Field | Value |
|---|---|
| Mock ID | my-first-mock |
| Protocol | HTTP |
| Route | /api/users |
| Method | GET |
| Namespace | sandbox |
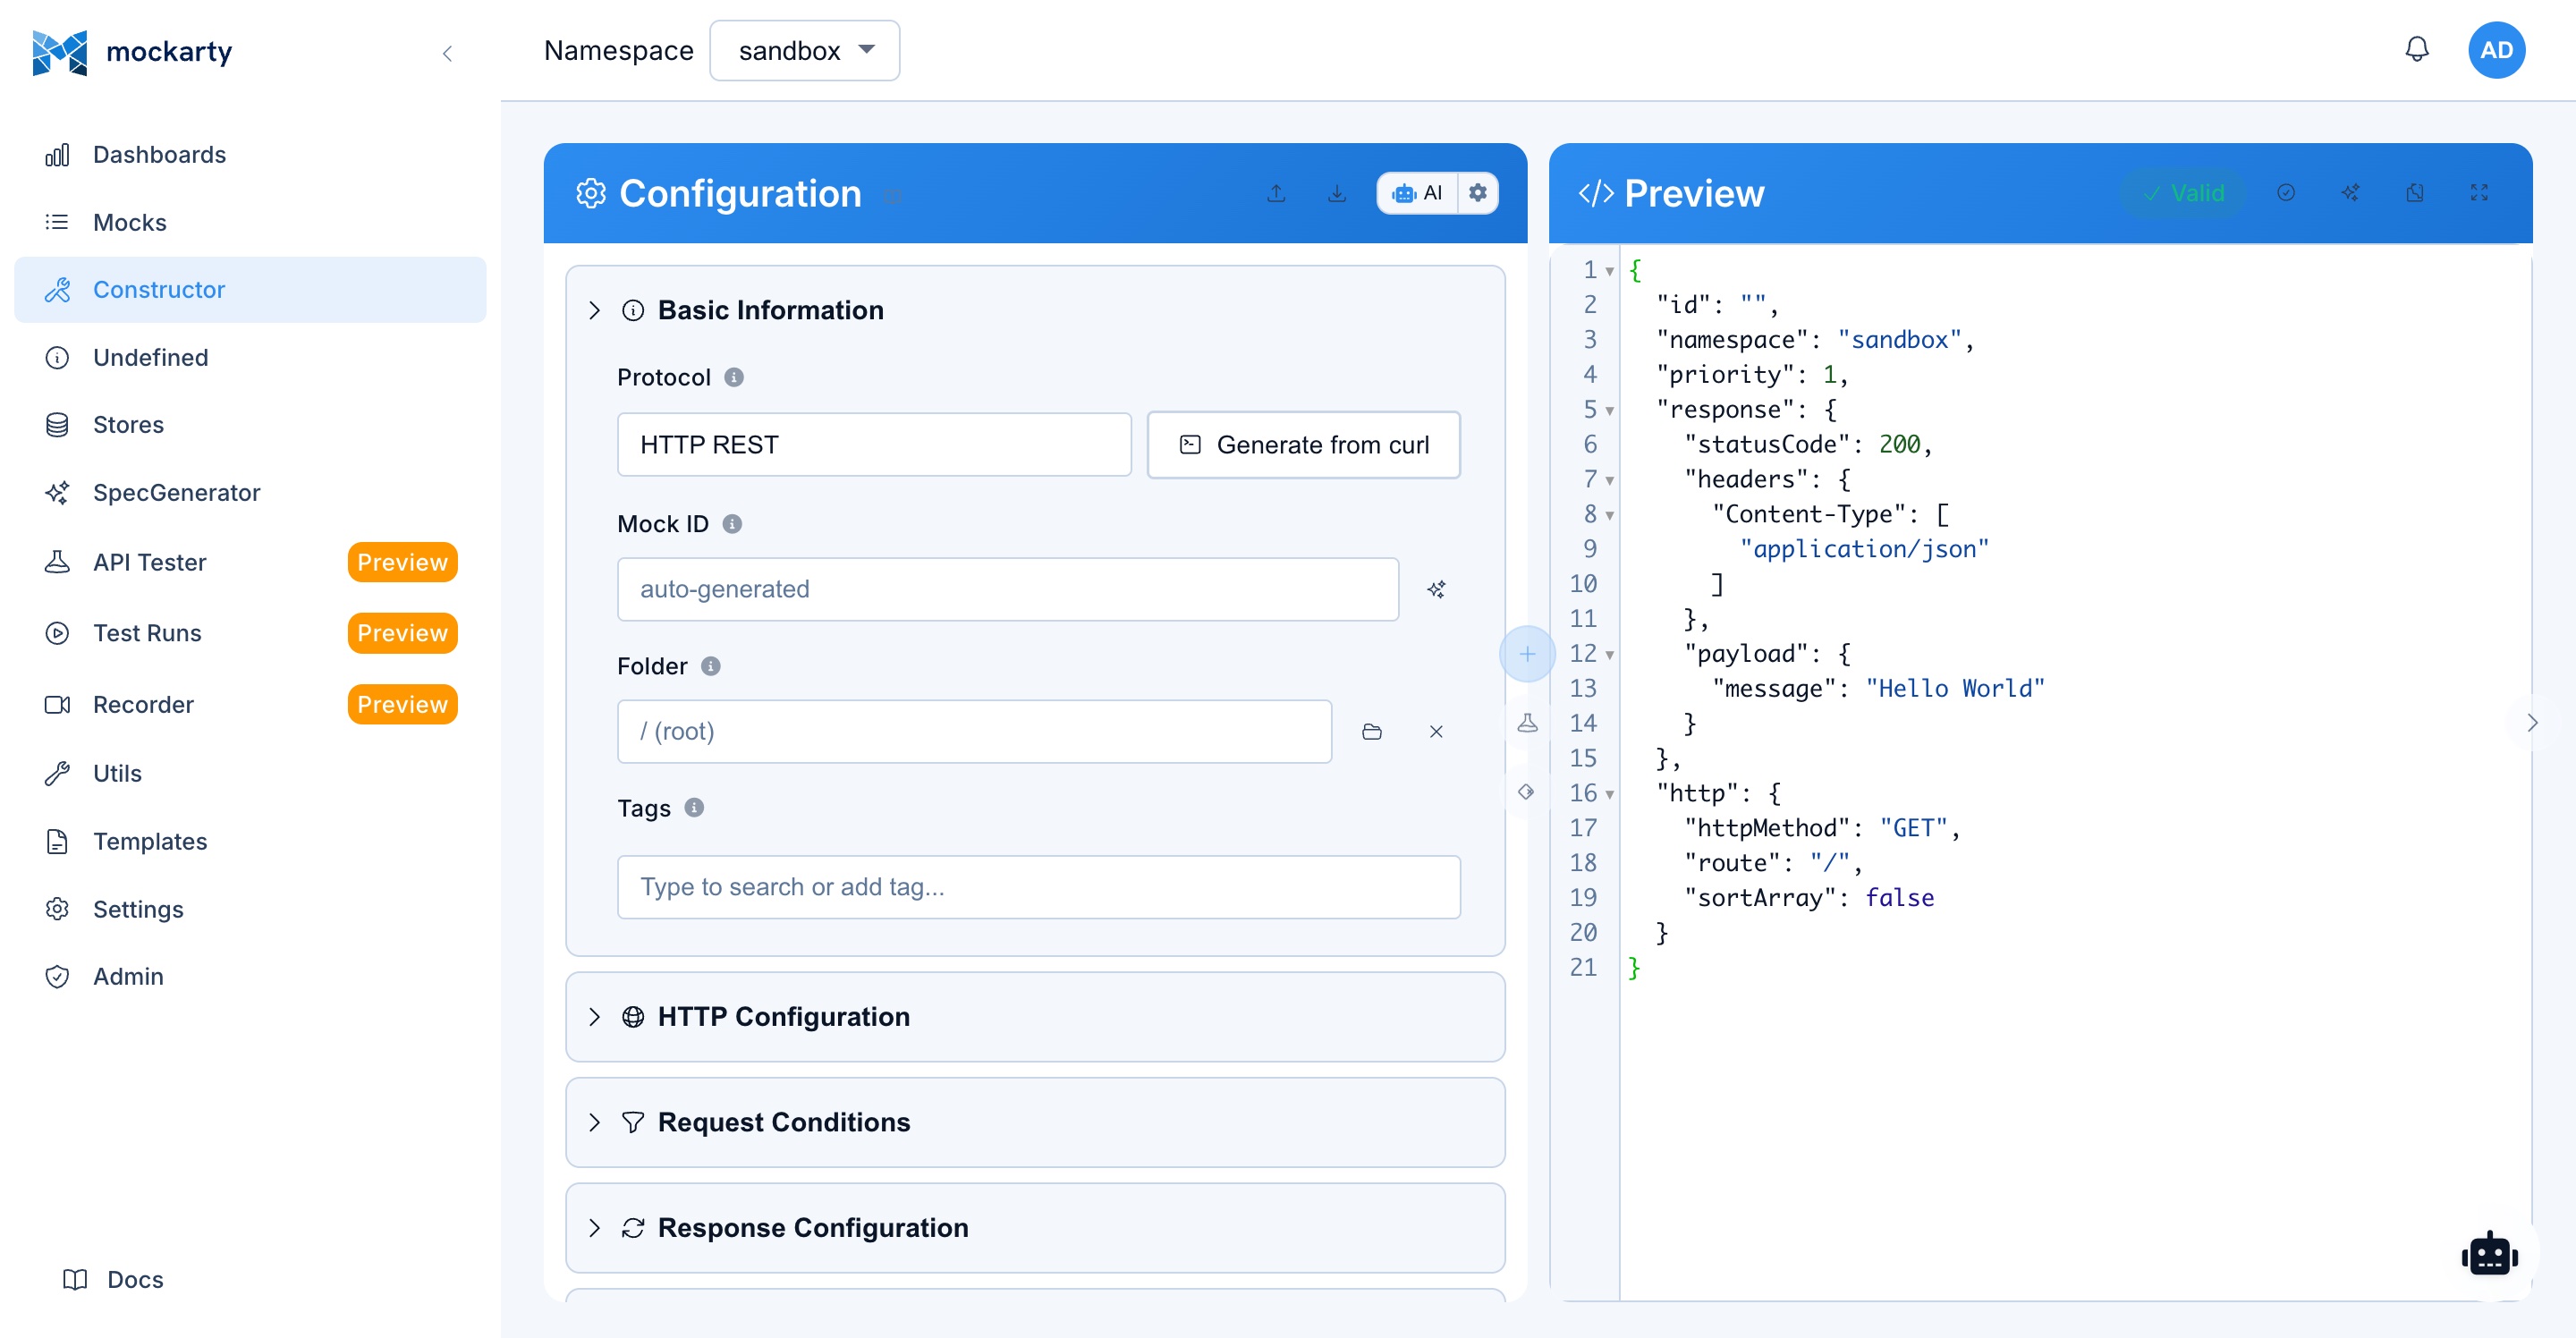
Step 3: Define the Response
In the Response section, set:
- Status Code:
200 - Content-Type:
application/json - Response Body:
{
  "users": [
    {
      "id": "$.fake.UUID",
      "name": "$.fake.Name",
      "email": "$.fake.Email",
      "age": "$.fake.Number"
    },
    {
      "id": "$.fake.UUID",
      "name": "$.fake.Name",
      "email": "$.fake.Email",
      "age": "$.fake.Number"
    }
  ],
  "total": 2
}
Step 4: Save the Mock
Click the Create Mock button. You will see a success notification and the mock will appear in the Mocks list.
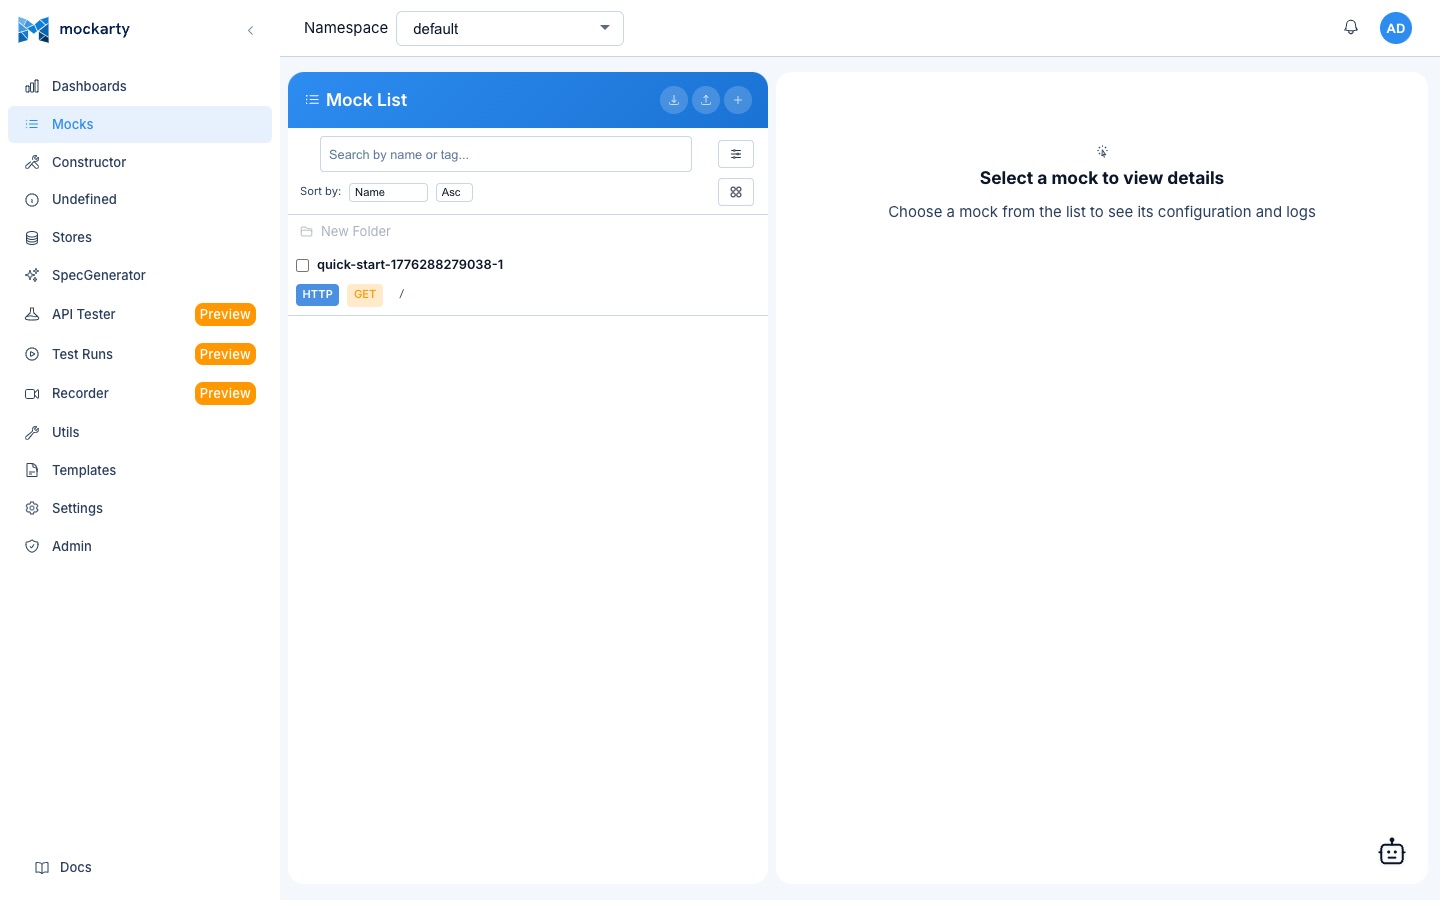
Test Your Mock
Now let’s call the mock and see the response. Remember, all mock calls go through the namespace URL pattern.
Using curl
curl -s http://localhost:5770/stubs/sandbox/api/users | jq
Example response:
{
  "users": [
    {
      "id": "a1b2c3d4-e5f6-7890-abcd-ef1234567890",
      "name": "John Smith",
      "email": "john.smith@example.com",
      "age": 34
    },
    {
      "id": "f9e8d7c6-b5a4-3210-fedc-ba0987654321",
      "name": "Emily Johnson",
      "email": "emily.johnson@example.net",
      "age": 28
    }
  ],
  "total": 2
}
Every call generates new random data thanks to Faker functions. Call it again and you will get different names, emails, and UUIDs.
Using the Built-in API Tester
You can also test directly from the Mockarty UI:
- Go to API Tester in the sidebar
- Create a new request
- Set method to GET and URL to
http://localhost:5770/stubs/sandbox/api/users - Click Send
Use Faker for Dynamic Responses
Faker functions generate realistic random data on every request. Use them in your response payloads with the $.fake. prefix.
Common Faker Functions
A selection of the most useful Faker functions. See the Faker Reference for the complete list of 70+ functions.
| Function | Example Output | Description |
|---|---|---|
$.fake.UUID |
a1b2c3d4-e5f6-... |
Random UUID v4 |
$.fake.Name |
John Smith |
Full name |
$.fake.FirstName |
Emily |
First name |
$.fake.LastName |
Johnson |
Last name |
$.fake.Email |
user@example.com |
Email address |
$.fake.Username |
jsmith1990 |
Username |
$.fake.Phone |
+1-555-123-4567 |
Phone number |
$.fake.Number |
42 |
Random integer |
$.fake.Float |
0.73 |
Random float |
$.fake.Bool |
true |
Random boolean |
$.fake.Date |
1982-02-27 |
Random date |
$.fake.Timestamp |
1973-06-21 14:50:46 |
Random datetime string |
$.fake.RFC3339 |
2024-01-15T14:30:45Z |
Current time in RFC 3339 format |
$.fake.UnixTime |
1197930901 |
Unix timestamp |
$.fake.IPv4 |
99.23.42.63 |
Random IPv4 address |
$.fake.IPv6 |
975c:fb2c:... |
Random IPv6 address |
$.fake.URL |
https://www.example.com/path |
Random URL |
$.fake.DomainName |
example.org |
Random domain name |
$.fake.Word |
innovative |
Random word |
$.fake.Sentence |
The quick brown fox... |
Random sentence |
$.fake.Paragraph |
Lorem ipsum dolor... |
Random paragraph |
$.fake.CCNumber |
373641309057568 |
Credit card number |
$.fake.CCType |
American Express |
Credit card type |
$.fake.Country |
United States |
Country name |
$.fake.City |
San Francisco |
City name |
$.fake.StreetAddress |
123 Main St |
Street address |
$.fake.State |
California |
State or province |
$.fake.ZipCode |
94102 |
Postal / ZIP code |
$.fake.Company |
Acme Corp |
Company name |
$.fake.JobTitle |
Senior Developer |
Job title |
$.fake.HexColor |
#3498db |
Random hex color |
$.fake.JWT |
eyJhbGciOiJIUzI1NiIs... |
Random JSON Web Token |
Request Data Interpolation
You can also reference values from the incoming request:
| Expression | Description |
|---|---|
$.req.fieldName |
JSON body field |
$.reqHeader.Authorization[0] |
Request header value |
$.queryParams.page |
Query parameter |
$.pathParam.id |
URL path parameter (from route like /users/:id) |
$.gS.keyName |
Global Store value |
$.cS.keyName |
Chain Store value |
$.mS.keyName |
Mock Store value |
Example: Echo User Data Back
Create a mock for POST /api/users that echoes submitted data with generated fields:
{
  "id": "$.fake.UUID",
  "name": "$.req.name",
  "email": "$.req.email",
  "createdAt": "$.fake.RFC3339",
  "status": "active"
}
When you POST {"name": "Alice", "email": "alice@example.com"}, the response will include the submitted name and email along with a generated UUID and timestamp.
Test it:
curl -s -X POST http://localhost:5770/stubs/sandbox/api/users \
  -H "Content-Type: application/json" \
  -d '{"name": "Alice", "email": "alice@example.com"}' | jq
Match Part of a Path (No Regex)
Often you want one mock to answer every request whose URL contains an id, a code, or some other variable segment — for example, all of GET /api/users/1, /api/users/42, /api/users/9999. Put a named parameter in the route and Mockarty matches any value in that position:
| Route | Matches |
|---|---|
/api/users/:id |
/api/users/1, /api/users/abc, /api/users/anything |
/api/orders/:id/items/:sku |
any order id and any sku |
You can also write the parameter in curly-brace form (/api/users/{id}). The matched value is available in the response as $.pathParam.id.
Match only a specific shape
If you want the mock to react only to values of a certain kind — say, numeric ids — add a type in parentheses. No regular expressions required:
| Route | Reacts to |
|---|---|
/api/users/:id(number) |
only digits: /api/users/42 ✓, /api/users/report.pdf ✗ |
/api/codes/:code(5 digits) |
exactly five digits: /api/codes/12345 |
/api/items/:uid(uuid) |
a UUID like 123e4567-e89b-12d3-a456-426614174000 |
/api/tags/:name(alpha) |
letters only |
/api/sku/:s(alnum) |
letters and digits |
/api/price/:p(decimal) |
a decimal number such as 9.99 |
/api/flag/:f(bool) |
true or false |
In the constructor, the Match part of the path helper under the path field lets you pick the type from a dropdown, inserts the parameter for you, and shows a live check of which URLs will match — so you never have to write or debug a regular expression. (A raw-regex mode is still available via the Use regex toggle for advanced patterns.)
Add Conditions
Conditions let you return different responses based on the incoming request. This is how you simulate realistic API behavior.
Example: Different Responses by User ID
Create separate mocks for different user IDs, or use query parameter conditions on a single route.
Option A: Separate Mocks for Different Routes
Create one mock for GET /api/users/1 returning the admin user, and another mock for GET /api/users/999 returning a not-found error.
Mock 1 — Route: /api/users/1, Response (Status 200):
{
  "id": 1,
  "name": "Admin User",
  "role": "admin"
}
Mock 2 — Route: /api/users/999, Response (Status 404):
{
  "error": "User not found"
}
Option B: Use Query Parameter Conditions
Create a single mock for GET /api/users and add conditions on a query parameter (e.g., ?id=1).
Condition:
- Type:
queryParam - Key:
id - Assert:
equals - Value:
1
Response (Status 200):
{
  "id": 1,
  "name": "Admin User",
  "role": "admin"
}
Then create a second mock for GET /api/users with no conditions and a lower priority for the default response.
Response (Status 404):
{
  "error": "User not found"
}
Test the conditional mock:
# Returns the admin user (condition matches)
curl -s "http://localhost:5770/stubs/sandbox/api/users?id=1" | jq

# Returns 404 (no condition matches, falls through to default)
curl -s "http://localhost:5770/stubs/sandbox/api/users?id=999" | jq
Condition Types
| Type | Description | Example |
|---|---|---|
| body | Match on JSON body field (JsonPath) | $.order.status equals "pending" |
| header | Match on request header | Authorization contains Bearer |
| queryParam | Match on query parameter | page equals 1 |
Assert Actions
| Action | Description | Example |
|---|---|---|
equals |
Exact match (deep equality for objects/arrays) | $.user.role equals "admin" |
contains |
Substring match for strings, subset check for objects, element presence for arrays | $.name contains "john" |
not_equals |
Negation of equals – matches when value does NOT equal expected |
$.status not_equals "deleted" |
not_contains |
Negation of contains – matches when value does NOT contain expected |
$.tags not_contains "test" |
any |
Always matches (wildcard, expected value is ignored) | $.request_id any |
notEmpty |
Value must be non-empty (non-null, non-empty string/array/object) | $.user.email notEmpty |
empty |
Value must be empty (null, "", [], or {}) |
$.error empty |
matches |
Regex pattern matching against string value | $.email matches "^.*@test\\.com$" |
Advanced Condition Fields (API Only)
Conditions also support advanced fields like decode (base64), sortArray, and valueFromFile when creating mocks via the REST API. These fields are not available in the web UI constructor. See the API Reference for full details and examples.
Setting Up Conditions in the UI
- In the Constructor, scroll to the Conditions section
- Click Add Condition
- Select the condition type (body, header, queryParam)
- Enter the key and expected value
- Choose the assert action
Multiple conditions on a single mock use AND logic — all conditions must match for the response to be selected.
Import from OpenAPI
If you already have an OpenAPI (Swagger) specification, Mockarty can generate mocks for all your endpoints automatically.
Step 1: Open the Generator
Click Generator in the sidebar menu.
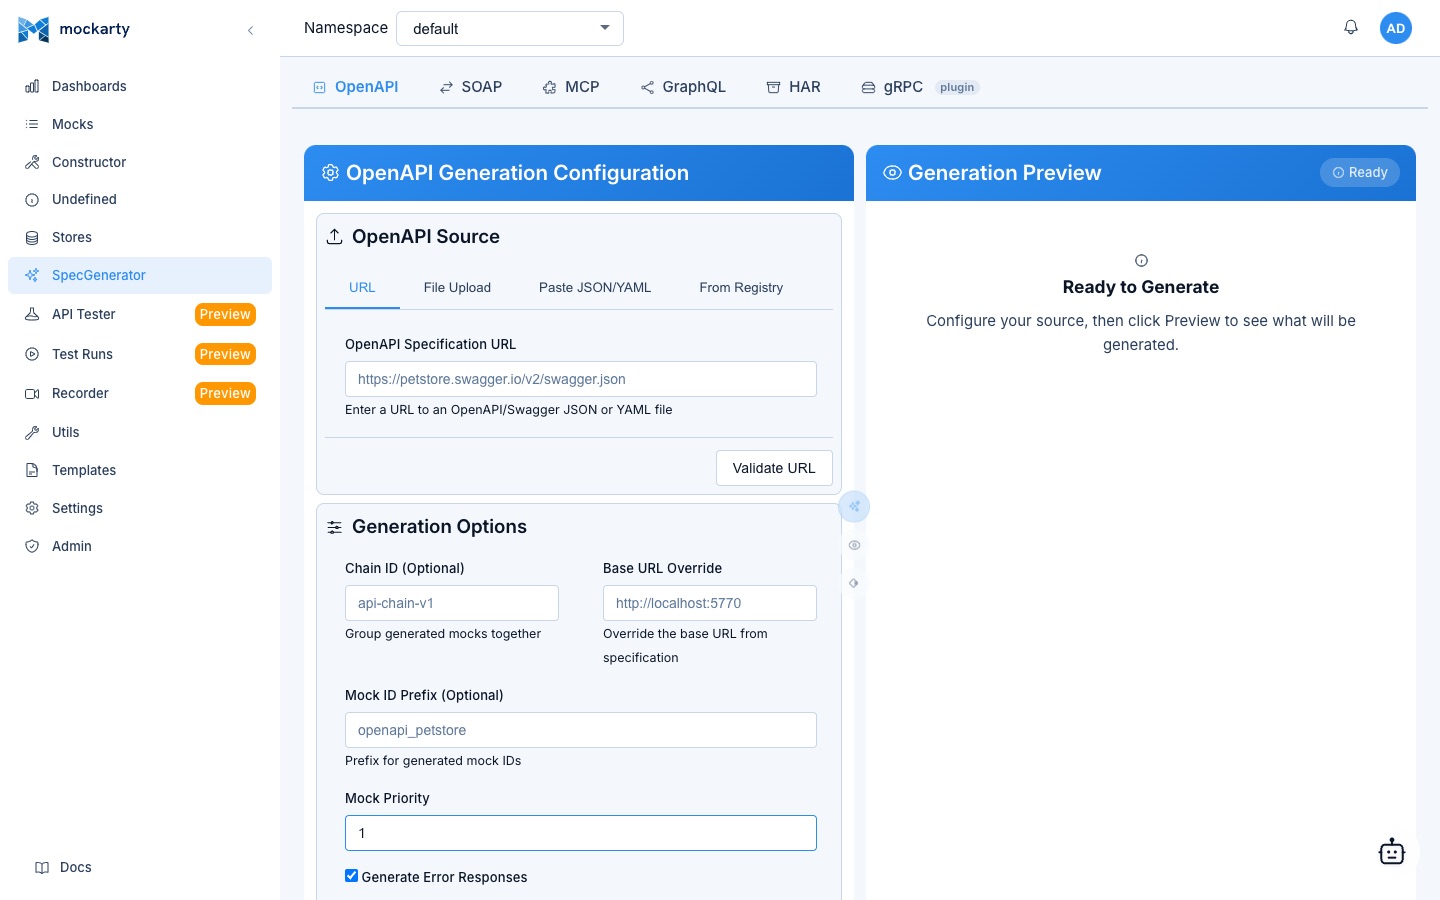
Step 2: Upload Your Spec
You can either:
- Paste a URL to your OpenAPI spec (JSON or YAML)
- Upload a file from your computer
- Paste the content directly into the editor
Supported formats:
- OpenAPI 3.0 / 3.1 (JSON and YAML)
- Swagger 2.0 (JSON and YAML)
Step 3: Configure Generation Options
Choose your generation preferences:
| Option | Description |
|---|---|
| Namespace | Target namespace for generated mocks |
| Use Faker | Replace example values with Faker functions for dynamic responses |
| Generate Conditions | Create conditions from parameter definitions |
| Prefix | Add a route prefix to all generated mocks |
Step 4: Generate
Click Generate Mocks. Mockarty will create a mock for every endpoint in your spec.
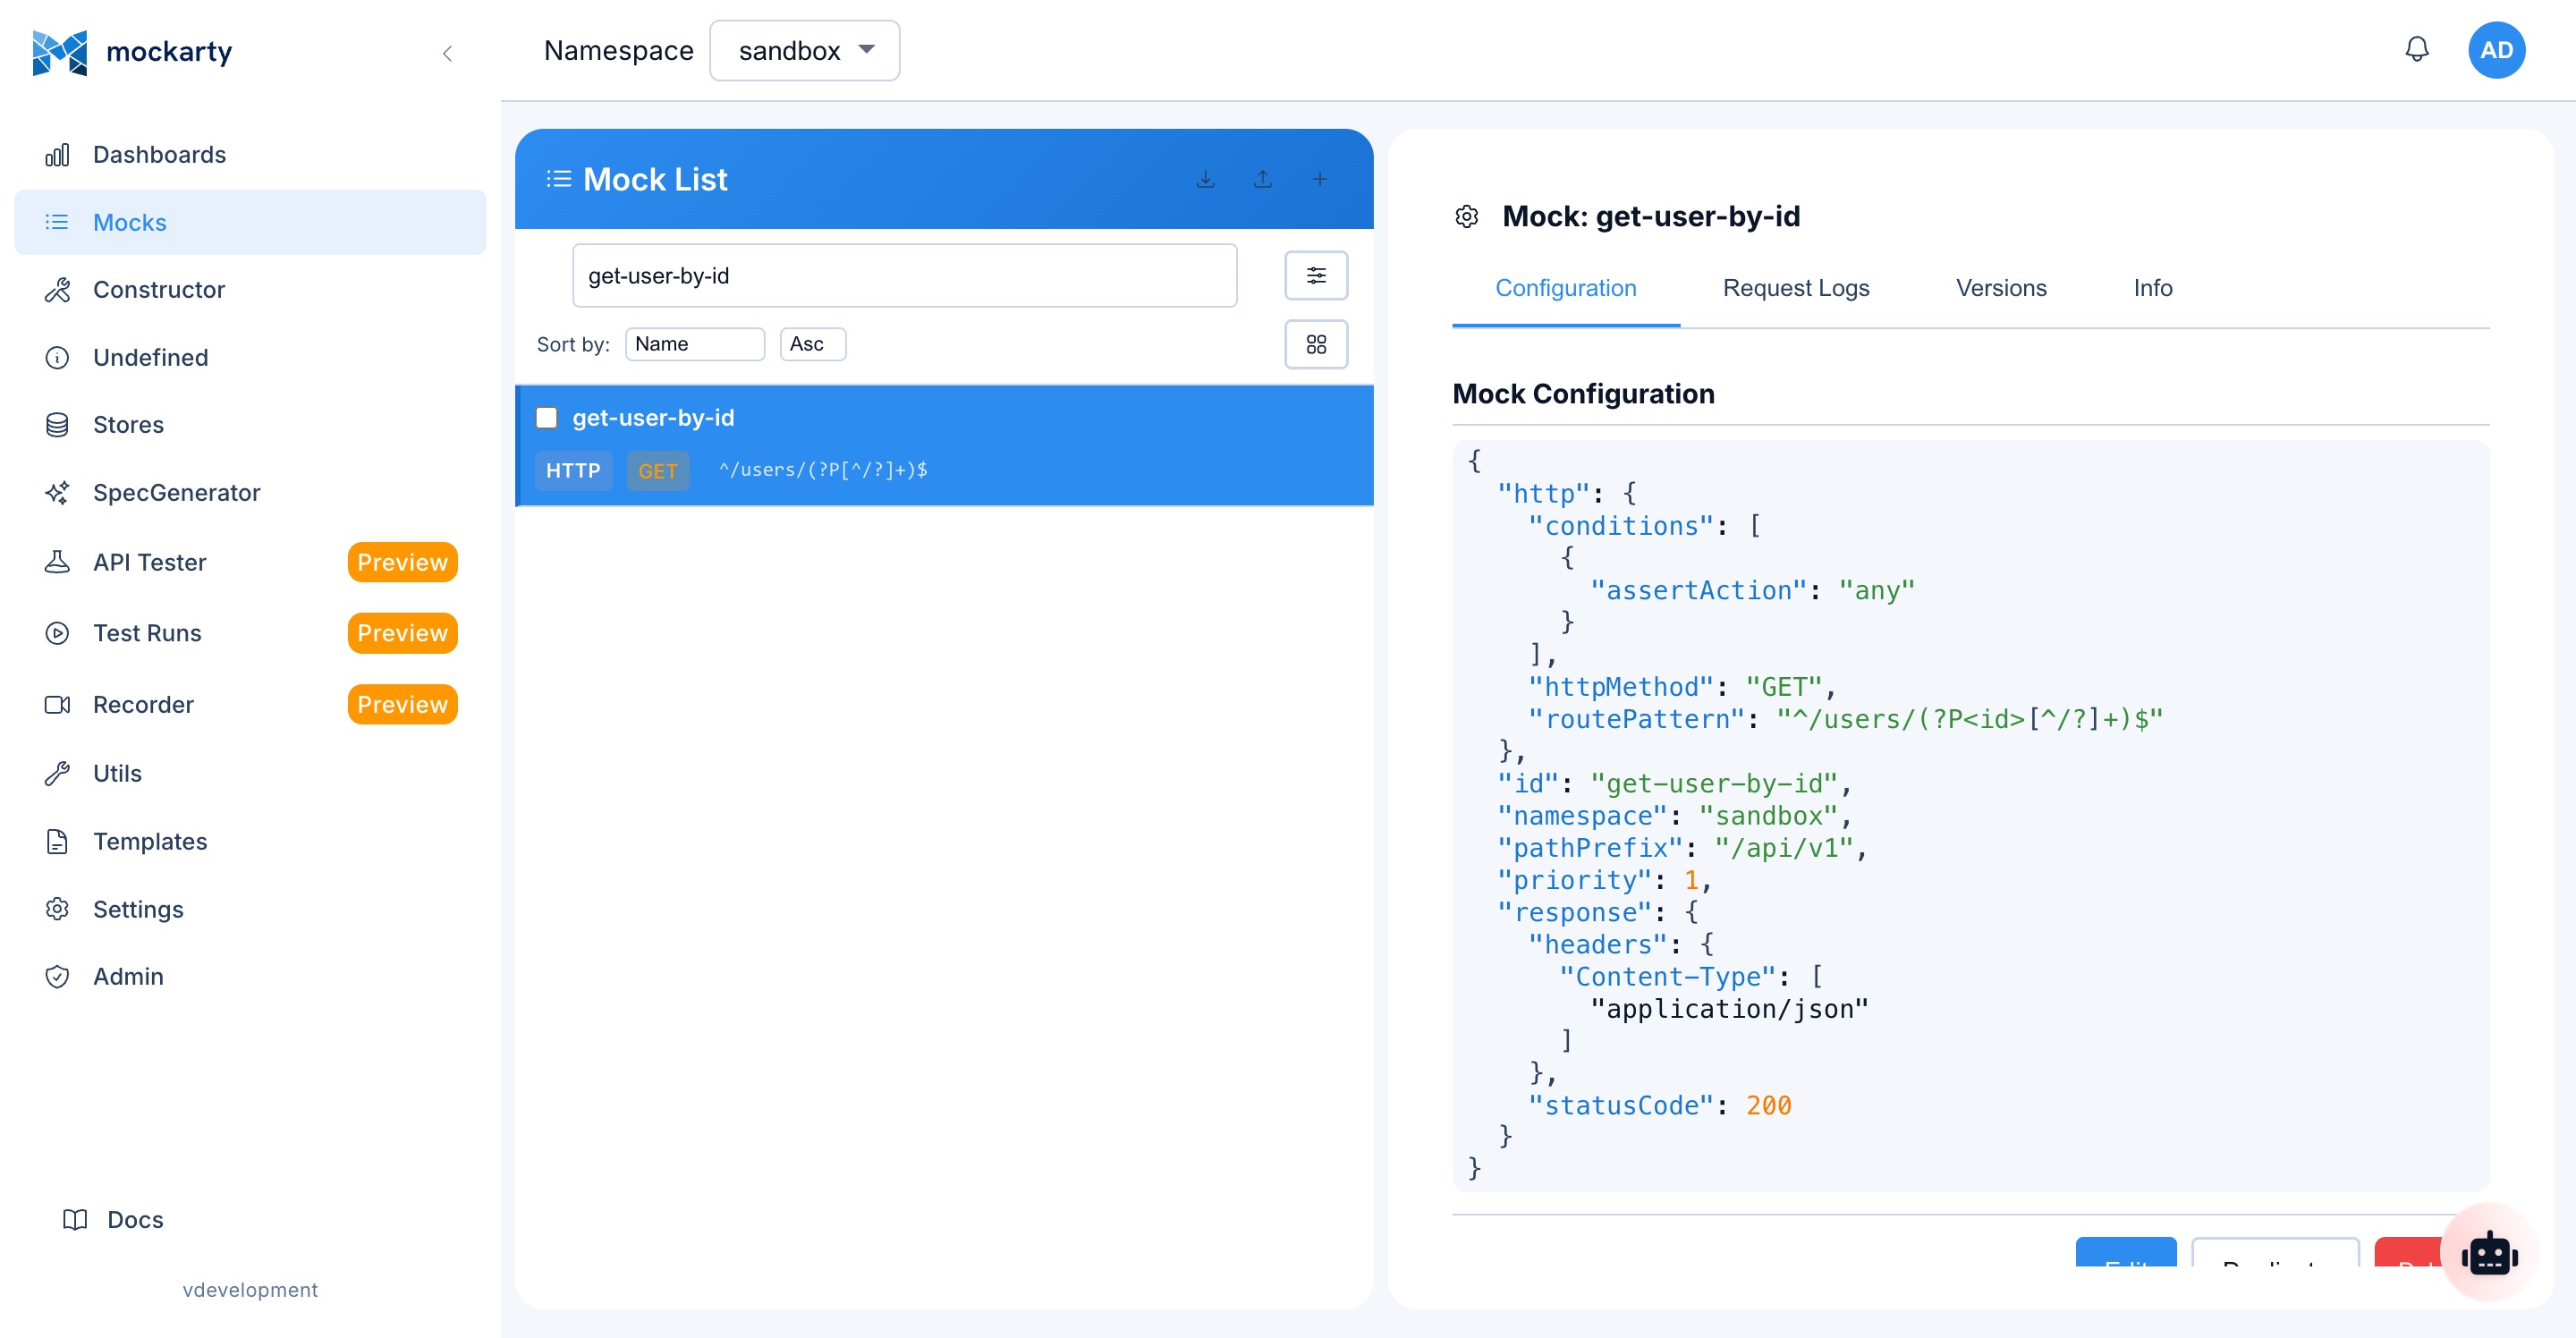
Step 5: Review and Test
Go to the Mocks page to see all generated mocks. Each mock will have:
- The correct route and HTTP method
- Response payload based on schema definitions
- Appropriate status codes
- Faker-enhanced dynamic values (if enabled)
You can edit any generated mock in the Constructor to customize it further. Remember to test them using the namespace URL pattern:
curl -s http://localhost:5770/stubs/sandbox/your-generated-route | jq
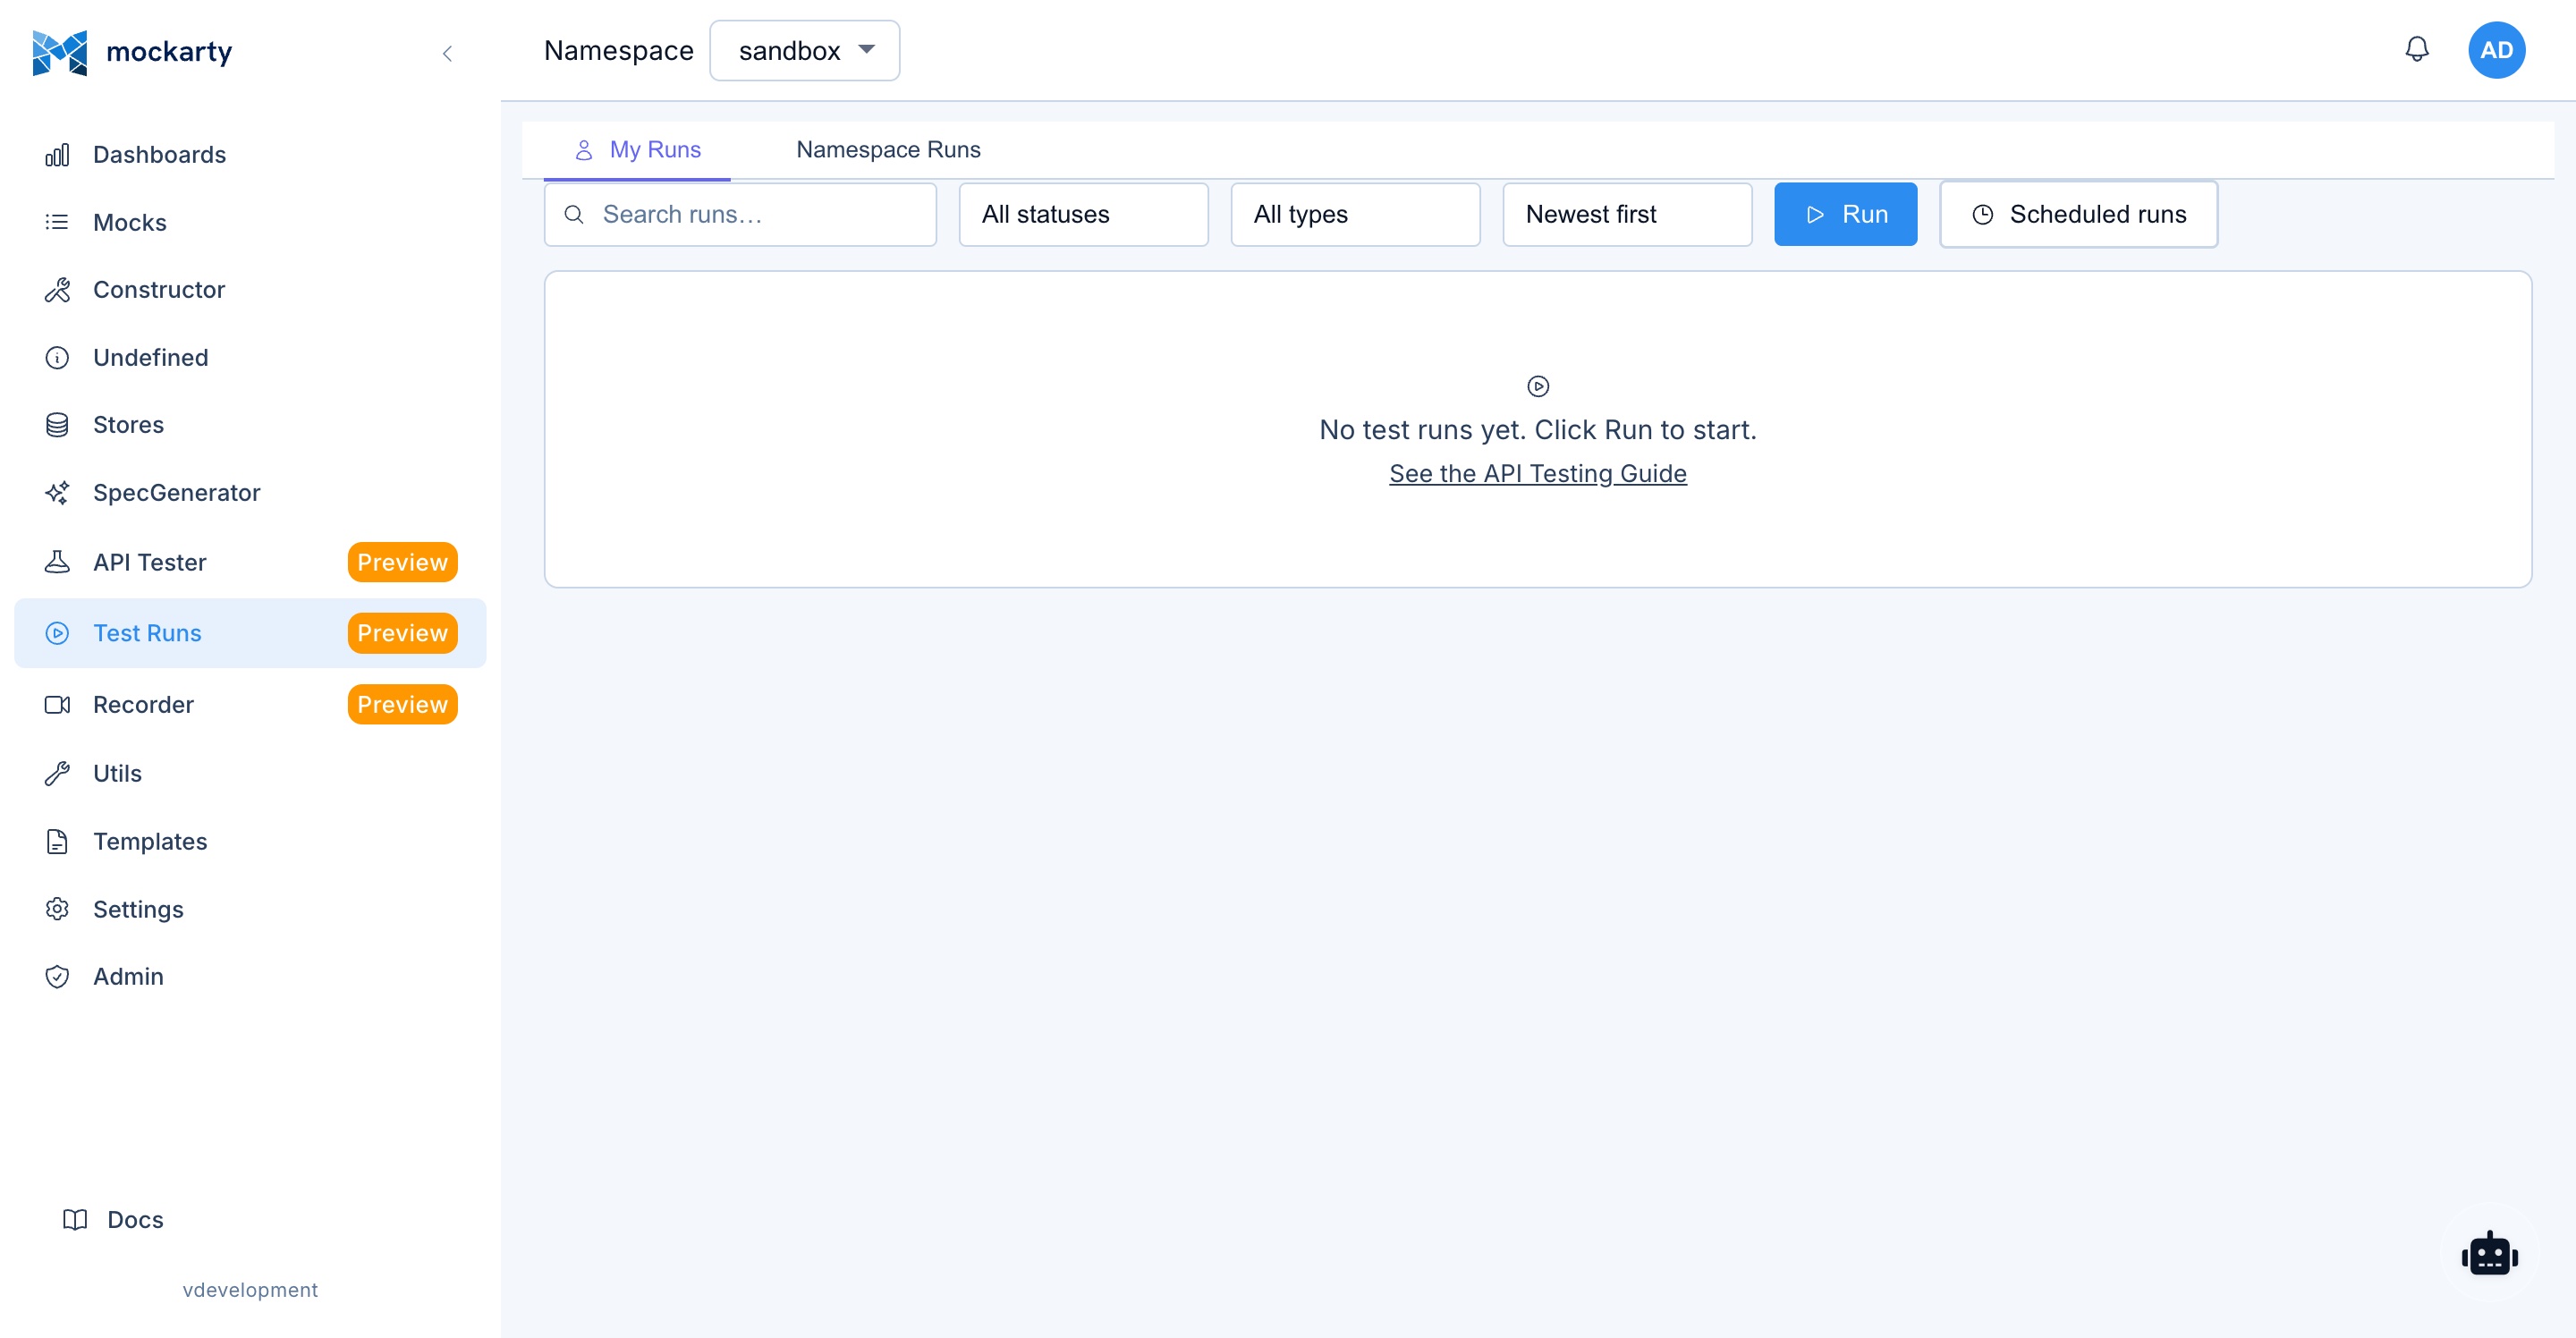
API Testing
Mockarty includes a built-in API testing tool — think of it as a Postman right inside your mock server. You can test your mocks, real APIs, or both.
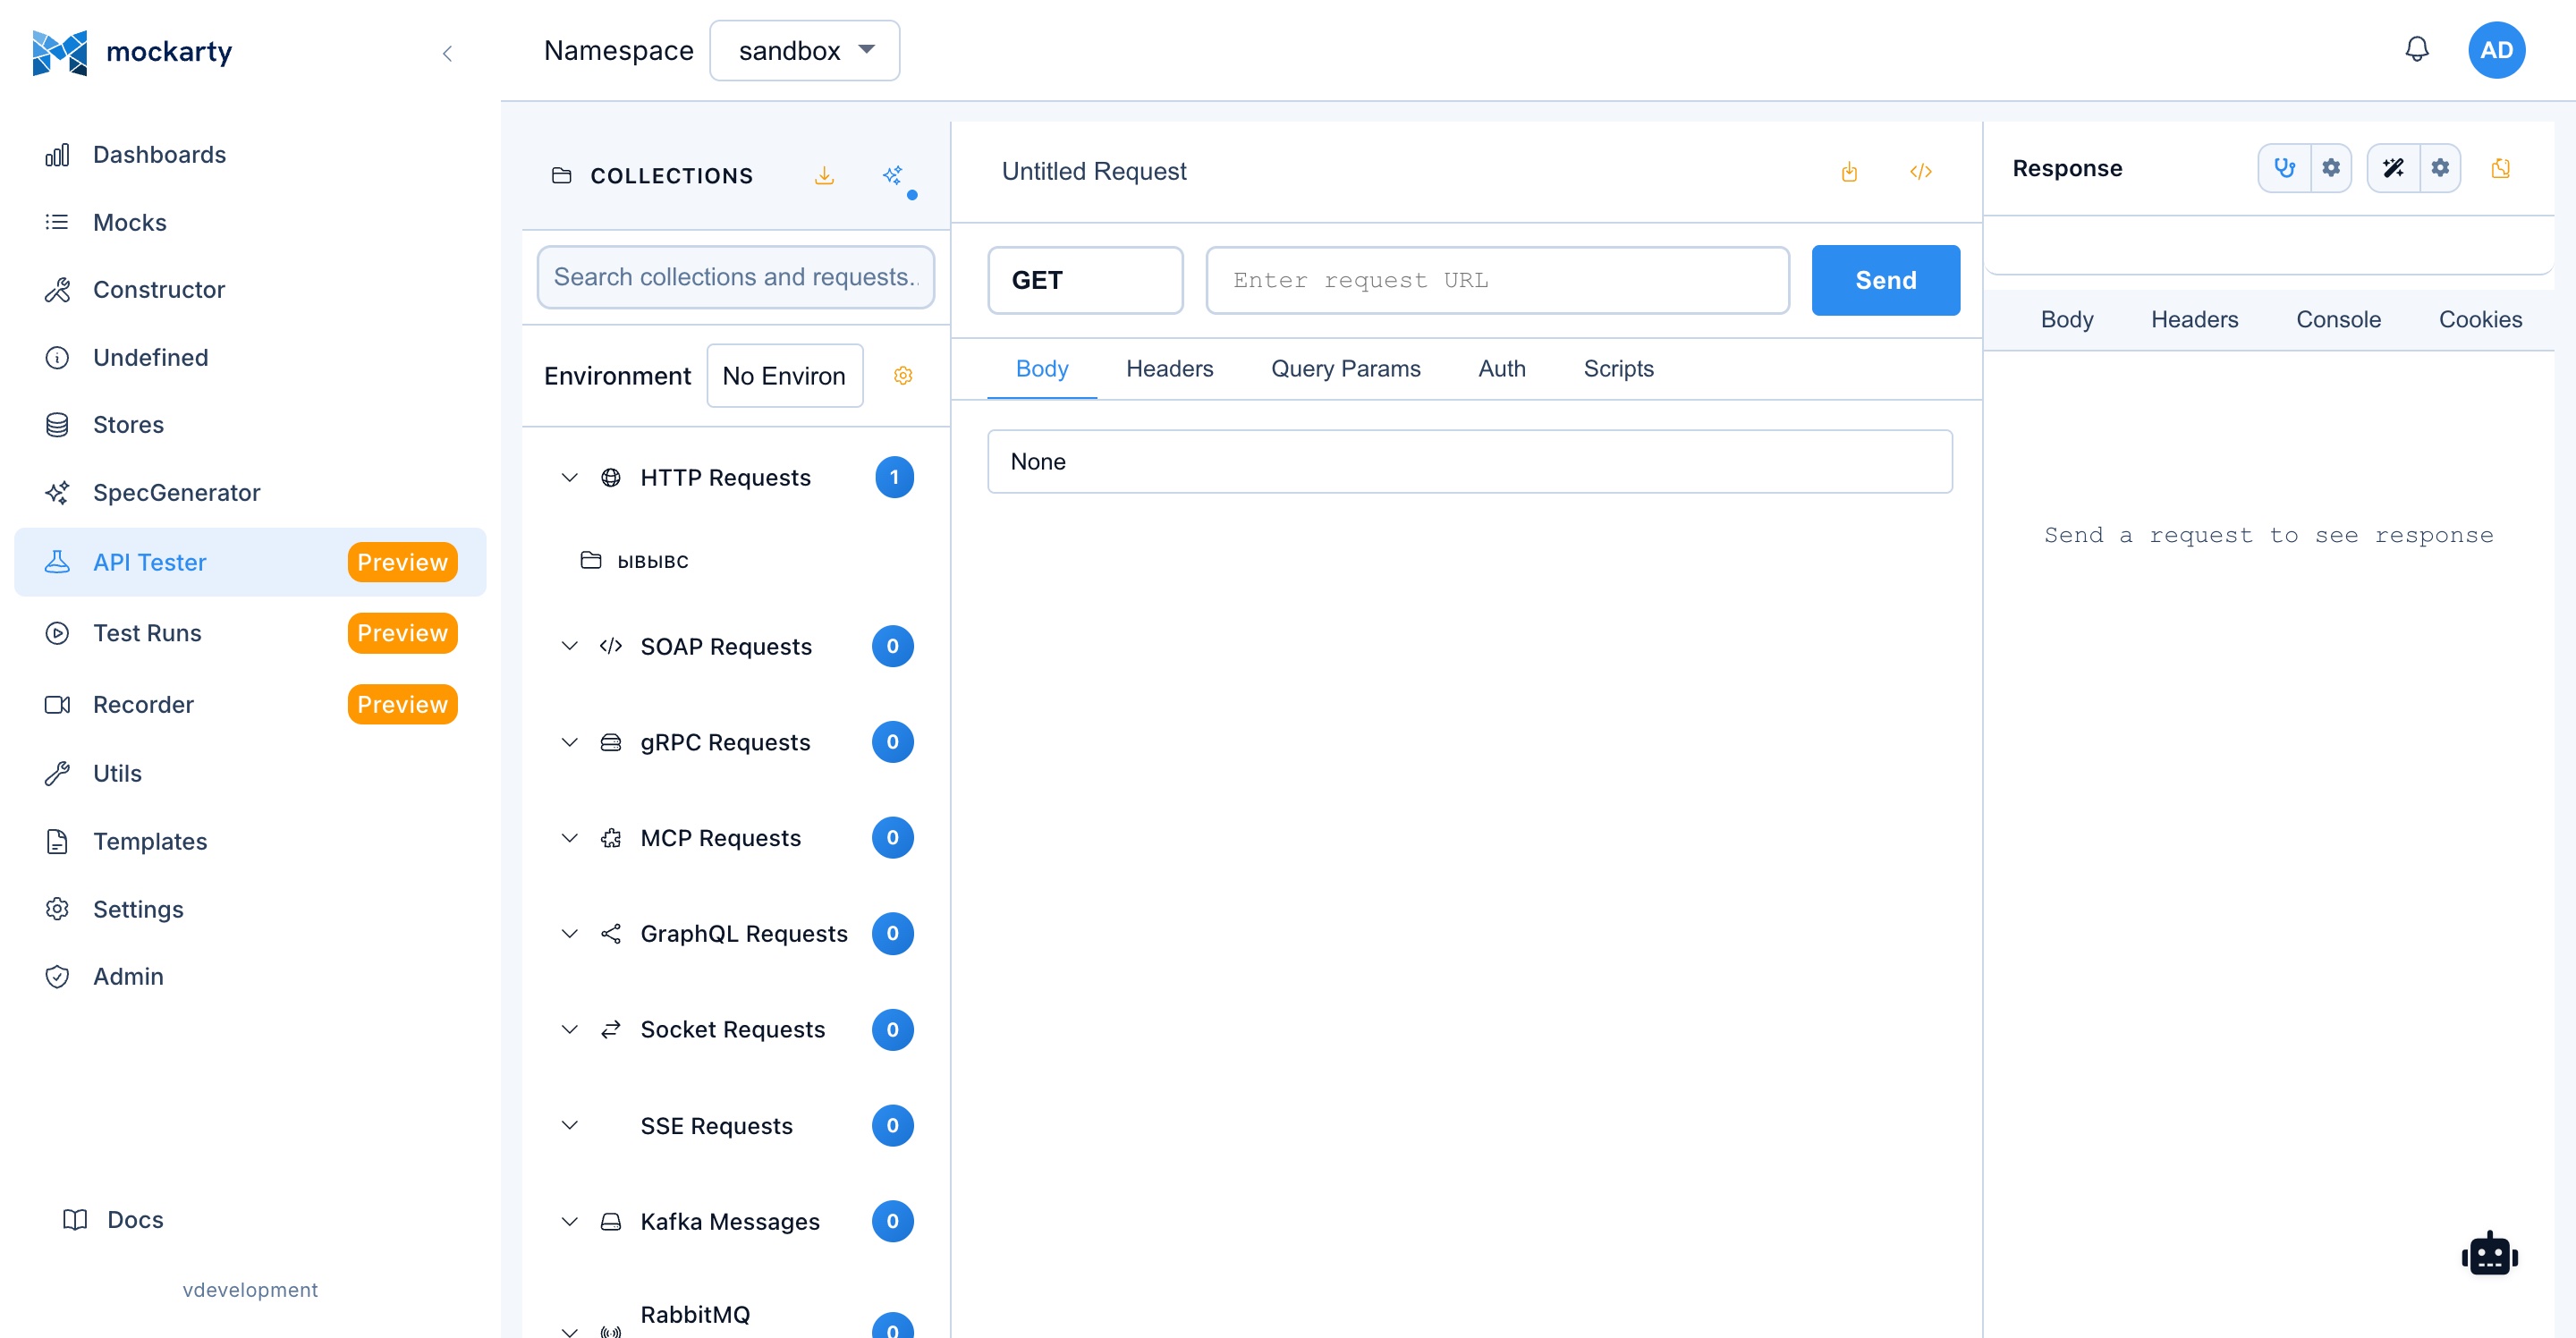
What is the API Tester?
The API Tester lets you:
- Send HTTP requests to any URL and see the response
- Organize requests into collections (like folders for your tests)
- Write test scripts in JavaScript to automatically check responses
- Use environments to switch between different servers (dev, staging, prod)
- Run entire collections at once to catch regressions
- Schedule test runs to run automatically on a timer
Step 1: Create a Collection
A collection is simply a group of related requests. Think of it like a test suite.
- Go to API Tester in the sidebar
- Click New Collection
- Give it a name, for example
User API Tests - Click Create
Step 2: Add Your First Request
- Inside your collection, click Add Request
- Fill in:
- Name:
Get Users(this is just a label for you) - Method:
GET(choose from the dropdown) - URL:
http://localhost:5770/stubs/sandbox/api/users
- Name:
- Click Send to try it immediately
You will see the response appear below: status code, response time, headers, and the JSON body.
Step 3: Add a POST Request
Let’s also add a request that sends data:
- Click Add Request again
- Fill in:
- Name:
Create User - Method:
POST - URL:
http://localhost:5770/stubs/sandbox/api/users
- Name:
- Go to the Headers tab and add:
- Key:
Content-Type, Value:application/json
- Key:
- Go to the Body tab, select raw, and paste:
{
  "name": "Alice",
  "email": "alice@example.com"
}
- Click Send
Step 4: Add Test Scripts
Test scripts let you automatically check that the response is correct. Go to the Tests tab of your Get Users request and paste:
// Check that we got a 200 OK
mk.test("Status is 200", function() {
    mk.response.to.have.status(200);
});

// Check that the response has a users array
mk.test("Has users array", function() {
    var data = mk.response.json();
    mk.expect(data.users).to.be.an('array');
    mk.expect(data.users.length).to.be.greaterThan(0);
});

// Check that each user has the required fields
mk.test("User has required fields", function() {
    var user = mk.response.json().users[0];
    mk.expect(user).to.have.property('id');
    mk.expect(user).to.have.property('name');
    mk.expect(user).to.have.property('email');
});
Click Send again. Now you will see test results below the response — green checkmarks for passing tests, red crosses for failures.
Step 5: Use Environments
Environments let you switch URLs without editing every request. For example:
- Click the Environments dropdown (top right of API Tester)
- Click Manage Environments → Add Environment
- Name it
Localand add a variable:- Variable:
base_url, Value:http://localhost:5770/stubs/sandbox
- Variable:
- In your request URL, use:
{{base_url}}/api/users
Now when you switch environments, all requests update automatically. This is useful when you want to test the same API on different servers.
Step 6: Run the Entire Collection
To run all requests in your collection at once:
- Click Run Collection (play button on the collection)
- Select which requests to include
- Click Run
Results show a summary: how many tests passed, how many failed, and the total execution time.
Tip: You can also schedule collection runs (e.g., every hour) from the collection settings. This is great for continuous monitoring of your APIs.
Pre-Request Scripts
You can also write scripts that run before each request. This is useful for generating authentication tokens or setting up test data:
// Generate a random user ID for this request
var userId = Math.floor(Math.random() * 1000);
mk.environment.set("user_id", userId);
Then use {{user_id}} in your request URL or body.
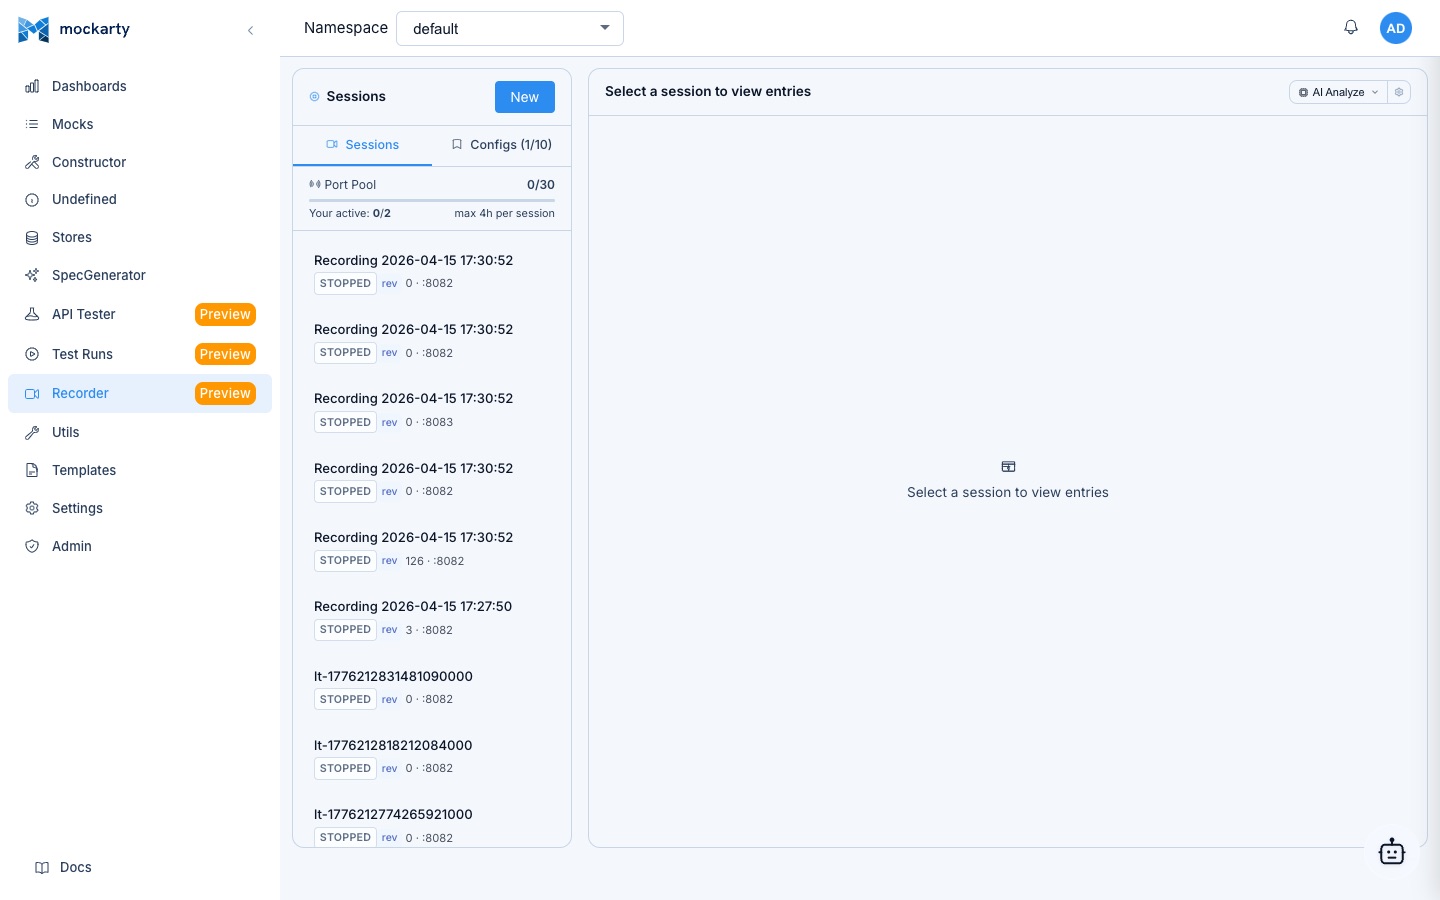
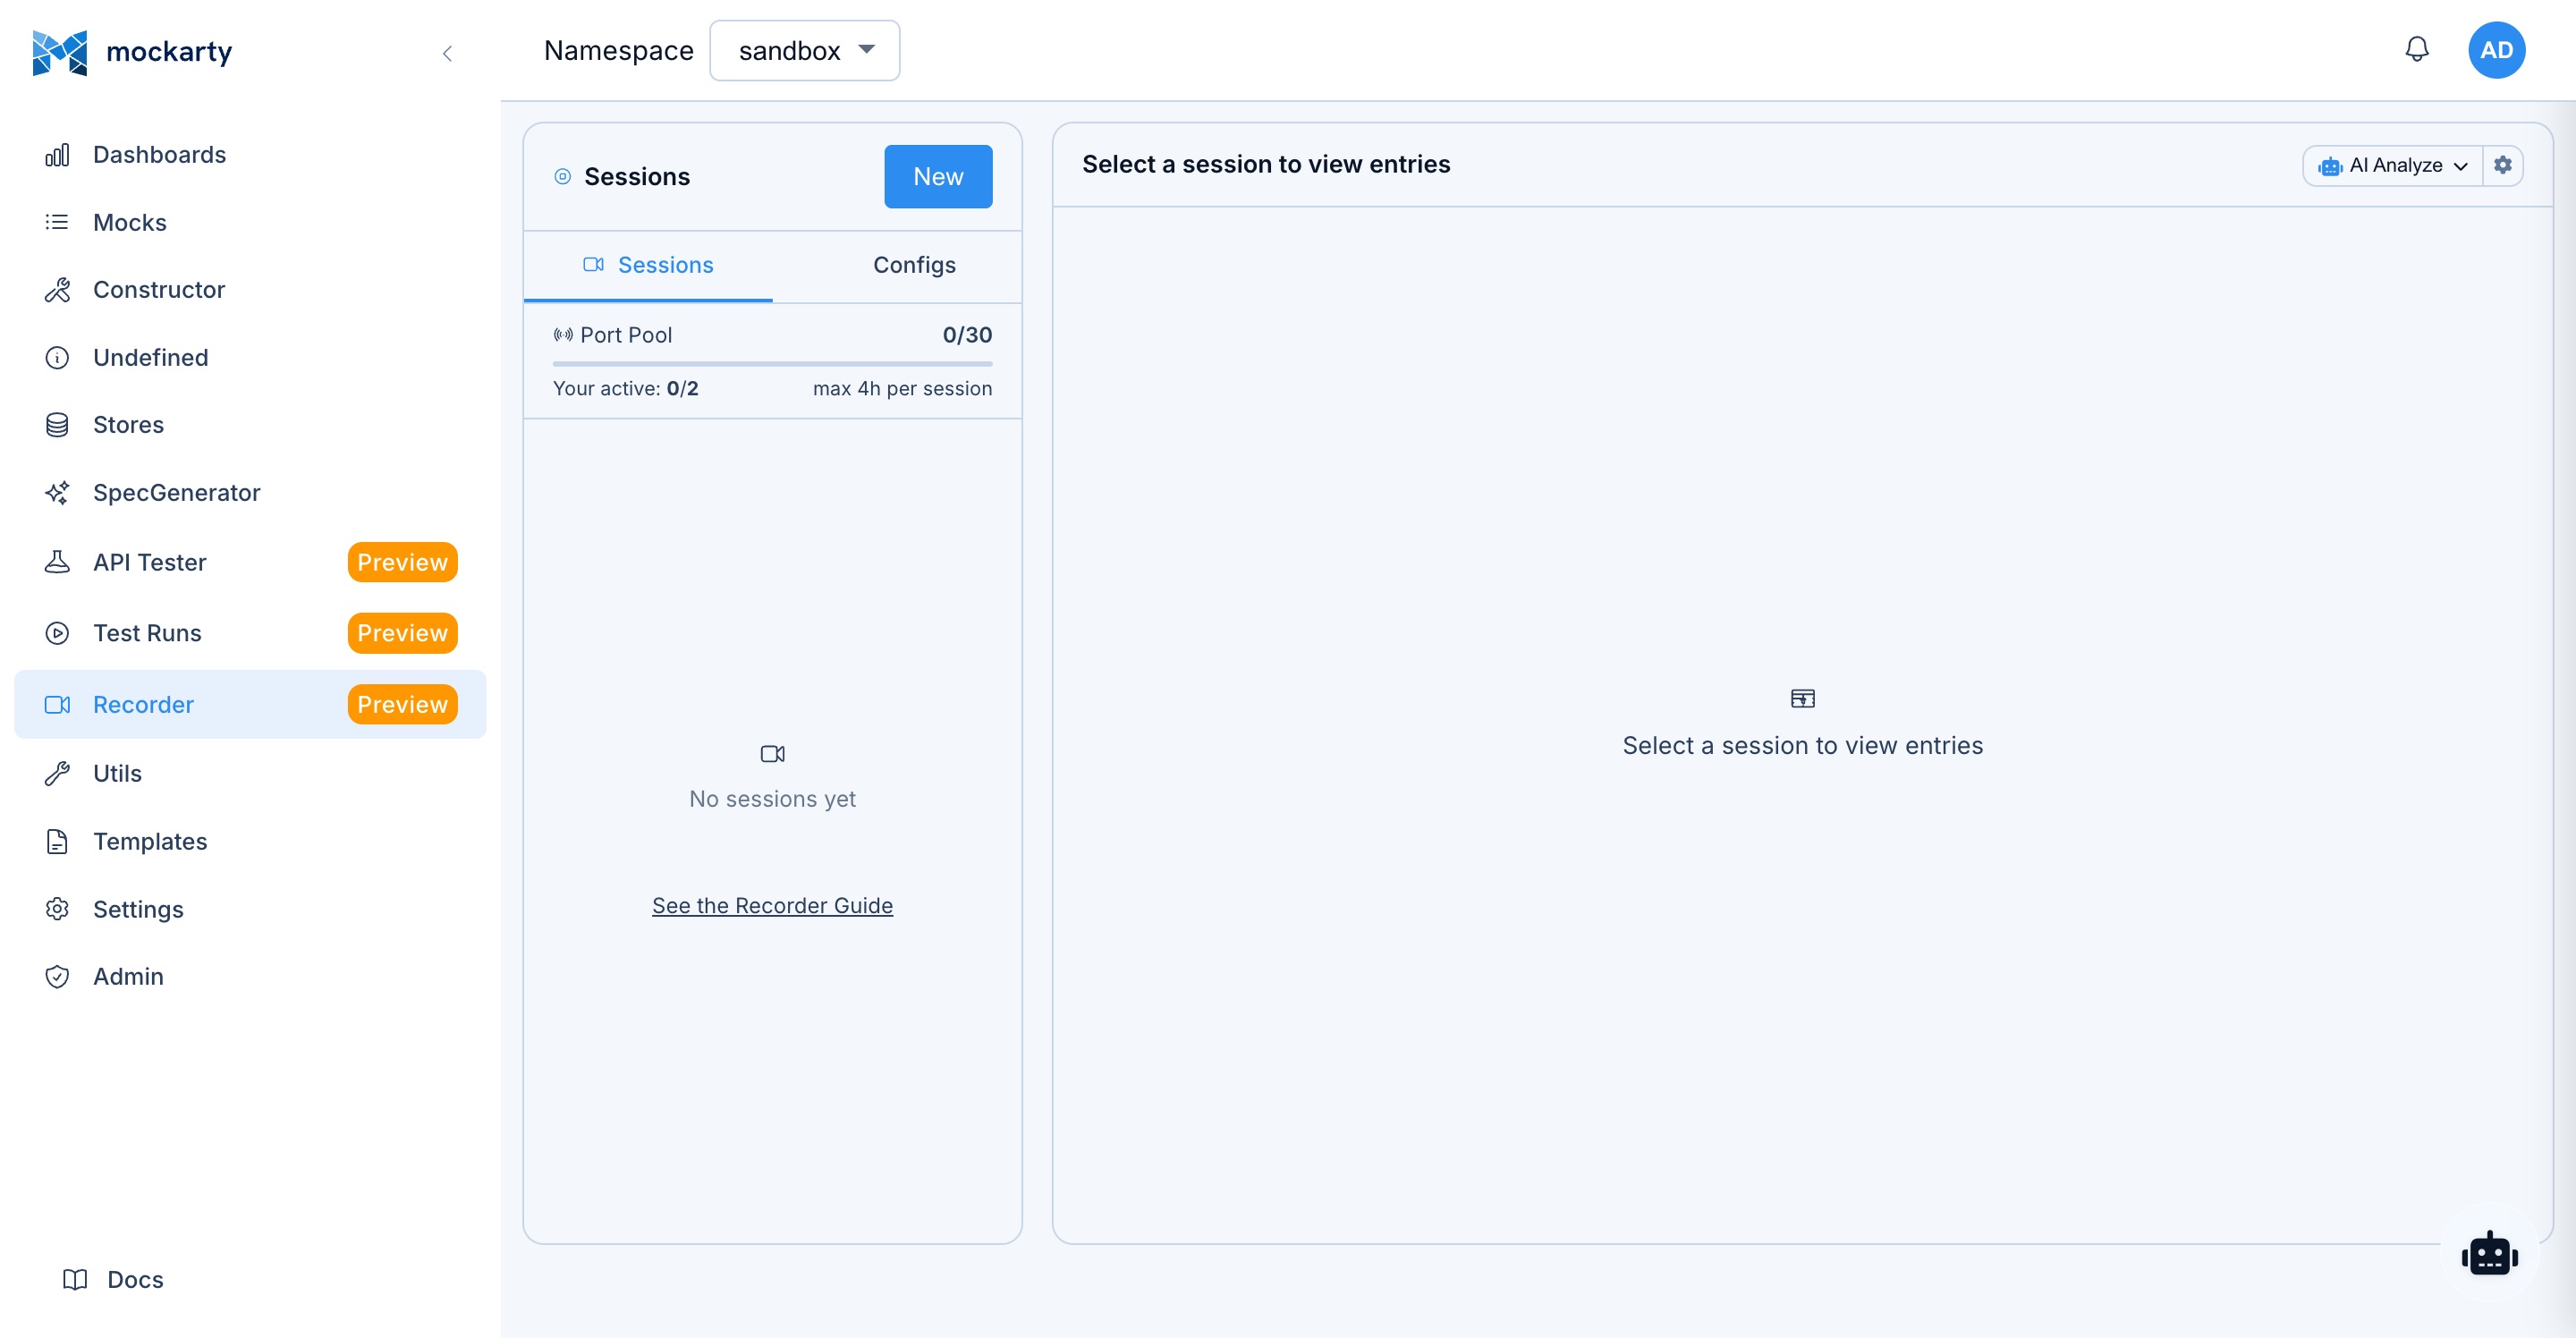
Traffic Recorder
The Traffic Recorder captures real HTTP traffic and turns it into mocks automatically. Instead of writing mocks by hand, you can point the recorder at a real API, run your application, and let Mockarty create mocks from the actual requests and responses.
What is the Recorder?
Think of the recorder as a “spy” that sits between your application and a real API. It passes all traffic through unchanged, but records everything. After recording, you can export the captured traffic as:
- Mocks — ready to use in Mockarty
- Test collections — for API testing
- Performance scripts — for load testing
Step 1: Start a Recording Session
- Go to Recorder in the sidebar
- Click New Session
- Choose Reverse Proxy mode (the simplest option)
- Enter the Target URL — this is the real API you want to record. For example:
https://jsonplaceholder.typicode.com - Optionally set a Listen Port (e.g.,
8085) or leave blank for auto-assignment - Click Start
The recorder is now running. It listens on the specified port and forwards all requests to the target URL.
Step 2: Send Traffic Through the Recorder
Now point your application (or curl) at the recorder instead of the real API:
# Instead of calling the real API:
# curl https://jsonplaceholder.typicode.com/users

# Call through the recorder:
curl http://localhost:8085/users
The recorder forwards your request to jsonplaceholder.typicode.com, gets the response, and records both the request and response. You will see entries appear in the Recorder UI in real time.
Step 3: Review Recorded Traffic
Each recorded entry shows:
- Request: method, URL, headers, body
- Response: status code, headers, body, timing
- Timing breakdown: DNS, TLS handshake, time to first byte
Click any entry to see full details.
Step 4: Export as Mocks
After recording enough traffic:
- Click Stop to end the session
- Click Export to Mocks
- Select which entries to export
- Choose the target namespace (e.g.,
sandbox) - Click Export
Mockarty will create mocks from the recorded traffic. Each request/response pair becomes a mock with the correct route, method, headers, and response body.
Step 5: Add Network Effects (Optional)
The recorder can simulate network problems while recording. Before starting a session, you can enable Toxics:
| Toxic | What it does |
|---|---|
| Delay | Adds a fixed delay (e.g., 200ms) to every response |
| Jitter | Adds random variation to the delay (e.g., ±50ms) |
| Bandwidth limit | Throttles response speed (e.g., 100 KB/s) |
| Error injection | Randomly returns errors (e.g., 503 on 10% of requests) |
This is useful for testing how your application handles slow or unreliable APIs.
Recording Modes Explained
| Mode | How it works | Best for |
|---|---|---|
| Reverse Proxy | You specify one target URL. All requests go to that URL. | Testing a single API integration |
| Forward Proxy | Your app uses HTTP_PROXY=http://localhost:8085. All outbound traffic goes through the recorder. |
Capturing traffic to multiple APIs at once |
Performance Testing
Mockarty includes a built-in load testing engine that supports k6-compatible single-file scripts (base build only, no extensions). You do not need to install k6 separately. Write JavaScript scripts using k6-style ESM syntax (import http from 'k6/http') and Mockarty executes them, simulating many users hitting your API at the same time. Core k6 globals (check, sleep, group, fail) are available natively.
What is Performance Testing?
Performance testing answers questions like:
- How many requests per second can my API handle?
- What happens when 100 users hit the API at the same time?
- Does response time degrade under load?
Step 1: Open the API Tester
Go to API Tester in the sidebar menu. Load tests live inside API Tester collections — the same workspace where you build API requests.
Step 2: Create a Performance Collection
- In the left sidebar of API Tester, switch to the Performance protocol group (k6-style load tests).
- Click the + next to “Performance” and choose Create Collection.
- Enter a collection name (e.g.,
my-first-load-test) and confirm.
Step 3: Create a New Load Test Script
Inside the new Performance collection, click the + button or open the collection context menu and choose New Request. For Performance collections this opens a prompt for a script name (default: New Load Test). Enter a name and confirm.
The editor opens with a starter template. Replace it with this minimal example:
import http from 'k6/http';
import { check, sleep } from 'k6';

// Configuration: 10 virtual users for 30 seconds
export const options = {
  vus: 10,
  duration: '30s',
};

// This function runs once per iteration per virtual user
export default function () {
  // Send a GET request
  const res = http.get('http://localhost:5770/stubs/sandbox/api/users');

  // Check that the response is correct
  check(res, {
    'status is 200': (r) => r.status === 200,
    'response time < 500ms': (r) => r.timings.duration < 500,
  });

  // Wait 1 second between iterations (simulates real user behavior)
  sleep(1);
}
What this does: Creates 10 “virtual users” that each send GET requests to your mock endpoint continuously for 30 seconds, with a 1-second pause between requests.
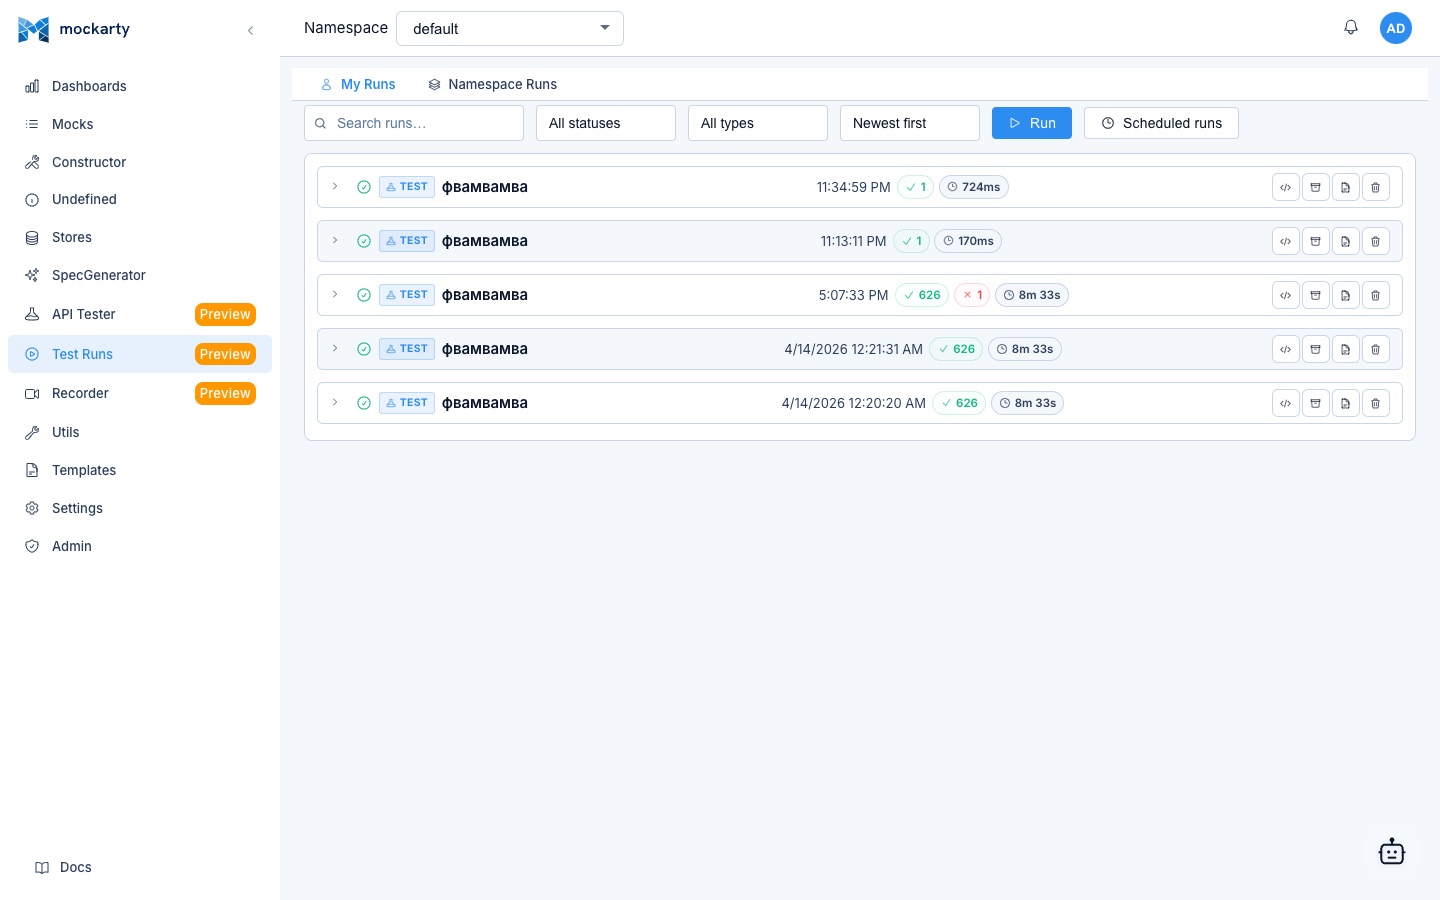
Step 4: Run the Test
Click Run. You will see real-time metrics as the test executes:
- Requests/second — how fast your API is responding
- Response time — p50, p95, p99 percentiles
- Error rate — percentage of failed requests
- Virtual users — how many simulated users are active
Step 5: Try a Ramp-Up Test
A more realistic test gradually increases the load. Replace the options in your script:
export const options = {
  stages: [
    { duration: '10s', target: 5 },   // Ramp up to 5 users over 10 seconds
    { duration: '20s', target: 20 },   // Ramp up to 20 users over 20 seconds
    { duration: '10s', target: 0 },    // Ramp down to 0 users over 10 seconds
  ],
};
This starts with 5 users, gradually increases to 20, then ramps back down. It gives you a clearer picture of how your API handles increasing load.
Step 6: Test a POST Endpoint
Load testing is not just for GET requests. Here is how to test a POST endpoint:
import http from 'k6/http';
import { check, sleep } from 'k6';

export const options = {
  vus: 5,
  duration: '20s',
};

export default function () {
  const payload = JSON.stringify({
    name: 'Test User ' + Math.random(),
    email: 'test' + Math.random() + '@example.com',
  });

  const params = {
    headers: { 'Content-Type': 'application/json' },
  };

  const res = http.post(
    'http://localhost:5770/stubs/sandbox/api/users',
    payload,
    params
  );

  check(res, {
    'status is 200 or 201': (r) => r.status === 200 || r.status === 201,
    'response time < 1000ms': (r) => r.timings.duration < 1000,
  });

  sleep(0.5);
}
Step 7: Add Thresholds (Pass/Fail Criteria)
Add thresholds to automatically mark the test as failed if performance is too slow:
export const options = {
  vus: 10,
  duration: '30s',
  thresholds: {
    'http_req_duration': ['p(95)<500'],  // 95% of requests must be under 500ms
    'http_req_failed': ['rate<0.01'],     // Less than 1% of requests can fail
  },
};
If any threshold is breached, the test is marked as FAILED — useful for CI/CD pipelines where you want to catch performance regressions automatically.
When to Use Performance Testing
| Scenario | Script example |
|---|---|
| Smoke test | 1 VU, 10s — verify the endpoint works at all |
| Load test | 10-50 VUs, 5min — typical expected load |
| Stress test | 100+ VUs with ramp-up — find the breaking point |
| Spike test | Sudden jump from 5 to 100 VUs — test auto-scaling |
| Soak test | 20 VUs for 1 hour — find memory leaks and resource exhaustion |
Fuzzing
Mockarty includes a built-in fuzz testing engine that helps you discover vulnerabilities and unexpected behavior in your APIs. Fuzzing sends a wide range of malformed, unexpected, and malicious inputs to your endpoints to see how they respond.
Access the Fuzzer
Click Security in the sidebar menu to open the security interface, then select the Fuzzing tab.
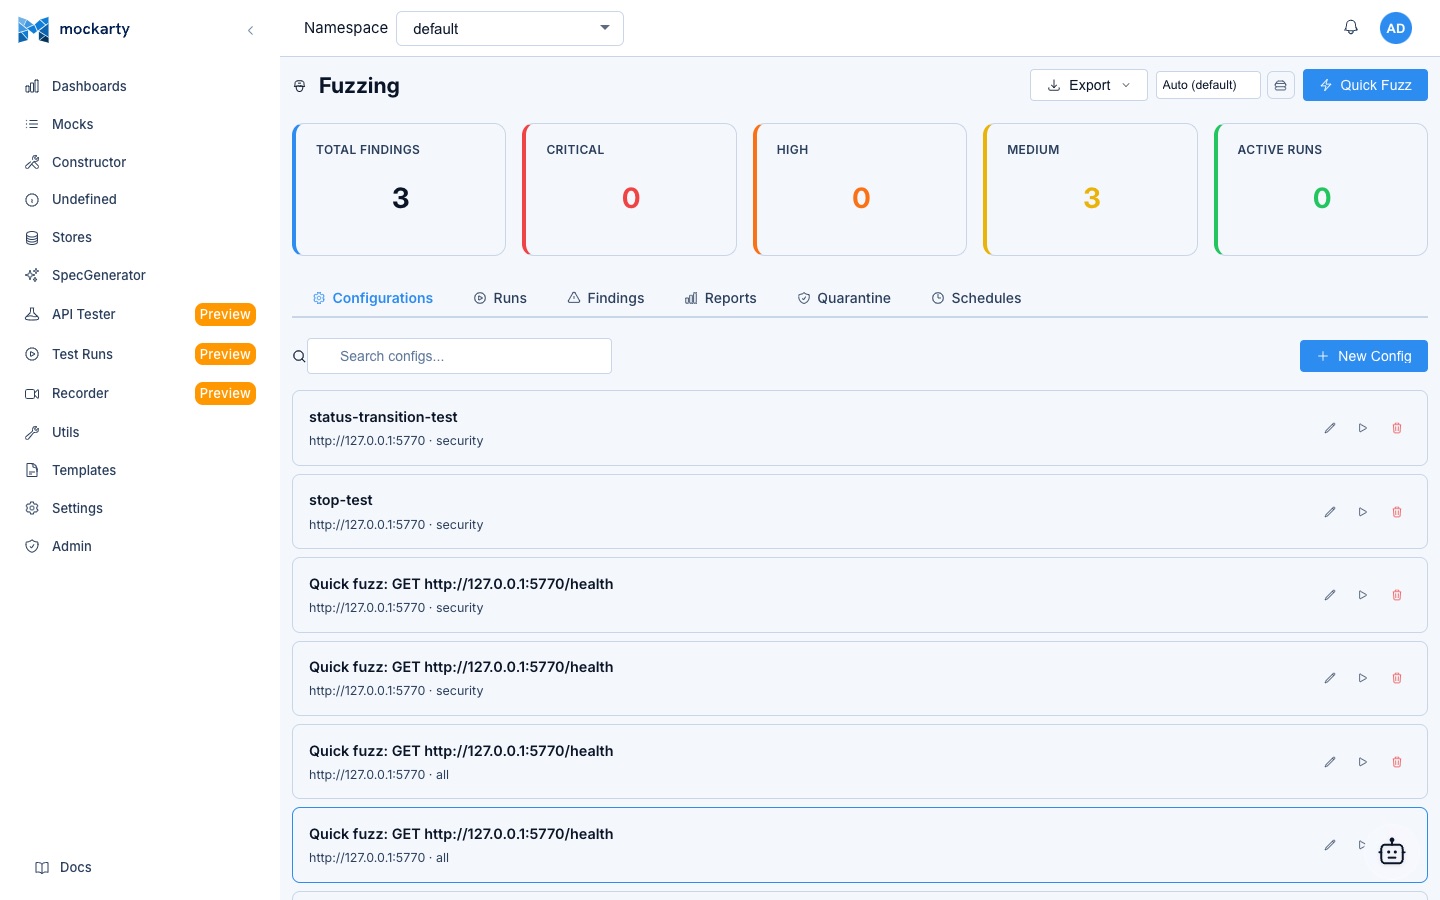
Quick Fuzz
The fastest way to start is with a quick fuzz test:
- Enter the Target URL — this can be any HTTP endpoint (your mocks, staging APIs, or local services)
- Select Payload Categories to test against:
- SQL Injection — common SQL injection patterns
- XSS — cross-site scripting payloads
- Path Traversal — directory traversal attempts
- Command Injection — OS command injection patterns
- Header Injection — HTTP header manipulation
- Overflow — buffer overflow and large input tests
- Configure the request method and any required headers (e.g., authentication tokens)
- Click Start Fuzzing
Understanding Results
As the fuzzer runs, results appear in real time. Each finding includes:
- Severity level — Critical, High, Medium, Low, or Info
- Payload — the exact input that triggered the finding
- Response details — status code, response body, and timing
- Category — which payload category the finding belongs to
Example: Fuzz a Login Endpoint
To quickly test a login endpoint for SQL injection:
- Set Target URL to
http://localhost:5770/stubs/sandbox/api/login - Set Method to
POST - Set Body template:
{"username": "{{payload}}", "password": "test"} - Select SQL Injection category
- Click Start Fuzzing
The fuzzer will replace {{payload}} with various SQL injection strings and report any suspicious responses (unexpected status codes, error messages leaking internal details, etc.).
When to Use Fuzzing
- Before deployment — test your real APIs for common vulnerabilities
- Mock validation — ensure your mocks handle edge cases gracefully
- CI/CD integration — run fuzz tests as part of your quality pipeline
- Security audits — systematic testing of input validation
Generate Standalone Server
Some protocols (gRPC, Kafka, RabbitMQ, WebSocket, TCP, UDP) require a generated standalone server to serve traffic. You create the mocks in the Mockarty UI, then generate a server that receives protocol-specific requests and calls back to the Mockarty node for mock resolution.
The server generator also works with direct protocols (OpenAPI, GraphQL, SOAP, SSE, MCP) — useful for creating self-contained mock servers for CI/CD.
Note: The server generator’s
-create-mocksmode requires that themockfeature is enabled in your license.
Install the Server Generator
Download mockarty-server-generator from the GitHub Releases page:
- macOS (Apple Silicon):
mockarty-server-generator-darwin-arm64 - macOS (Intel):
mockarty-server-generator-darwin-amd64 - Linux (x86_64):
mockarty-server-generator-linux-amd64
chmod +x mockarty-server-generator-darwin-arm64
Example: Generate from OpenAPI Spec
./mockarty-server-generator openapi \
  -input ./petstore.yaml \
  -output server.go \
  -package main \
  -create-mocks \
  -api-token mk_your_token \
  -namespace sandbox
This creates a complete Go project with:
- All routes from the OpenAPI spec
- Mock responses based on schema definitions
- A built-in admin UI at
/ui - Health endpoint at
/health/live - Vendored dependencies (no internet required to build)
Example: Generate gRPC Server
gRPC mocks are created in the Mockarty UI (Constructor → gRPC protocol), but to actually serve gRPC traffic, you need a generated server:
# Generate server + create mocks from proto files
./mockarty-server-generator grpc \
  -input ./proto/ \
  -output server.go \
  -package main \
  -create-mocks \
  -api-token mk_your_token \
  -namespace sandbox \
  -server-name my-grpc-service
Upload your .proto files as-is — option go_package is optional, any format is accepted, and language-specific options (java_package, php_namespace, etc.) are stripped automatically. No protoc installation required.
Example: Generate Kafka Server
./mockarty-server-generator kafka \
  -input kafka-config.json \
  -output kafka_server.go \
  -package main \
  -create-mocks \
  -api-token mk_your_token \
  -server-name my-kafka-server
Where kafka-config.json defines topics, broker address, and consumer group. See the Server Generator Guide for the full configuration format.
Build and Run the Generated Server
All generated servers include vendored dependencies and can be built completely offline:
cd generated-server
go build -mod=vendor -o server .

# Run with required env vars
HTTP_PORT=8080 \
HTTP_ADMIN_BASE_URL=http://localhost:5770 \
NAMESPACE=sandbox \
./server
The generated server connects to the Mockarty node (HTTP_ADMIN_BASE_URL) for mock resolution on every request. The Mockarty node must be running and accessible.
Supported Server Types
Usage: mockarty-server-generator <type> [flags]
| Type | Input | Description |
|---|---|---|
openapi |
OpenAPI/Swagger file or URL | HTTP REST server |
grpc |
Directory with .proto files |
gRPC server (unary + streaming) |
mcp |
JSON config or MCP server URL | MCP server |
graphql |
.graphql file, URL, or directory |
GraphQL server |
soap |
WSDL file or URL | SOAP server |
sse |
JSON config | Server-Sent Events server |
kafka |
JSON config | Kafka adapter — connects to a real Apache Kafka cluster as a consumer and resolves mock payloads via Mockarty |
rabbitmq |
JSON config | RabbitMQ adapter — connects to a real RabbitMQ instance as a consumer and resolves mock payloads via Mockarty |
socket |
JSON config | WebSocket, TCP, or UDP server |
smtp |
JSON config | SMTP mail server mock |
AI Assistant
Mockarty includes a built-in AI assistant that can create mocks, fill forms, navigate the interface, and answer questions using natural language. The AI assistant, internal agent network, and MCP server are part of the base product — available to every user without requiring a specific feature license.
The only licensable AI-related feature is A2A (Agent-to-Agent protocol), which allows exposing your Mockarty install as a peer in external agent networks. This is controlled by the a2a feature flag and does not affect the built-in AI assistant.
Prerequisites
The AI assistant requires:
- LLM provider configuration — an administrator must configure at least one LLM profile (server-side mode), or you can use your own API key (client-side mode — see below).
When an LLM provider is configured, a floating chat button appears in the bottom-right corner of every page in the Web UI. Click it to open the chat. You can also navigate to Agent Chat in the sidebar for a full-screen experience.
Server-Side Mode (Admin-Configured)
The recommended approach for teams. The administrator configures LLM profiles in Administration → LLM Settings:
- Profiles are created and managed centrally — users select from available profiles in the chat settings dropdown
- Supported providers: OpenAI, Anthropic (Claude), OpenRouter, Google (Gemini), Mistral, Groq, Ollama (local), and Custom (any OpenAI-compatible endpoint)
- API keys are stored securely on the server
- The administrator can also configure MCP servers for extended tool capabilities
Client-Side Mode (Bring Your Own Key)
If you prefer to use your own API key, or if no server-side profiles are configured:
- Open the floating chat and click the Settings icon (gear)
- Select a provider (e.g., OpenAI, Anthropic, OpenRouter)
- Enter your API key and select a model
- Click Save
In client-side mode, your API key is stored in the browser’s localStorage and requests are sent directly to the LLM provider — the Mockarty server never sees your key. The server is only involved for executing tool calls (creating mocks, reading data, etc.).
What Can the AI Assistant Do?
- Create mocks: “Create a GET /api/users endpoint that returns a list of users with fake names and emails”
- Fill forms: “Set the status code to 404 and add a JSON error response”
- Navigate the UI: The assistant can interact with page elements, fill fields, and click buttons on your behalf
- Explain features: “How do I use conditions to match requests by header?”
- Troubleshoot: “Why is my mock not matching requests?”
Auto-Approve Mode
By default, each AI tool call requires manual approval (Accept/Decline). Enable Auto Approve in the chat panel dropdown to automatically execute tool calls without confirmation.
For detailed LLM configuration instructions, see the Administration Guide and the AI Features Guide.
Troubleshooting
Common first-run issues:
| Symptom | Likely Cause | Fix |
|---|---|---|
401 Unauthorized when calling the API |
Missing or wrong API token | Get a token from Settings → API Tokens and send it as Authorization: Bearer <token> or X-API-Key: <token> |
403 invalid license on startup |
License key is invalid or expired | Check Administration → License in the Web UI. Apply a valid license key or verify trial has not expired |
/ui/ shows 404 or blank page |
Admin node not fully started | Wait for /health/live to return pass, then reload |
Mock created but /stubs/... returns 404 |
Wrong namespace or route in the URL | Verify the namespace in the URL path: /stubs/{namespace}/{route}. Check the mock route matches exactly (including leading /) |
| Mock returns the wrong response | Another mock with higher priority matches first | Check Mocks → List for overlapping routes; adjust priority |
| Faker values never change | Response payload is a literal string, not a template |
Wrap it as "name": "$.fake.FirstName" (with the $. prefix) |
DB_DSN connection refused |
Postgres container not running or wrong port | docker ps to verify, then check the DSN in .env |
| Port 5770 already in use | Another Mockarty instance or Docker container bound it | lsof -i :5770 and stop the conflicting process |
If nothing above applies, check the server logs — structured log output includes the request ID and error chain for every failed request.
Next Steps
You now have a working Mockarty instance with your first mock. Here is where to go next:
Learn More
| Resource | Description |
|---|---|
| UI Guide | Comprehensive guide to the Web UI |
| API Reference | Full REST API documentation for programmatic mock management |
| Faker Reference | Complete list of all Faker functions |
| JsonPath Guide | Advanced request data extraction and response interpolation |
| Store Systems | Global, Chain, and Mock stores for stateful mocking |
| AI Features | AI assistant capabilities, LLM configuration, and chat modes |
| Code Generator Guide | Detailed guide to the server-generator CLI |
| Test Case Management | Organise test cases in folders, add steps, link to Jira/GitHub, submit for review |
| Test Plans | Orchestrate multi-type test runs: functional + load + fuzz + chaos in one DAG workflow |
| Contract Testing | Validate mocks against API specs and run consumer-driven contract tests |
| Chaos Engineering | Inject faults into Kubernetes clusters to test service resilience |
| Docker Deployment | Production Docker deployment with PostgreSQL |
| Integrations Guide | Set up resolver nodes and runner agents for scaling |
| Tips & Useful Features | Keyboard shortcuts, autocomplete, environments, and other hidden UX features |
Common Next Steps
-
Set up PostgreSQL for production use — SQLite is great for development, but PostgreSQL is recommended for teams and production environments.
-
Create additional namespaces to organize mocks by project or team. Go to the Admin panel to create namespaces and assign users.
-
Import existing APIs using the OpenAPI Generator or HAR file import. Record real API traffic and create mocks automatically.
-
Use the AI Assistant — open the floating chat or navigate to Agent Chat in the sidebar and describe what mocks you need in natural language. The assistant is part of the base product and available to all users. See AI Features for details.
-
Set up CI/CD integration — use the REST API to create and manage mocks programmatically in your test pipelines.
-
Explore proxy mode — forward requests to real services while adding delays, modifying responses, or logging traffic.
-
Scale with resolver nodes — deploy multiple resolver nodes for high-availability mock serving. See the Integrations Guide for details.
-
Run fuzz tests — use the built-in fuzzer to test your real APIs for vulnerabilities before deployment.
-
Contract testing — validate that your mocks stay in sync with real API specs. Detect breaking changes and API drift automatically. See Contract Testing.
-
Chaos engineering — inject faults (pod kills, network latency, resource stress) into Kubernetes clusters to verify your services handle failures gracefully. See Chaos Engineering.
-
Test Case Management — if your team tracks test cases manually today (spreadsheets, Confluence, TestRail), migrate to Mockarty’s built-in TMS. Organise cases in folders, add step-by-step instructions, link to Jira/GitHub issues, submit for review, and trigger automated runs. See Test Case Management.
-
Test Plans — orchestrate your entire regression suite as a DAG workflow: run functional tests, then load, then chaos — with gates that block the next step if a previous one fails. Trigger from CI/CD via API or cron. See Test Plans.
Getting Help
- Documentation: All guides are available in the sidebar under the Docs section
- Health Check: Visit
http://localhost:5770/health/liveto verify the server is running - Swagger UI: Visit
http://localhost:5770/swagger/index.htmlfor interactive API documentation - Logs: Check the console output for structured logs with request details
Happy mocking!