Mockarty Administration Guide
This guide covers everything an administrator needs to configure after the first launch of Mockarty. It assumes you have already installed and deployed Mockarty following the Installation & Deployment guide.
About URLs in examples: All examples use
localhost:5770as the default Mockarty address. If your instance runs on a remote server, replacelocalhost:5770with its actual address (e.g.https://mockarty.company.comorhttp://192.168.1.50:5770). See Tips & Useful Features for details.
Table of Contents
- First Launch
- Authentication Configuration
- User Management
- System Roles
- Namespace Management
- Namespace Roles
- Assigning Users to Namespaces
- Email Notifications Setup
- Backup and Restore
- Cleanup Policies
- Audit Logs
- LLM / AI Assistant Configuration
- Security Best Practices
First Launch
When you start Mockarty for the first time, the following happens automatically:
- Database migrations are applied, creating all required tables and indexes.
- A default namespace called
sandboxis created. - A built-in admin account is created with default credentials.
Default Credentials
| Field | Value |
|---|---|
| Username | admin |
| Password | admin |
Warning: Change the default password immediately after your first login. Using default credentials in production is a critical security risk.
Trial License: On first launch, Mockarty starts with a 7-day trial license. Trial limits: a small per-feature seat pool (3 seats for core features such as mocking and API testing, fewer for advanced ones) and the
sandboxnamespace only. To unlock full capabilities, apply a license key in Administration → License.
Accessing the Web UI
Open your browser and navigate to:
http://localhost:5770/ui/
You will see the login page. Enter the default credentials to log in.
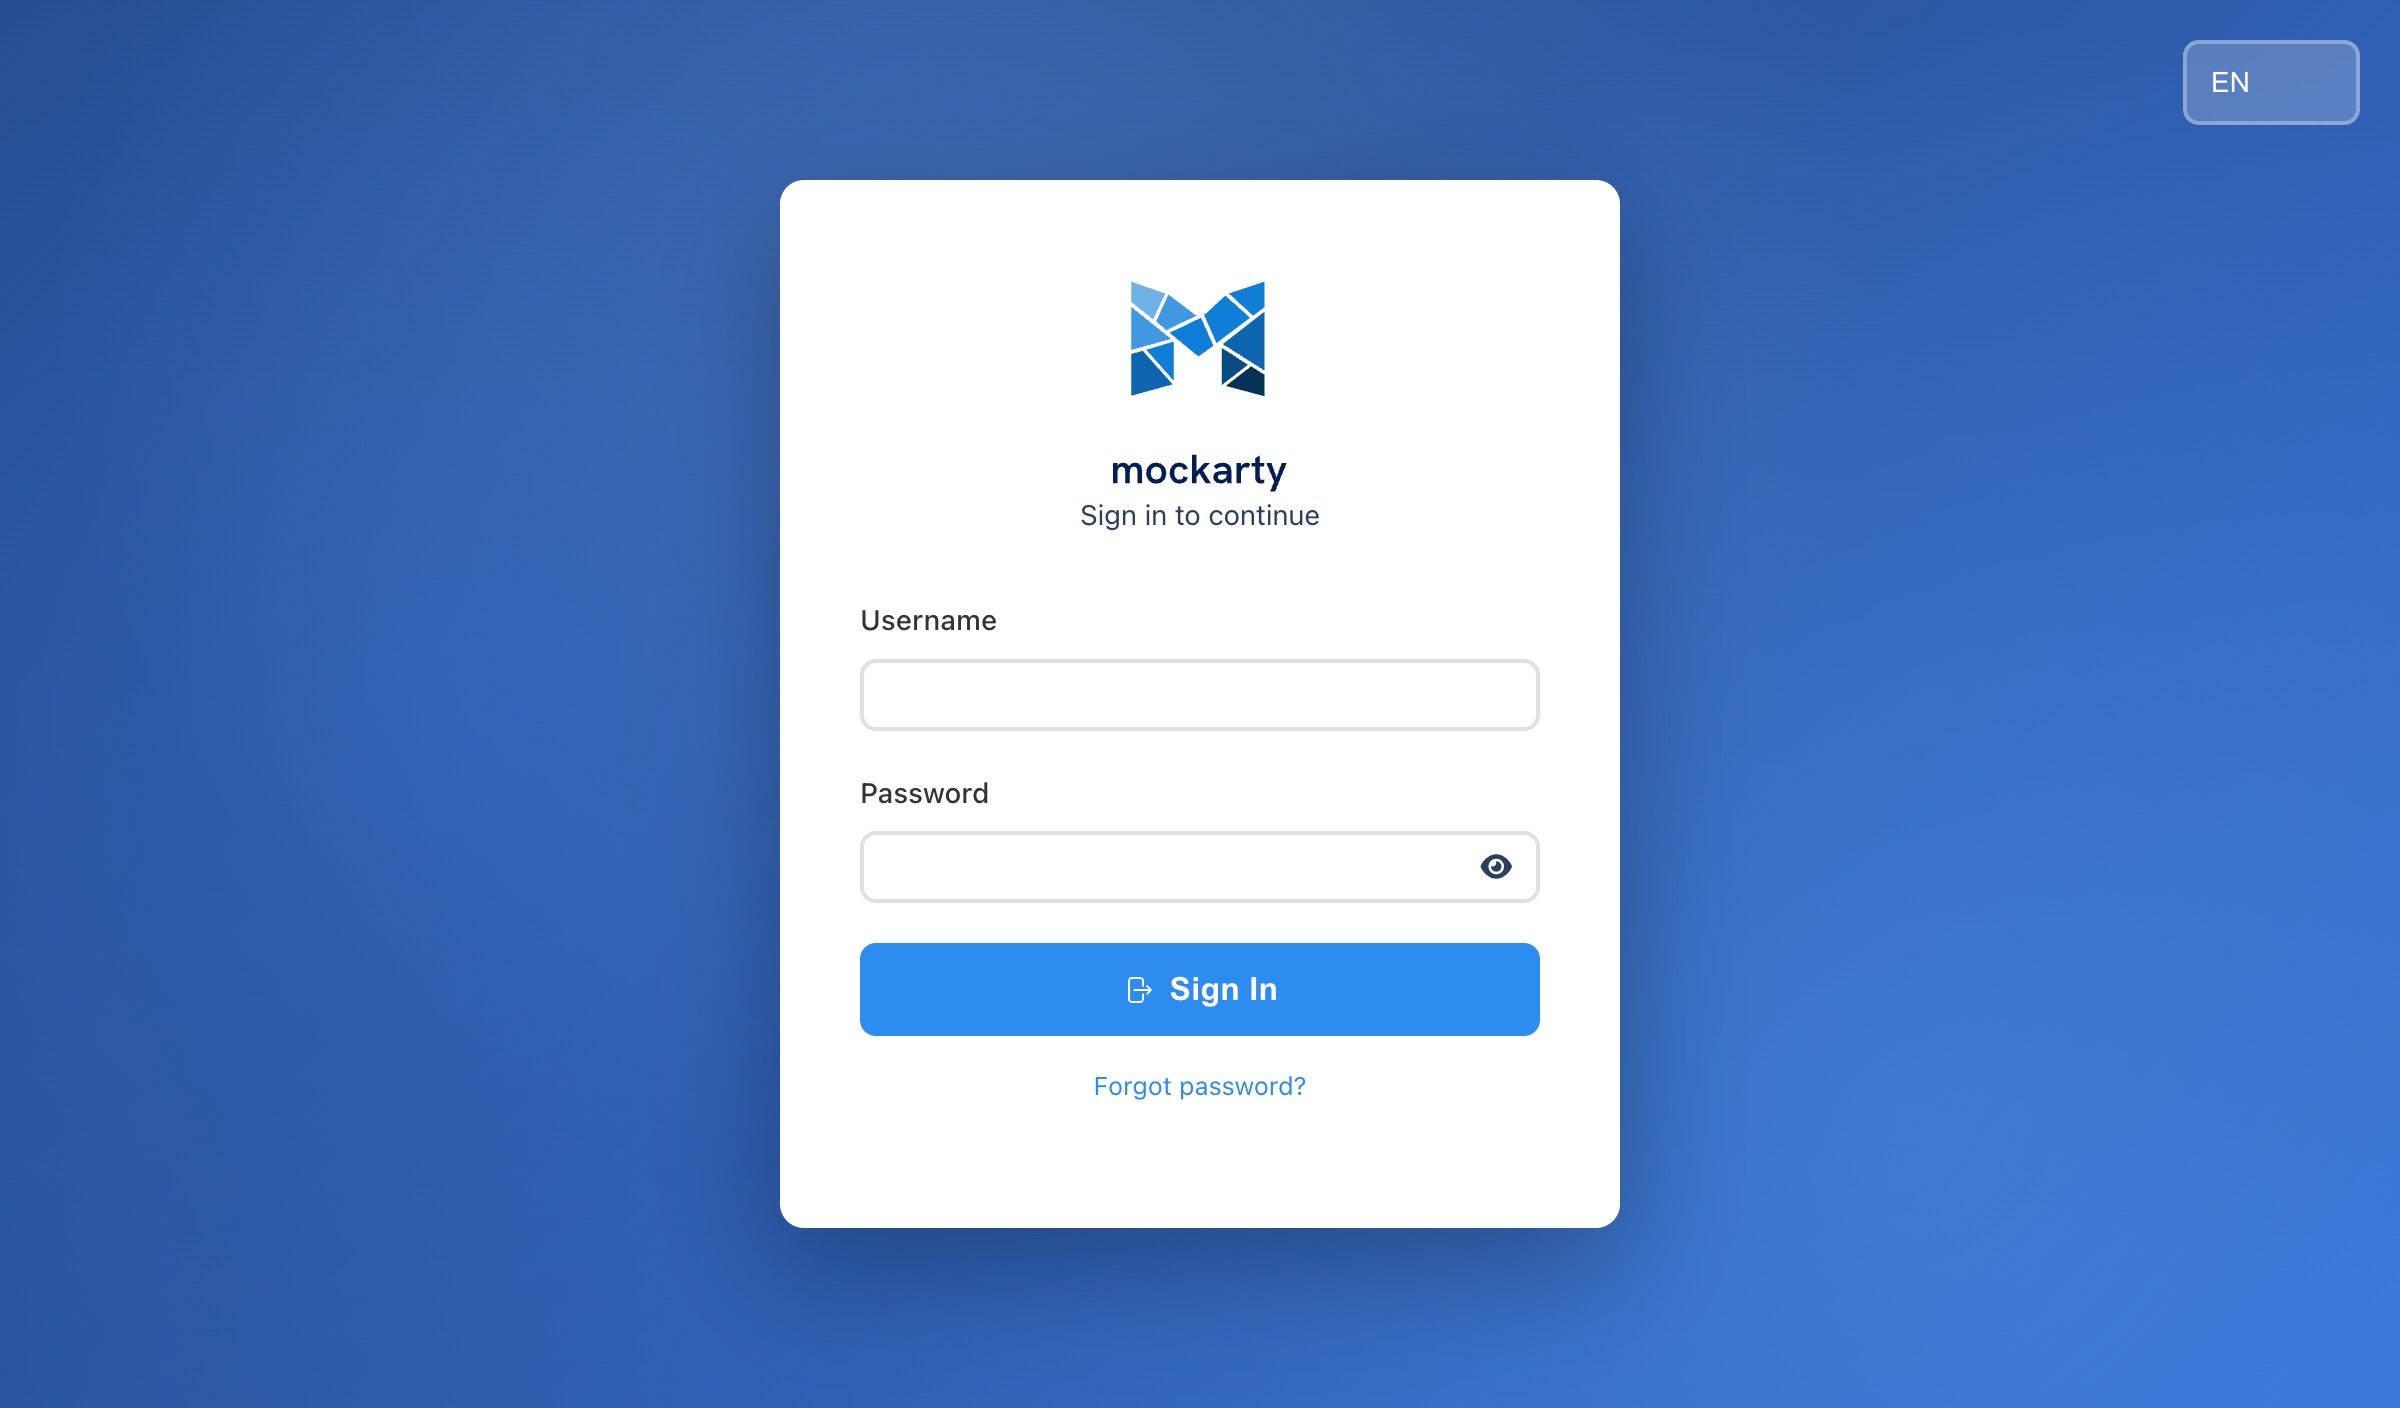
Changing the Default Password
- Log in with
admin/admin. - Navigate to Settings (gear icon in the sidebar).
- Go to the Profile section.
- Click Change Password.
- Enter a new strong password (minimum 8 characters).
- Click Save.
Authentication Configuration
Mockarty supports multiple authentication methods. The core auth settings are controlled by environment variables, while external identity providers (OAuth, LDAP) are configured through the Admin Panel UI with hot-reload support — no restart required.
Key Concepts
If you are new to authentication terminology, here is a quick reference:
- OAuth 2.0 — A standard protocol that lets users log in to Mockarty using their existing account from another service (Google, GitHub, etc.) instead of creating a separate password. You have probably seen “Sign in with Google” buttons — that is OAuth.
- LDAP / Active Directory — A directory service commonly used in corporate environments to store user accounts centrally. If your company uses Windows domain logins, it likely runs Active Directory, which speaks the LDAP protocol.
- SAML — An enterprise Single Sign-On (SSO) protocol used by services like Okta, Azure AD, and OneLogin. It allows users to log in once and access multiple applications without re-entering credentials.
- RBAC — Role-Based Access Control. Instead of granting permissions to individual users, you assign them roles (e.g., Owner, User, Viewer), and each role has a predefined set of permissions.
- 2FA / MFA — Two-Factor (or Multi-Factor) Authentication. After entering your password, you must provide a second proof of identity, such as a code from an authenticator app or email.
Authentication Mode (AUTH_MODE)
The AUTH_MODE environment variable controls the overall authentication strategy:
| Value | Description |
|---|---|
full |
(Default) Standard multi-user mode with database-backed authentication, OAuth, LDAP, SAML, and 2FA support. Use this for server deployments. |
local |
Single-user mode. All external auth providers are disabled. A local admin user is created automatically with a random password, and login is bypassed. Use this for local development or single-user deployments. |
Set it in your environment or .env file:
AUTH_MODE=full   # default, multi-user server deployment
AUTH_MODE=local  # single-user mode (no login screen)
Base URL for OAuth Redirects (AUTH_BASE_URL)
When using OAuth providers, Mockarty needs to know its own public URL so it can construct correct redirect URIs (the URL the provider sends the user back to after login).
AUTH_BASE_URL=https://mockarty.yourcompany.com
| Variable | Default | Description |
|---|---|---|
AUTH_BASE_URL |
http://localhost:5770 |
The public base URL of your Mockarty instance. Must match exactly what you register as the redirect URI in each OAuth provider’s developer console. |
Important: If
AUTH_BASE_URLdoes not match the redirect URI registered with the OAuth provider, login will fail with a “redirect_uri_mismatch” error.
First Admin Account
On first startup, Mockarty creates an admin user using these environment variables:
| Variable | Default | Description |
|---|---|---|
FIRST_ADMIN_LOGIN |
admin |
Username for the initial admin account |
FIRST_ADMIN_PASSWORD |
admin |
Password for the initial admin account |
FIRST_ADMIN_EMAIL |
(empty) | Email for the admin account (defaults to <login>@localhost) |
If the default admin/admin credentials are used, the system will force a password change on the first login.
Tip: For automated deployments, set custom values to avoid the password-change prompt:
FIRST_ADMIN_LOGIN=myadmin
FIRST_ADMIN_PASSWORD=MyStr0ngP@ssword!
FIRST_ADMIN_EMAIL=admin@yourcompany.com
Session Expiration (AUTH_SESSION_EXPIRATION)
Controls how long a user session lasts before requiring re-authentication:
| Variable | Default | Description |
|---|---|---|
AUTH_SESSION_EXPIRATION |
24 |
Session lifetime in hours |
AUTH_SESSION_SLIDING |
false |
When true, an active session is renewed on use, so a user working continuously is not logged out at the fixed lifetime mark. Off by default — the expiry stays fixed at login + AUTH_SESSION_EXPIRATION. |
AUTH_SESSION_ABSOLUTE_MAX_HOURS |
0 |
With sliding enabled, the hard ceiling (hours from login) past which a session can no longer be renewed and re-authentication is required. 0 = no ceiling. Set this to keep a maximum re-login interval. |
AUTH_SESSION_EXPIRATION=48          # sessions last 2 days
AUTH_SESSION_SLIDING=true           # keep active users logged in
AUTH_SESSION_ABSOLUTE_MAX_HOURS=168 # ...but force re-login after 7 days
Local Authentication (Default)
When no external identity provider is configured, Mockarty uses its built-in local authentication system. Users log in with a username and password stored in the Mockarty database.
Password requirements:
- Minimum 8 characters
OAuth 2.0 Setup
OAuth 2.0 allows users to log in with their existing accounts from external services instead of creating a separate Mockarty password. Mockarty supports the following OAuth providers:
- Yandex
- VK
- GitHub
- GitLab
- Generic / Custom OAuth — any OAuth 2.0 compatible provider
Configuring OAuth Providers via Admin Panel
All OAuth providers are configured through the Admin Panel UI. No environment variables are needed for individual providers.
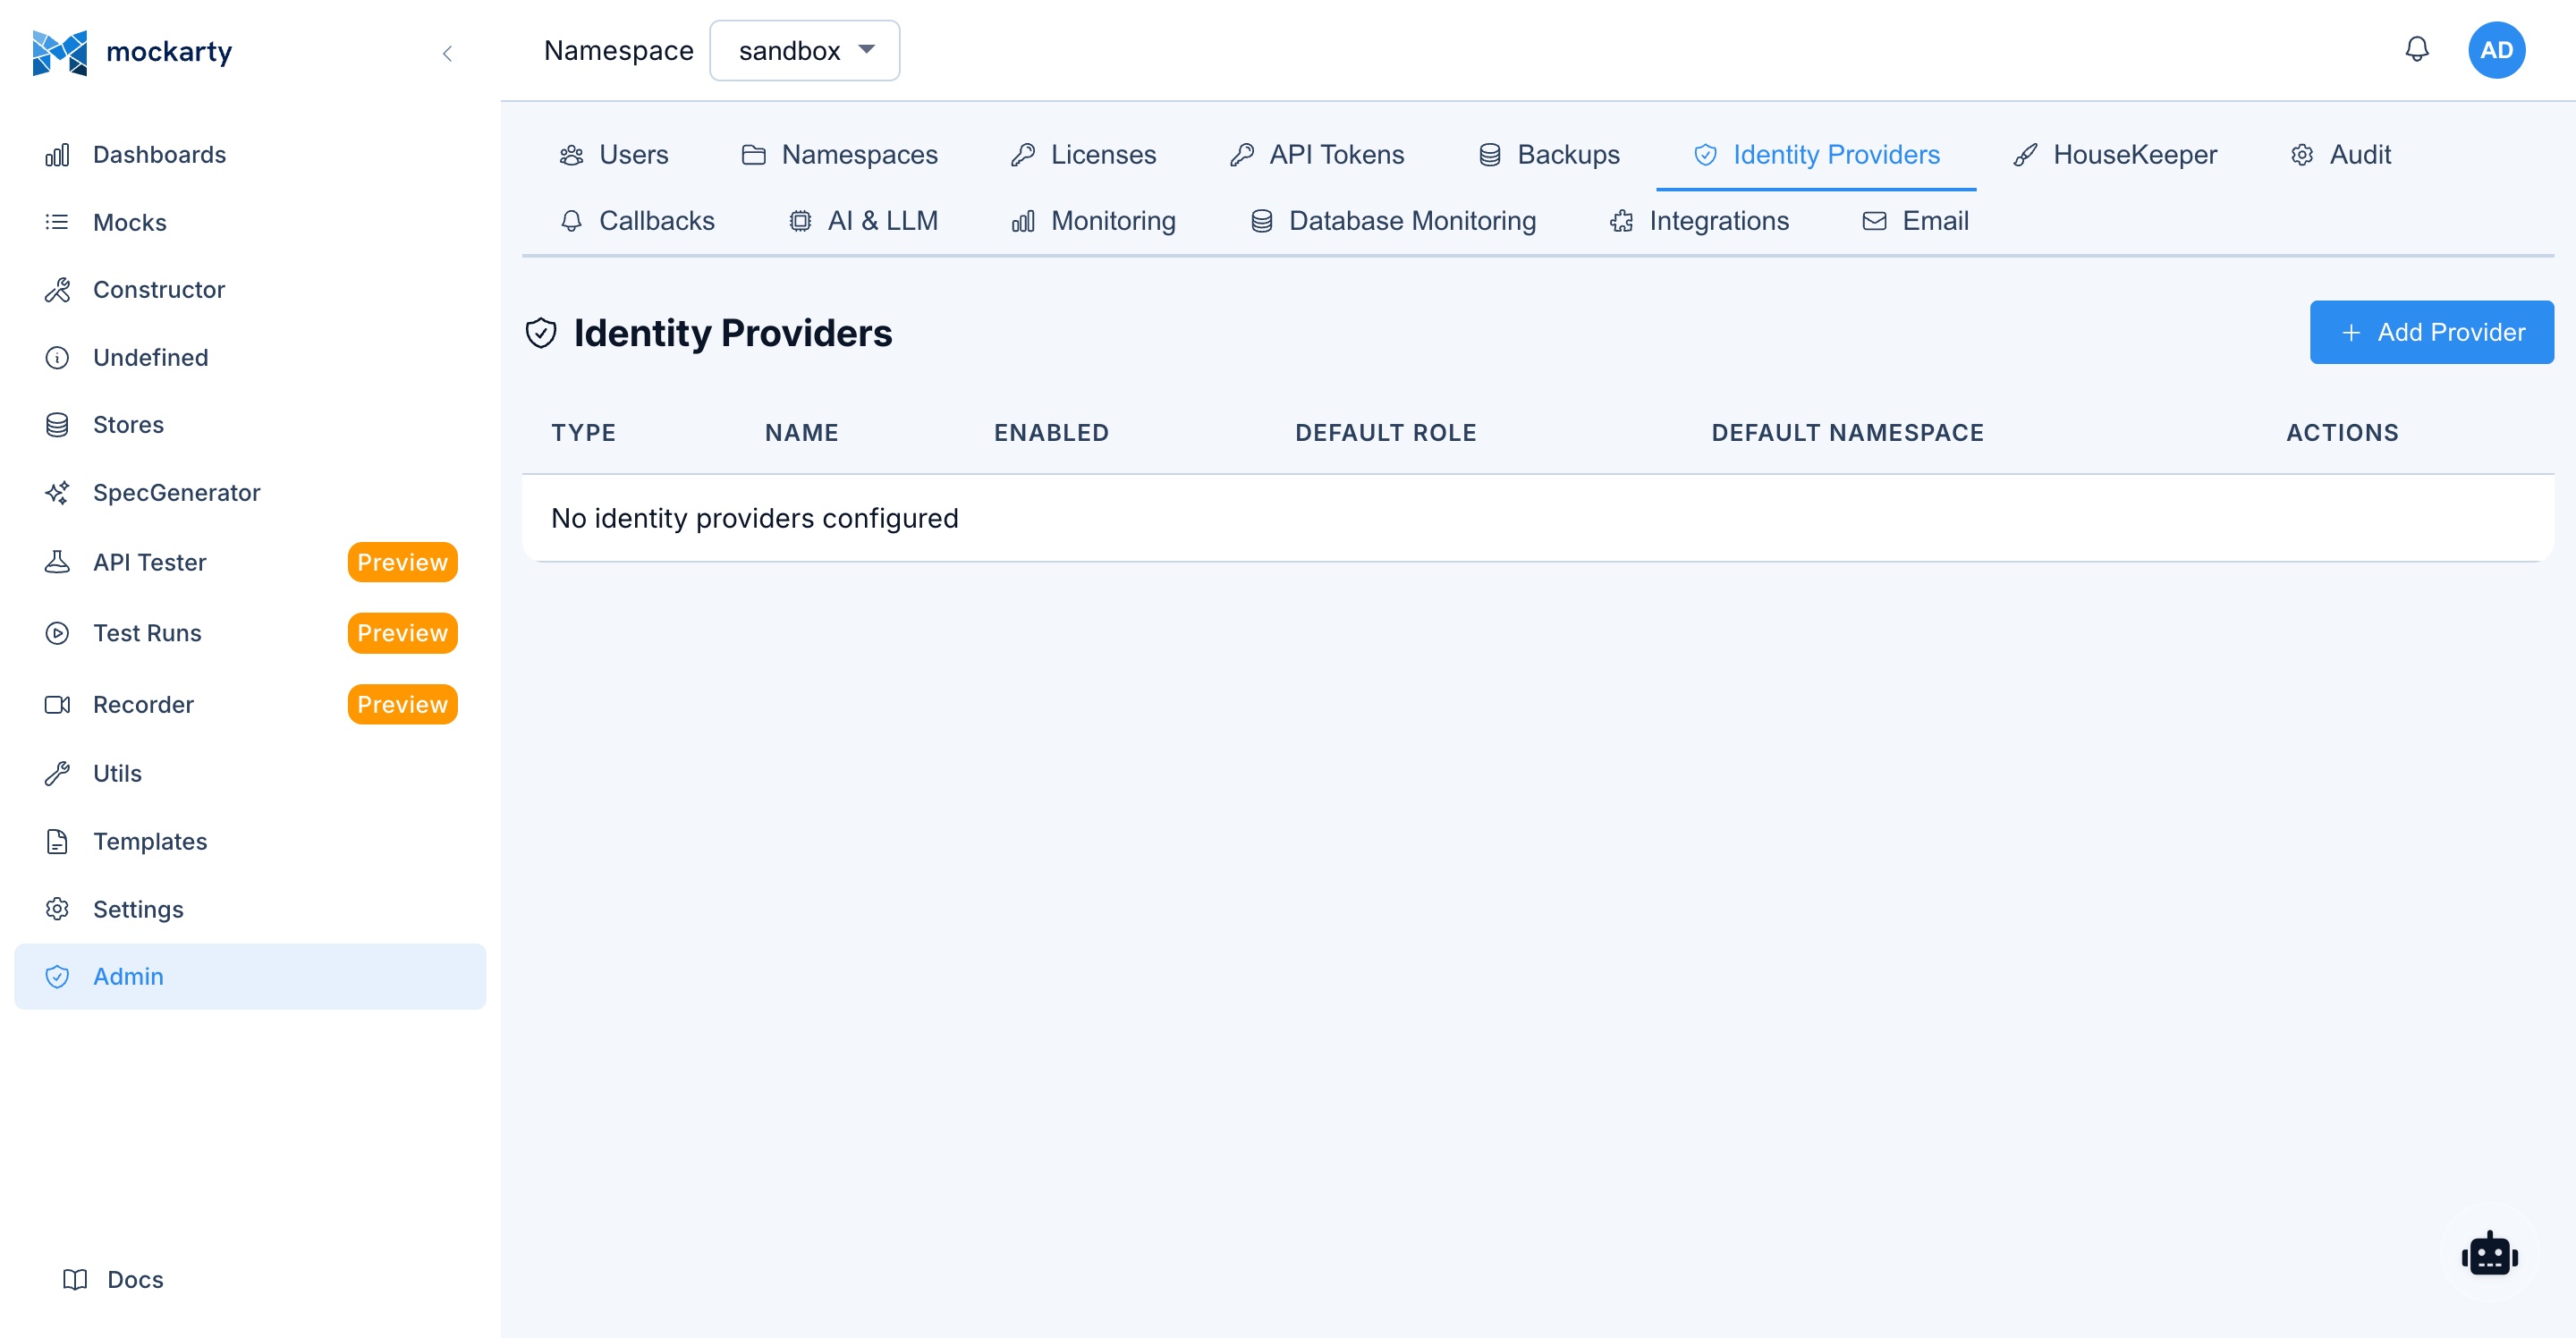
- Navigate to Admin Panel > Identity Providers.
- Click Add Identity Provider.
- Select the provider type (e.g., Google, GitHub, GitLab, Generic).
- Fill in the required fields:
- Client ID — Obtained from the provider’s developer console.
- Client Secret — Obtained from the provider’s developer console.
- For Generic/Custom providers, you will also need to fill in: Authorization URL, Token URL, UserInfo URL, and Scopes.
- Toggle Enabled to activate the provider.
- Click Save.
Hot-reload: Changes take effect immediately. You do not need to restart Mockarty after adding, editing, or removing an identity provider.
Redirect URI: When registering your application in the provider’s developer console, use the following redirect URI:
{AUTH_BASE_URL}/api/v1/auth/oauth/callbackFor example:
https://mockarty.yourcompany.com/api/v1/auth/oauth/callback
When OAuth providers are enabled, the login page automatically displays “Sign in with…” buttons for each active provider.
LDAP / Active Directory
LDAP (Lightweight Directory Access Protocol) allows Mockarty to authenticate users against your organization’s existing user directory, such as Microsoft Active Directory. This means users can log in with the same credentials they use for their corporate network.
Configuring LDAP via Admin Panel
LDAP is configured through the Admin Panel UI, just like OAuth providers.
- Navigate to Admin Panel > Identity Providers.
- Click Add Identity Provider.
- Select LDAP / Active Directory as the type.
- Fill in the connection details:
- LDAP URL — Your directory server address (e.g.,
ldap://ldap.example.com:389orldaps://ldap.example.com:636for TLS). - Base DN — The starting point for user searches (e.g.,
dc=example,dc=com). - Bind DN — The account used to connect and search the directory (e.g.,
cn=admin,dc=example,dc=com). - Bind Password — Password for the bind account.
- User Filter — LDAP filter to locate users. Use
%sas a placeholder for the username (e.g.,(sAMAccountName=%s)for Active Directory,(uid=%s)for OpenLDAP).
- LDAP URL — Your directory server address (e.g.,
- Click Test Connection to verify that Mockarty can reach your directory server and authenticate with the bind credentials.
- Toggle Enabled and click Save.
Hot-reload: Like OAuth, LDAP configuration changes take effect immediately without restarting Mockarty.
When LDAP is enabled, users can log in with their directory credentials. On first login, a Mockarty account is created automatically with the User system role. The administrator can then assign namespace roles as needed.
SAML SSO
Mockarty supports SAML 2.0 for Single Sign-On integration with enterprise identity providers (Okta, Azure AD, OneLogin, etc.).
Configuration is done through the Admin Panel:
- Navigate to Admin Panel > Authentication > SAML.
- Upload or paste the Identity Provider (IdP) metadata XML.
- Copy the Mockarty Service Provider (SP) metadata URL and register it with your IdP.
- Configure attribute mapping (email, display name, groups).
- Enable SAML authentication.
Two-Factor Authentication (2FA)
Mockarty supports two types of two-factor authentication:
TOTP (Time-based One-Time Passwords):
- Works with any authenticator app (Google Authenticator, Authy, Microsoft Authenticator, etc.)
- Users enable it from Settings > Security > Two-Factor Authentication.
- A QR code is displayed for scanning with the authenticator app.
- Recovery codes are provided for backup access.
Email codes:
- One-time codes sent to the user’s registered email address.
- Requires email notifications to be configured (see Email Notifications Setup).
- Users enable it from Settings > Security > Two-Factor Authentication.
Managing 2FA for users:
Administrators can manage 2FA on a per-user basis:
- Disable 2FA for a user: Navigate to Admin Panel > Users, select the user, and click Disable 2FA. This removes both TOTP and email 2FA for that user.
- Recommendation: Strongly recommend (or require through organizational policy) that all Admin and Support role users enable 2FA for their accounts.
Note: 2FA is enabled by individual users in their own Settings > Security > Two-Factor Authentication page. There is no global enforcement toggle — 2FA adoption is managed through organizational policy.
User Management
Creating Users
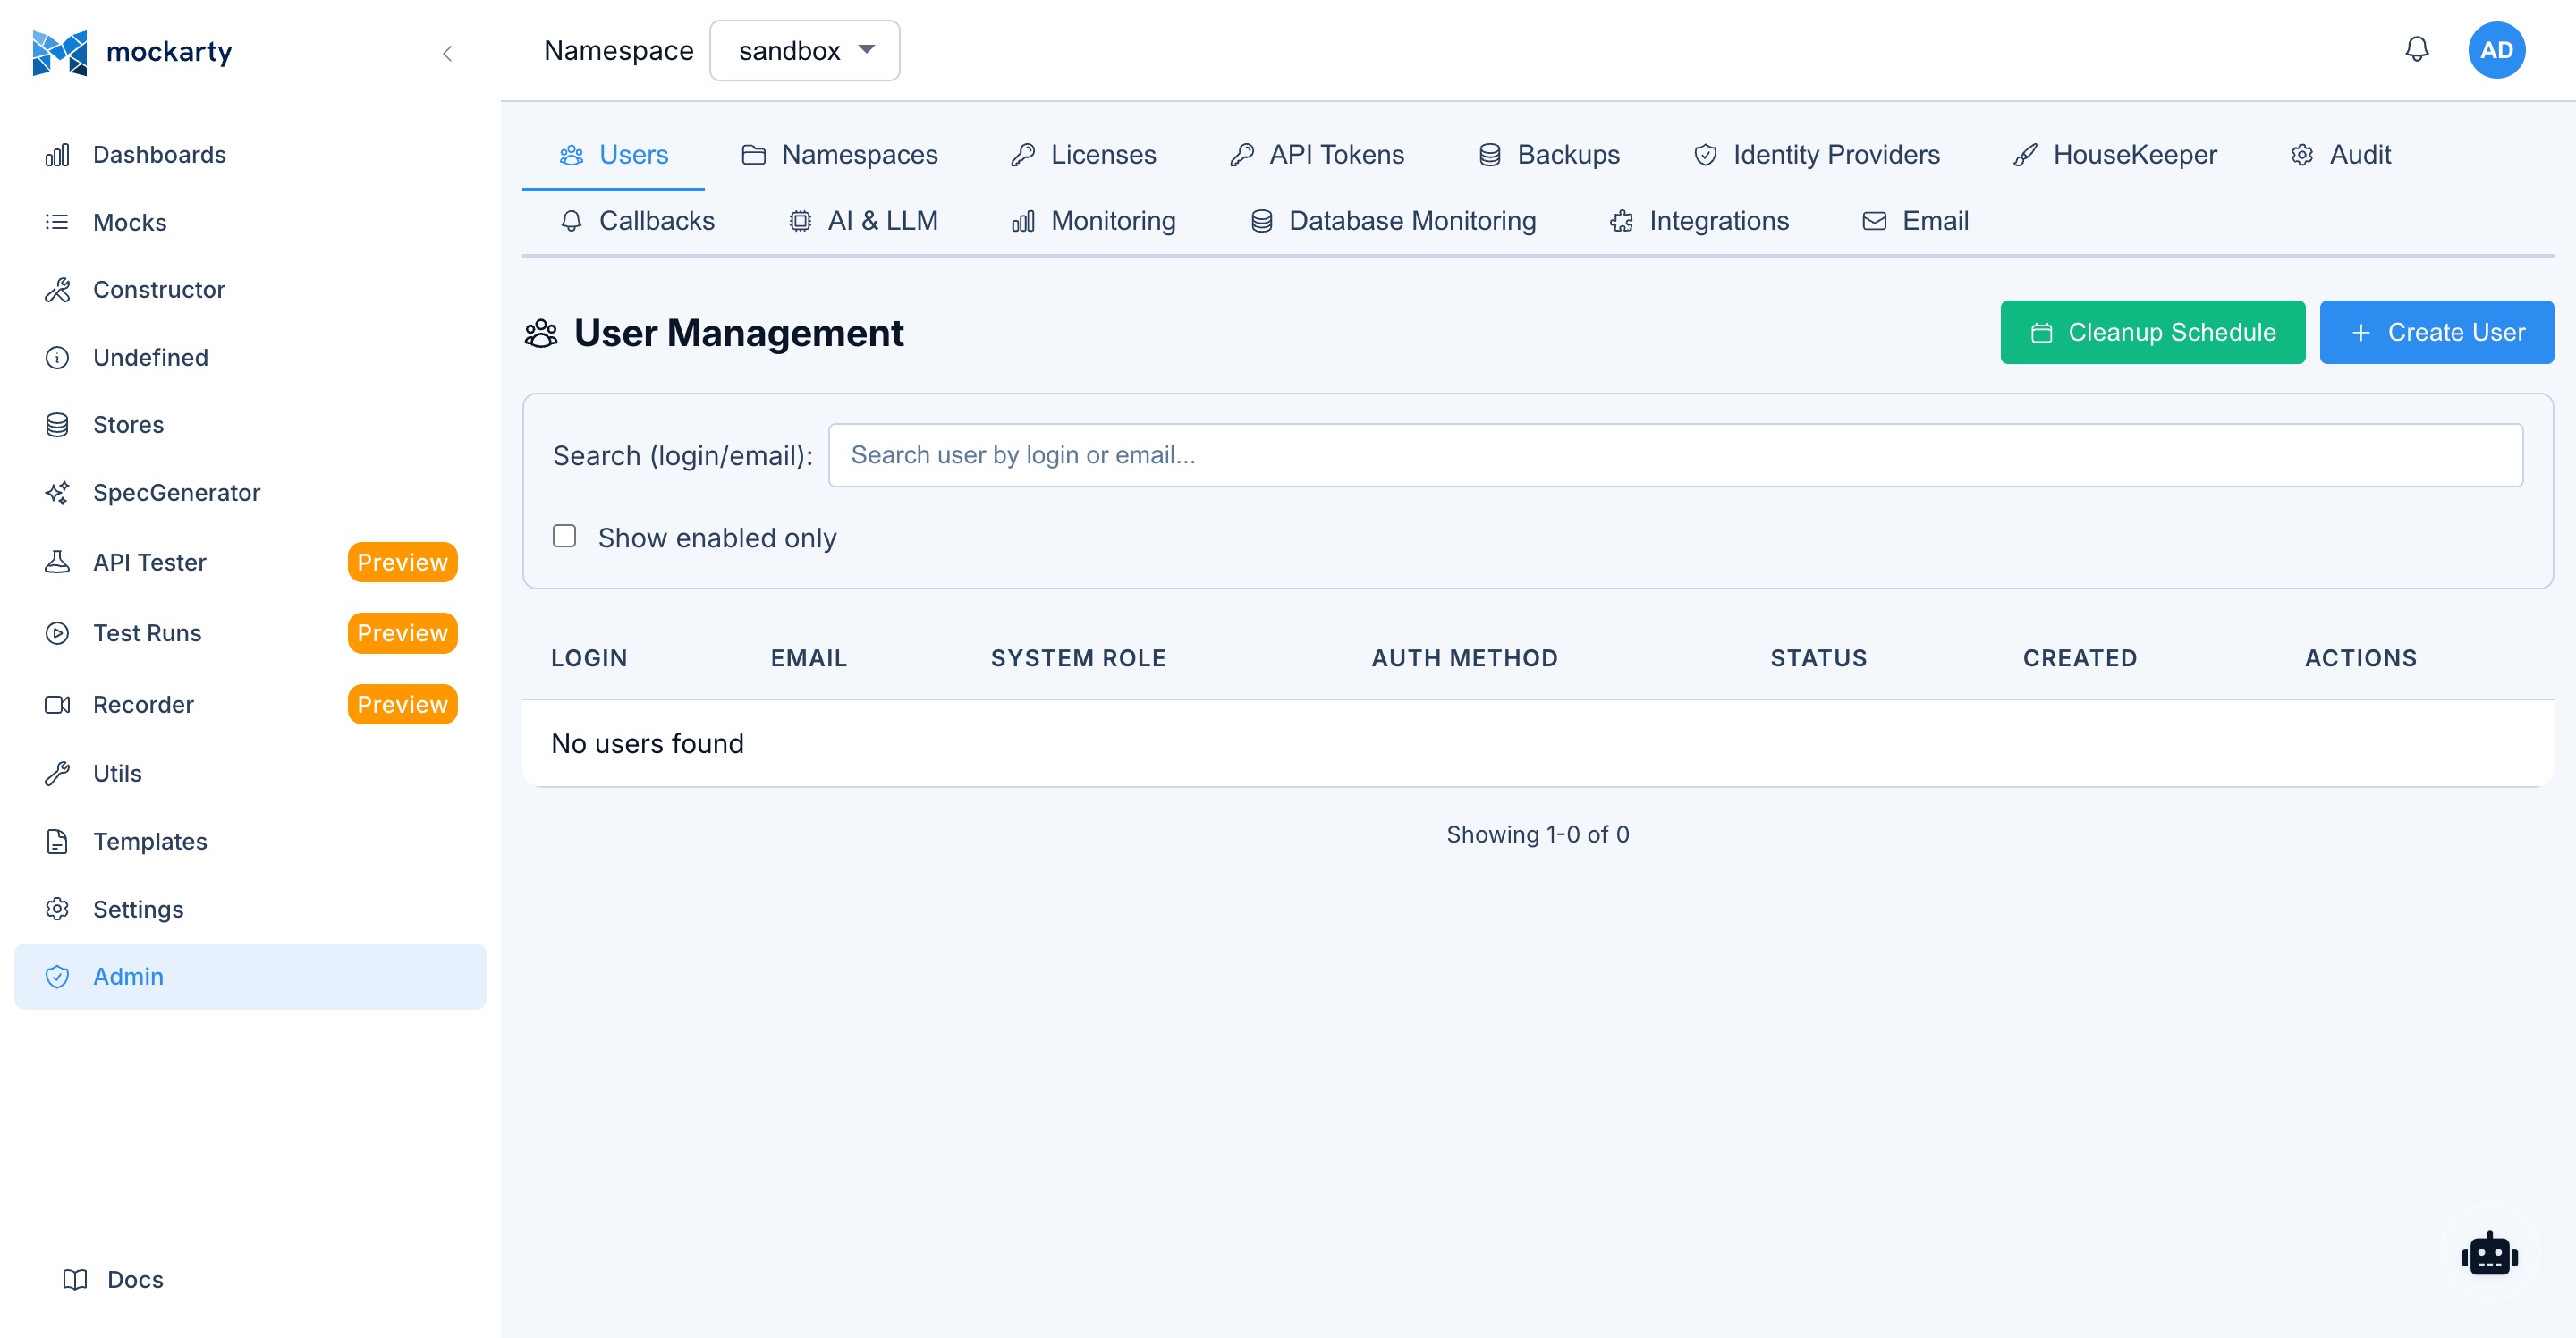
- Navigate to Admin Panel > Users.
- Click Create User.
- Fill in the required fields:
- Username — Unique login name.
- Email — Email address (used for notifications and password resets).
- Password — Initial password (user can change it later).
- System Role — Select from Admin, Support, Auditor, or User (see System Roles).
- Click Create.
Setting Passwords and Emails
- To reset a user’s password: Admin Panel > Users > (select user) > Reset Password.
- To change a user’s email: Admin Panel > Users > (select user) > Edit > Email.
- Password reset links can be sent via email if email notifications are configured.
Disabling / Enabling Accounts
Disabled accounts cannot log in, but their data and namespace assignments are preserved.
- Navigate to Admin Panel > Users.
- Find the user in the list.
- Click the toggle switch next to their name to disable or enable the account.
Deleting Users
- Navigate to Admin Panel > Users.
- Find the user in the list.
- Click Delete.
- Confirm the deletion.
Note: Deleting a user removes their account and all namespace role assignments. Mocks and other resources created by the user are preserved.
User Self-Registration
When OAuth or LDAP is enabled, users can register themselves by logging in through the external identity provider. A Mockarty account is created automatically with the User system role. The administrator can then assign namespace roles as needed.
System Roles
Mockarty has four system-level roles that determine what a user can access across the entire platform.
Role Descriptions
Admin
Full system access. Admins can manage all users, all namespaces, system settings, audit logs, backups, email configuration, LLM profiles, telemetry, and database health. This role should be limited to a small number of trusted people.
Support
Full access to namespace resources (mocks, stores, API tests, fuzzing, recorder, collections) across all namespaces. In the Admin Panel, Support users can view user accounts, reset passwords, and view audit logs, but cannot create or delete users, change system settings, or access sensitive configuration. Support users cannot create or delete namespaces.
Auditor
Read-only access to audit logs and system metrics. Auditors cannot modify any resources and cannot export audit logs. In the sidebar, they see: Dashboard, Mocks (view only), Test Runs, Recorder (view only), Fuzzing (view only), Utils, Settings (view only), and Admin Panel (audit logs view only).
User
Standard user account. Permissions are determined entirely by namespace role assignments (see Namespace Roles). Users have no access to the Admin Panel.
Permissions Matrix
| Capability | Admin | Support | Auditor | User |
|---|---|---|---|---|
| View Dashboard | Yes | Yes | Yes | Yes |
| Manage own profile | Yes | Yes | Yes | Yes |
| Access Admin Panel | Yes | Partial | Partial | No |
| Create / delete users | Yes | No | No | No |
| View user list | Yes | Yes | No | No |
| Reset user passwords | Yes | Yes | No | No |
| Disable / enable accounts | Yes | No | No | No |
| Manage system settings | Yes | No | No | No |
| Create / delete namespaces | Yes | No | No | No |
| View audit logs | Yes | Yes | Yes | No |
| Export audit logs | Yes | Yes | No | No |
| Manage backups | Yes | No | No | No |
| Configure email settings | Yes | No | No | No |
| Manage LLM profiles | Yes | No | No | No |
| View telemetry / metrics | Yes | No | Yes | No |
| Database health | Yes | No | No | No |
| Manage API tokens | Yes | No | No | No |
| View mocks (all namespaces) | Yes | Yes | Yes | No |
| Work with namespace resources | Yes | Yes | No | By role |
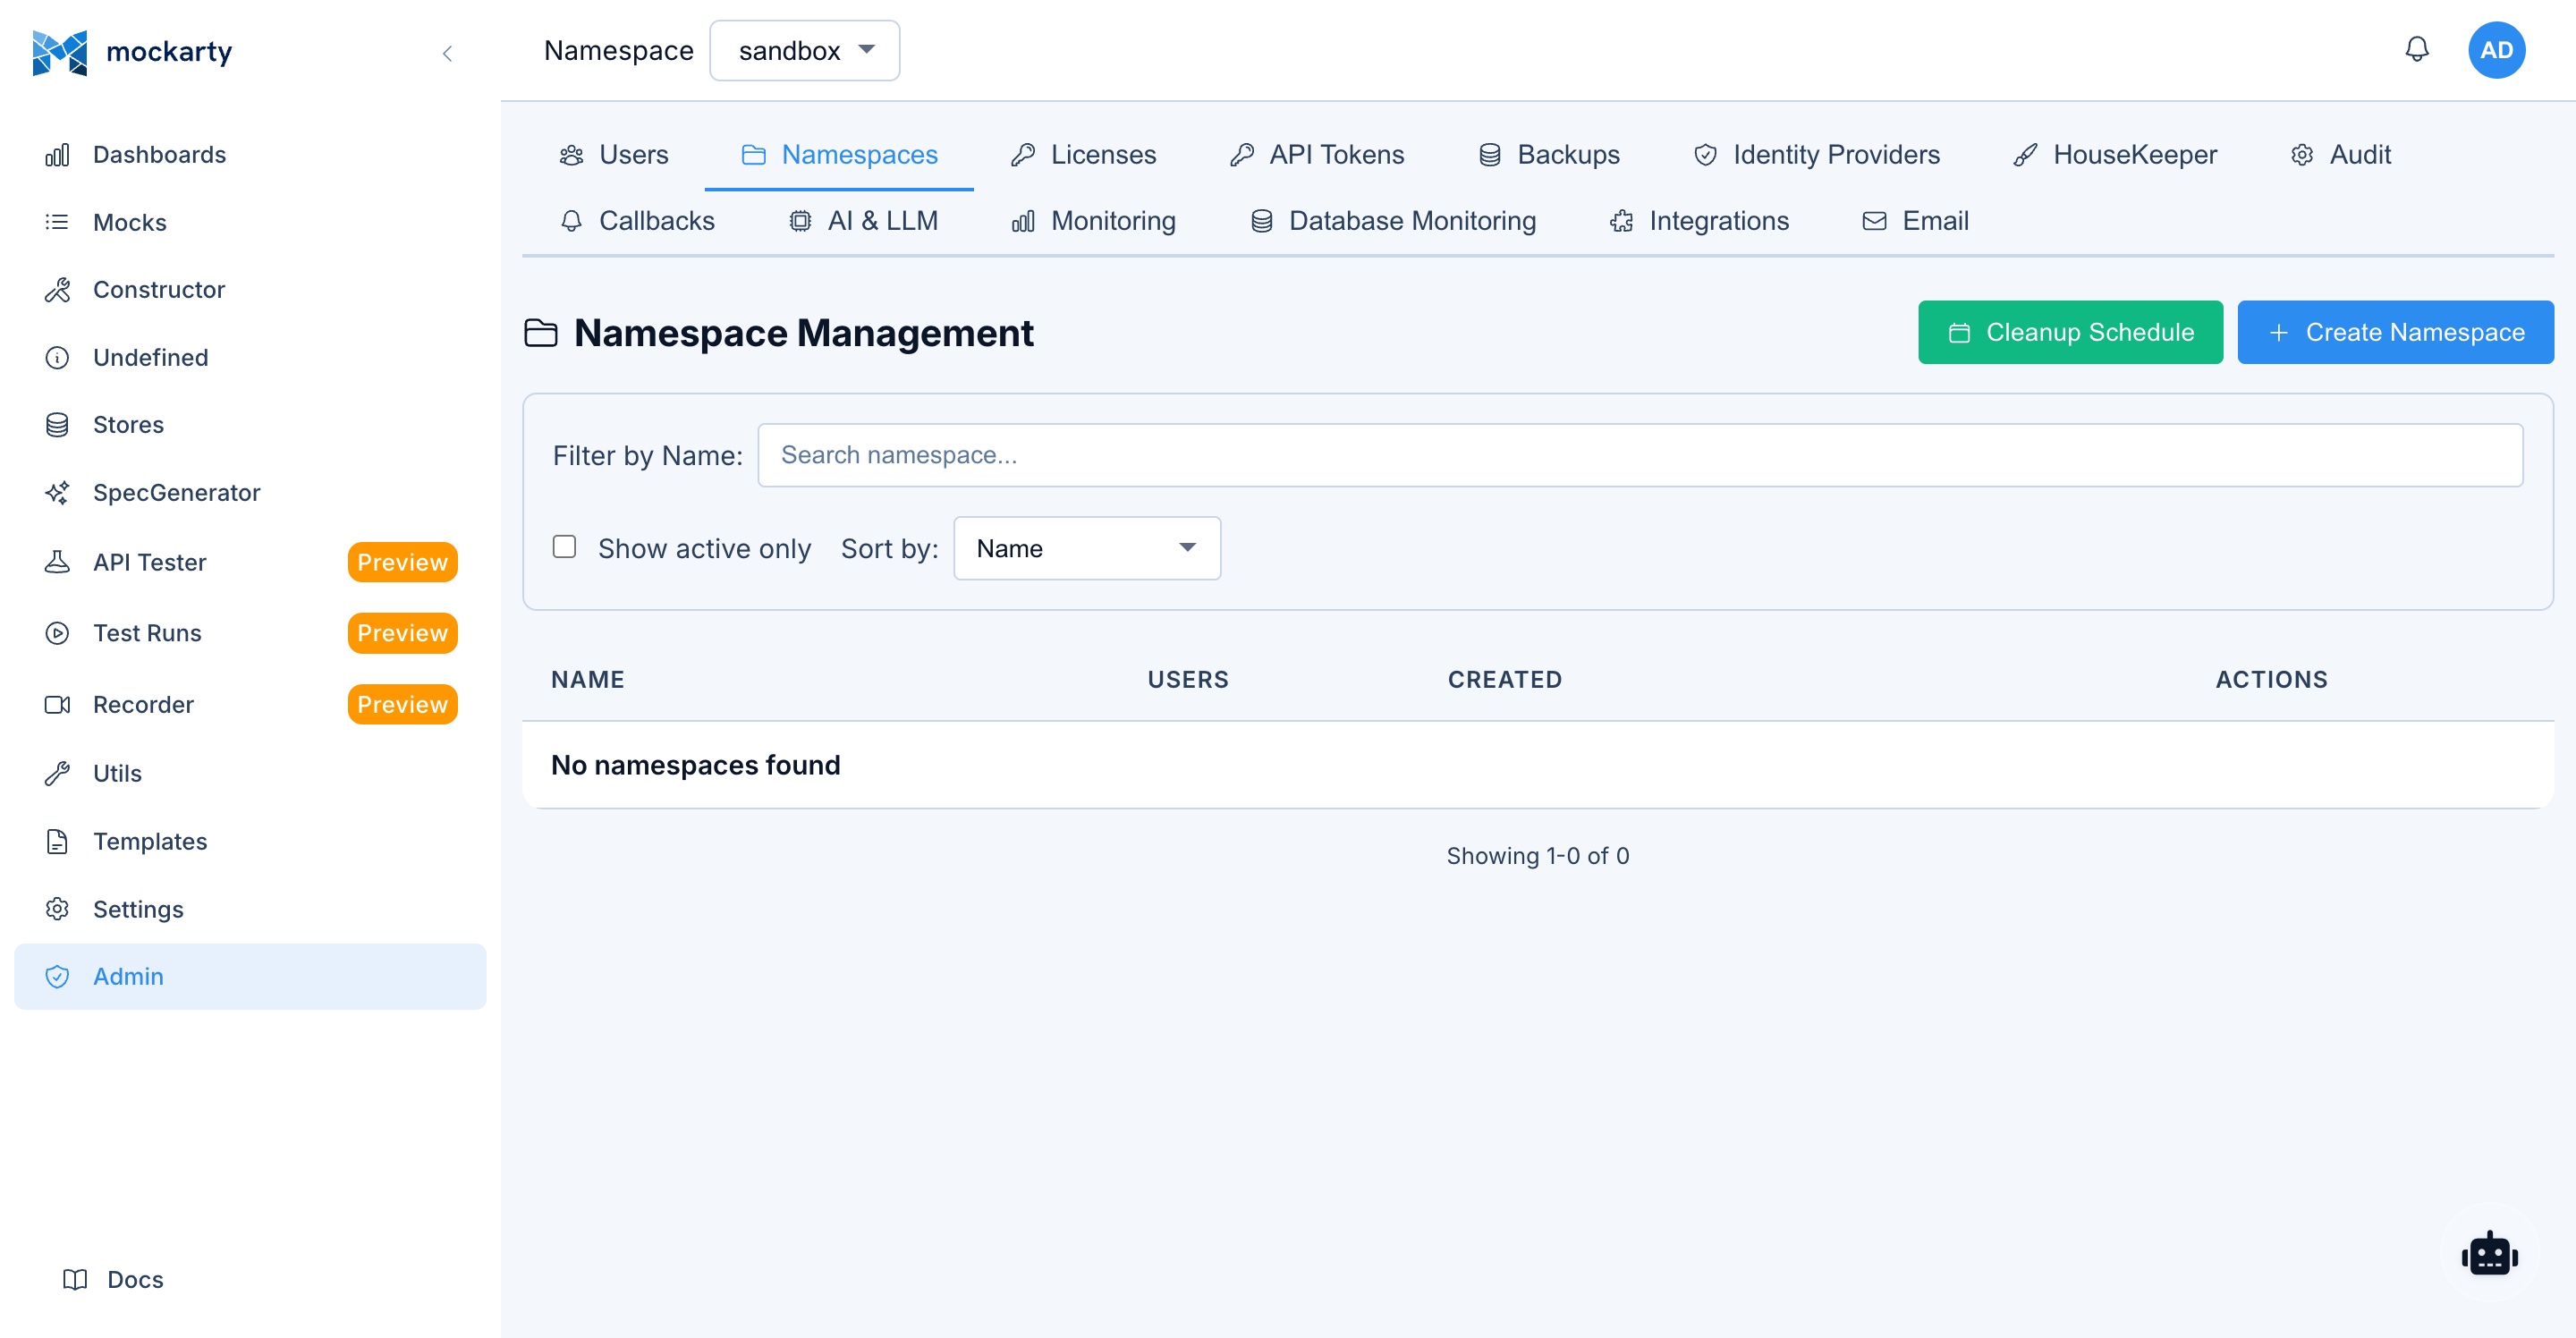
Namespace Management
What Is a Namespace
A namespace is an isolated workspace within Mockarty. Each namespace contains its own:
- Mocks and routes
- Global, Chain, and Mock stores
- API test collections and environments
- Test run results
- Recorder sessions
- Fuzzing configurations
- API tokens
Namespaces provide separation between teams, services, or environments. Resources in one namespace are invisible to users of another namespace (unless they have roles in both).
Creating Namespaces
Via Admin Panel:
- Navigate to Admin Panel > Namespaces.
- Click Create Namespace.
- Enter a name and optional description.
- Click Create.
Via Settings page:
- Navigate to Settings > Namespaces (visible to Admin users).
- Click Create Namespace.
- Enter a name and optional description.
- Click Create.
Naming Conventions and Best Practices
Choose a naming convention that fits your organization:
| Strategy | Example namespaces | Best for |
|---|---|---|
| Per team | backend-team, mobile-team, qa-team |
Small organizations |
| Per service | payment-service, user-service, orders |
Microservice architectures |
| Per environment | dev, staging, qa, demo |
Environment-based workflows |
| Combined | payments-dev, payments-staging |
Large organizations |
Tips:
- Use lowercase names with hyphens (e.g.,
user-service). - Keep names short but descriptive.
- Avoid generic names like
testortempfor permanent namespaces. - Document your naming convention so all teams follow it consistently.
Default Namespace
The sandbox namespace is created automatically on first launch. It cannot be deleted. All users have access to the default namespace unless explicitly removed.
Deleting / Restoring Namespaces
- Navigate to Admin Panel > Namespaces.
- Find the namespace and click Delete.
- Confirm the deletion.
Warning: Deleting a namespace removes all mocks, stores, test collections, and other resources within it. This action is irreversible.
Namespace Roles
Within each namespace, users can have one of three roles that control what they can do with namespace resources.
Role Descriptions
Owner
Full control over the namespace. Owners can manage namespace settings, add or remove users, and perform all operations on resources (mocks, stores, collections, tests). Namespace Owners cannot delete the namespace — only users with the Admin or Support system role can delete namespaces.
User
Can create, edit, and delete mocks, stores, collections, and run tests. Users cannot manage namespace settings or add/remove users.
Viewer
Read-only access to all namespace resources. Viewers can browse mocks, view test results, and see store values, but cannot create, edit, or delete anything.
Namespace Capabilities Matrix
| Capability | Owner | User | Viewer |
|---|---|---|---|
| View mocks | Yes | Yes | Yes |
| Create / edit / delete mocks | Yes | Yes | No |
| Import mocks (OpenAPI, HAR, etc.) | Yes | Yes | No |
| View stores | Yes | Yes | Yes |
| Create / edit / delete stores | Yes | Yes | No |
| View API test collections | Yes | Yes | Yes |
| Create / edit / delete collections | Yes | Yes | No |
| Run tests | Yes | Yes | No |
| View test results | Yes | Yes | Yes |
| Use API Tester | Yes | Yes | No |
| View Recorder sessions | Yes | Yes | Yes |
| Start / stop Recorder | Yes | Yes | No |
| Configure Fuzzing | Yes | Yes | No |
| View Fuzzing results | Yes | Yes | Yes |
| Manage namespace API tokens | Yes | No | No |
| Add / remove namespace users | Yes | No | No |
| Change namespace settings | Yes | No | No |
| Delete namespace | No | No | No |
| Use Agent Chat | Yes | Yes | Yes |
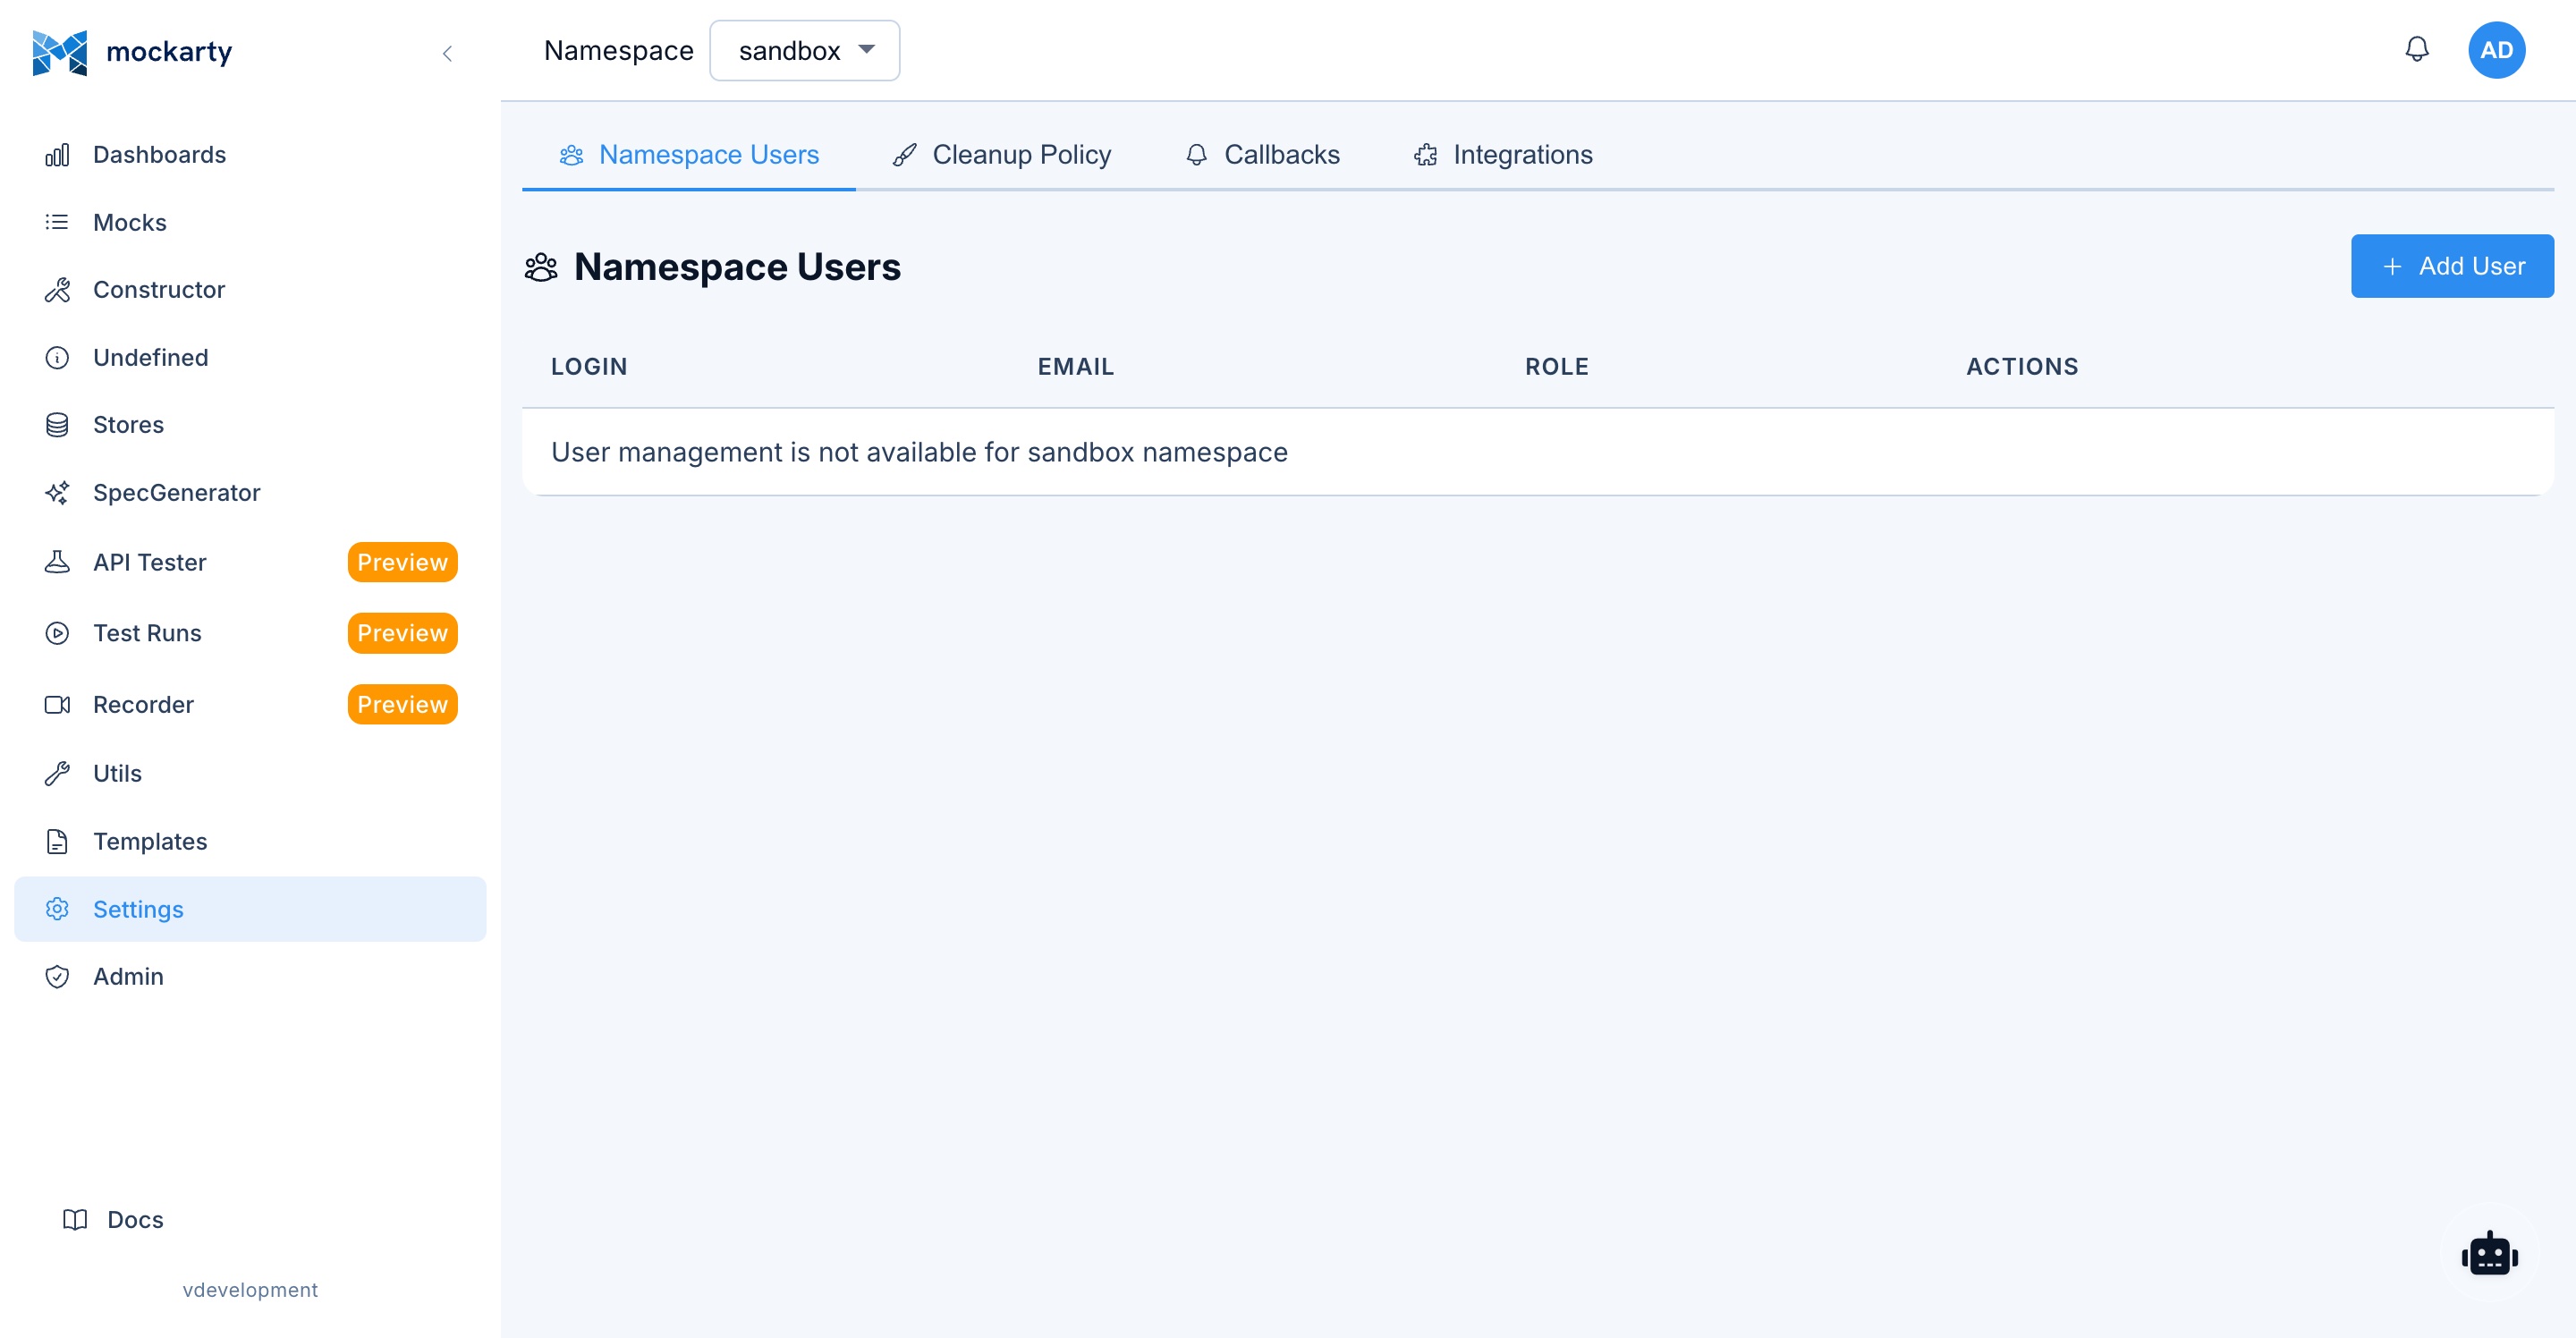
Assigning Users to Namespaces
Adding a User to a Namespace
- Switch to the target namespace using the namespace selector in the sidebar.
- Navigate to Settings > Users.
- Click Add User.
- Select the user account from the dropdown list.
- Choose a role: Owner, User, or Viewer.
- Click Add.
Changing a User’s Namespace Role
- Navigate to Settings > Users within the target namespace.
- Find the user in the list.
- Click the role dropdown next to their name.
- Select the new role.
- The change takes effect immediately.
Removing a User from a Namespace
- Navigate to Settings > Users within the target namespace.
- Find the user in the list.
- Click Remove.
- Confirm the action.
Note: Removing a user from a namespace does not delete their account. They simply lose access to that namespace’s resources.
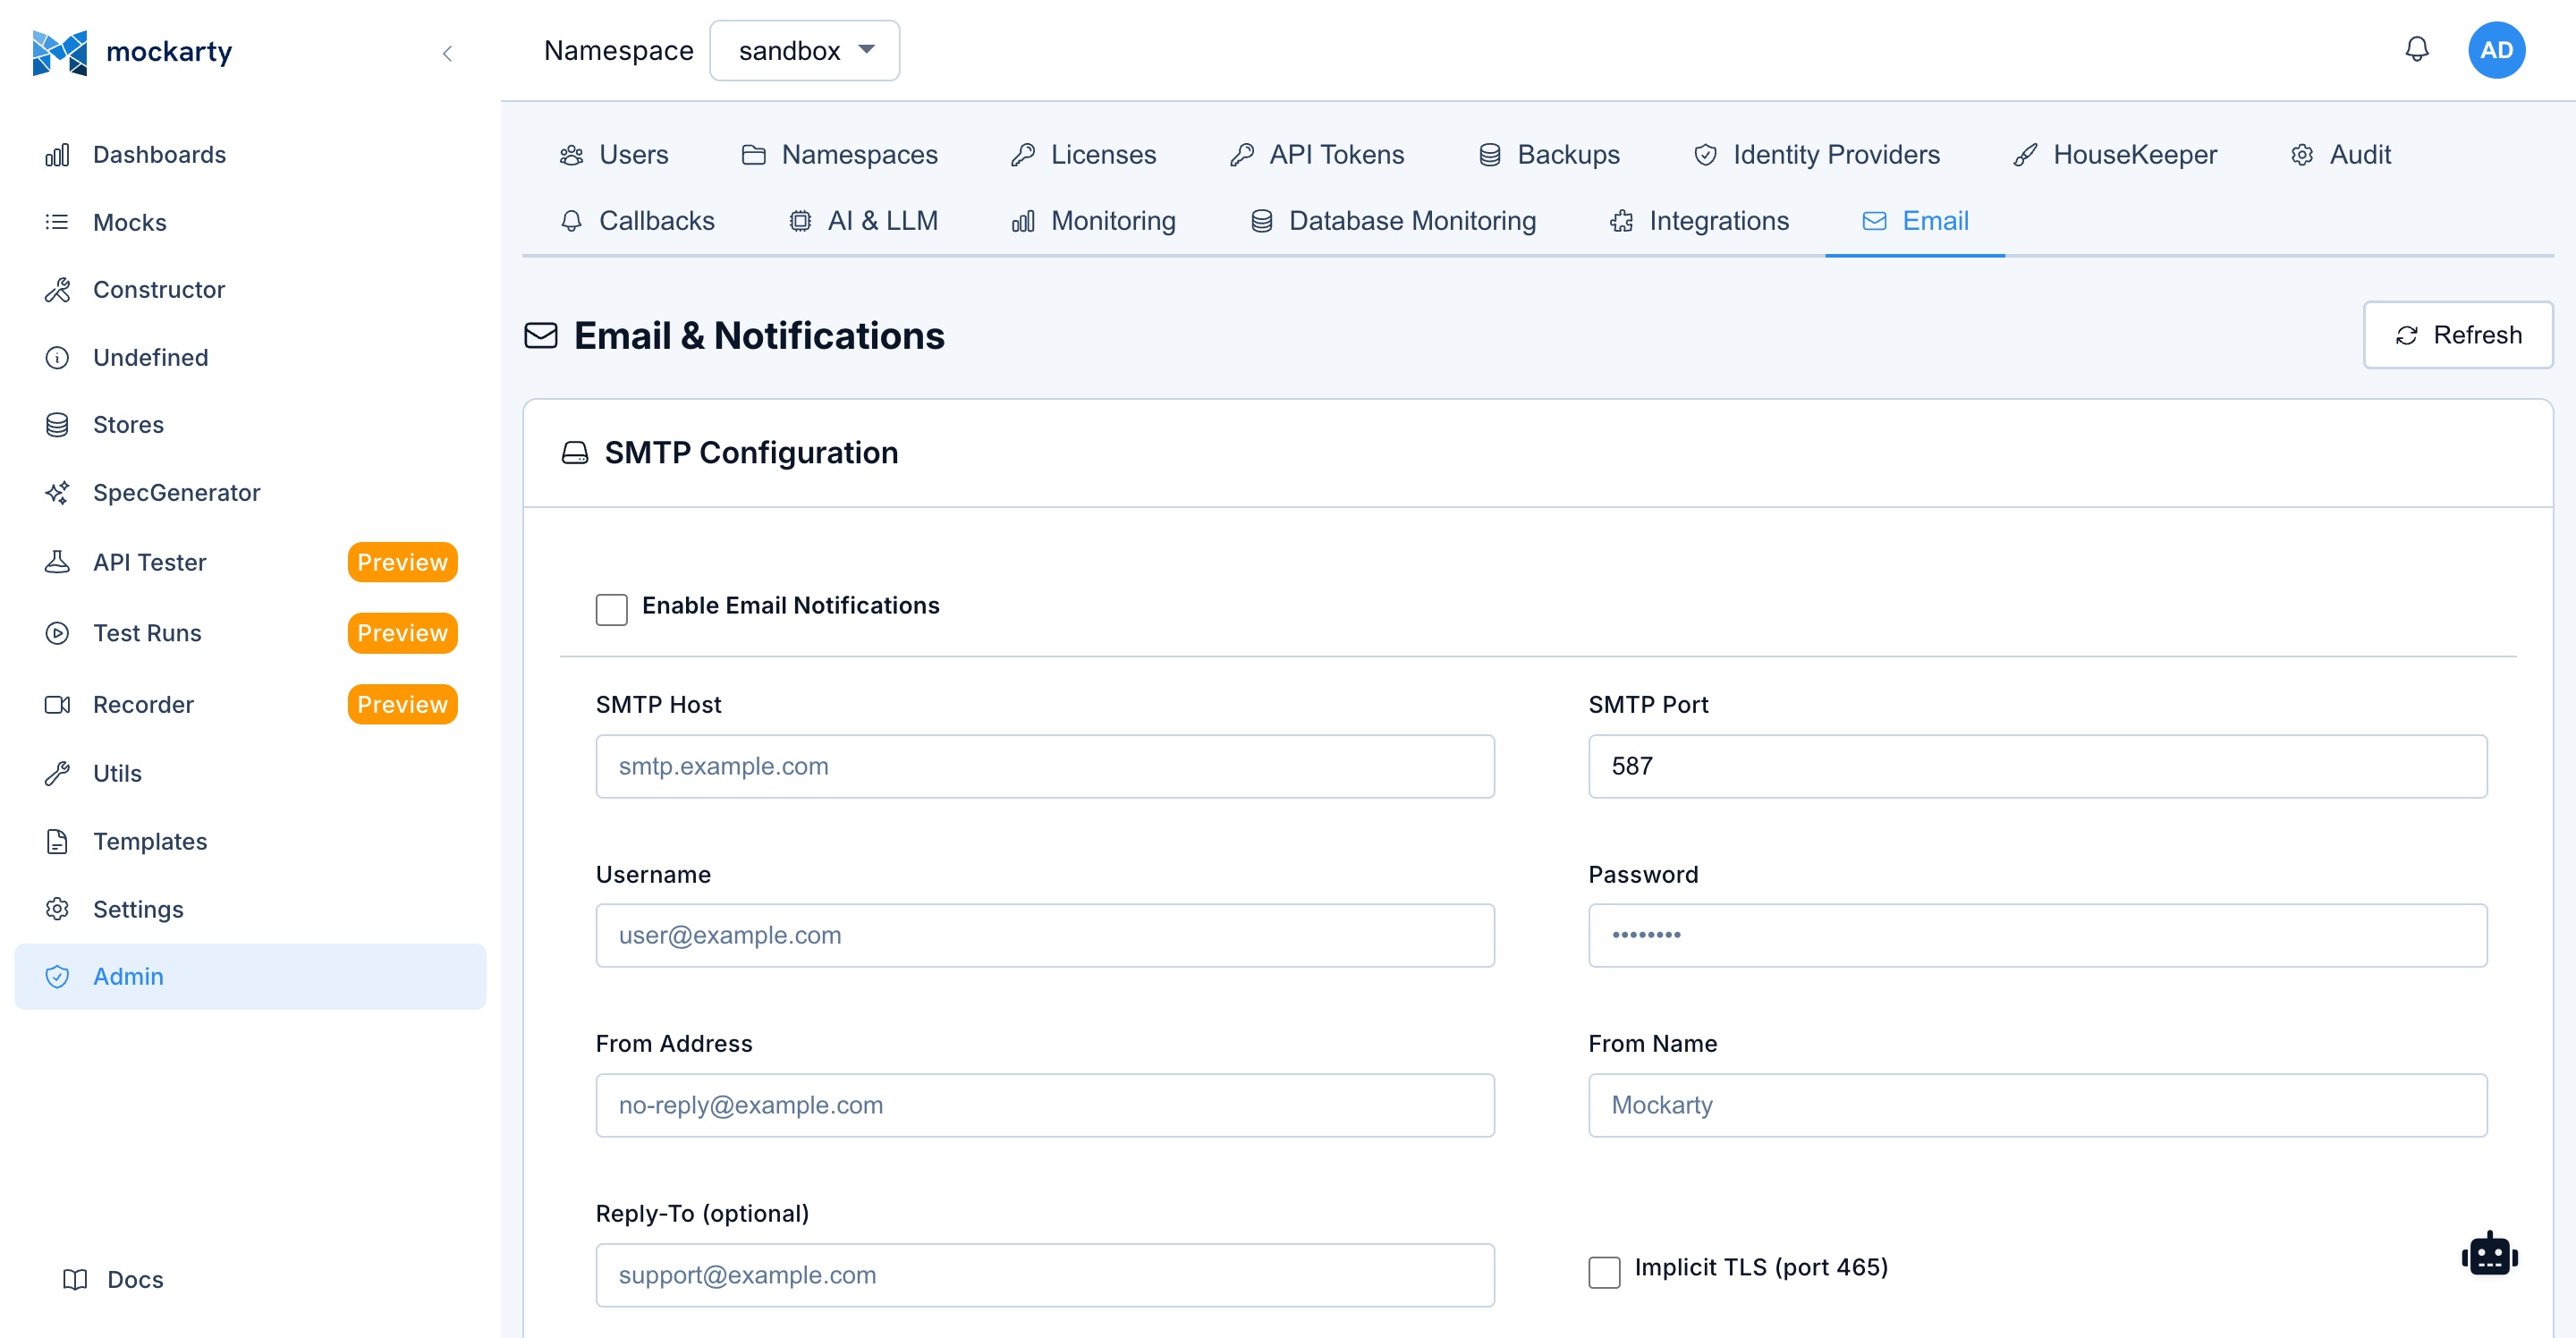
Email Notifications Setup
Email notifications enable password resets, 2FA code delivery, invite links, and test run notifications.
Enabling Email
Email settings are configured through the Admin Panel UI (no restart required):
- Navigate to Admin Panel > Email Settings.
- Fill in the SMTP connection details:
- SMTP Host — your SMTP server (e.g.,
smtp.gmail.com) - SMTP Port — typically
587for STARTTLS or465for Implicit TLS - Username / Password — SMTP authentication credentials
- From Address — the sender email address shown to recipients
- From Name — the sender display name (e.g.,
Mockarty) - Reply-To — optional reply-to address
- SMTP Host — your SMTP server (e.g.,
- Toggle Enabled and click Save.
Alternative: environment variables. SMTP settings can also be provided via environment variables at startup (
EMAIL_ENABLED,SMTP_HOST,SMTP_PORT,SMTP_USERNAME,SMTP_PASSWORD,EMAIL_FROM,EMAIL_FROM_NAME,EMAIL_REPLY_TO,SMTP_USE_IMPLICIT_TLS). See the Installation & Deployment Guide for the full reference. UI settings take precedence over environment variables after the first save.
Testing Email Configuration
- Navigate to Admin Panel > Email Settings.
- Click Send Test Email.
- Enter a recipient email address.
- Click Send.
- Verify the test email arrives in the recipient’s inbox.
Custom Email Templates
Mockarty uses built-in HTML templates for all email notifications. You can customize them:
- Navigate to Admin Panel > Email tab, then switch to the Templates sub-tab.
- Select the template to customize (e.g., “Password Reset”, “2FA Code”, “Welcome”, “Invite”, “Email Verify”).
- Edit the subject line, HTML template, and plain text template. Available variables are listed on the page.
- Click Save.
- Use Preview to see how the email will look.
- Use Reset to Default to restore the built-in template.
What Gets Sent
| Event | Email content |
|---|---|
| Password reset request | Link to reset password (expires in 1 hour) |
| 2FA code (email method) | 6-digit verification code (expires in 20 minutes) |
| User invite | Link to join Mockarty with pre-assigned role |
| Email verification | Link to verify email address |
| Test run completion | Summary of test results with pass/fail counts |
Backup and Restore
Mockarty has a built-in backup system that uses pg_dump / pg_restore for PostgreSQL and file copy for SQLite to create and restore database backups. Backups are managed through the Admin Panel or API.
Automatic Backups
Mockarty runs scheduled backups automatically. The default schedule is daily at 2:00 AM (configurable via cron expression). In distributed deployments, backups run only on the leader node to avoid duplicates.
Configuring Backup
- Navigate to Admin Panel > Backup.
- Click Create Backup Config (or edit the default config).
- Configure:
- Schedule — Cron expression (e.g.,
0 0 2 * * *for daily at 2 AM). - Retention — Number of days to keep old backups (0 = unlimited).
- Compression — Enable compression for smaller backup files.
- Format —
custom(recommended, supportspg_restore),plain(SQL text),tar, ordirectory. - Include schema / Include data — Choose what to include.
- Schedule — Cron expression (e.g.,
- Toggle Enabled and click Save.
Manual Backup
Via Admin Panel:
- Navigate to Admin Panel > Backup.
- Click Create Backup.
- Wait for the backup to complete.
- Click Download to save the backup file.
Via API:
# Create a backup
curl -X POST http://localhost:5770/api/v1/admin/backups/create \
  -H "Authorization: Bearer $TOKEN" \
  -H "Content-Type: application/json" \
  -d '{"config_id": "your-config-id"}'

# Download the backup
curl http://localhost:5770/api/v1/admin/backups/download?path=backup_file.dump \
  -H "Authorization: Bearer $TOKEN" \
  -o backup.dump
Restoring from Backup
Via Admin Panel:
- Navigate to Admin Panel > Backup.
- Click Restore.
- Upload the backup file.
- Confirm the restore operation.
- Wait for the process to complete. The license cache will be reloaded automatically.
Via API:
# Restore from uploaded file
curl -X POST http://localhost:5770/api/v1/admin/backups/restore-from-file \
  -H "Authorization: Bearer $TOKEN" \
  -F "file=@backup.dump"
Warning: Restoring a backup replaces all current data. This operation cannot be undone.
What Is Included in a Backup
- Complete database (all mocks, stores, users, namespaces, test results, audit logs, configurations)
- Backup format depends on your settings (
customformat is recommended for fastest restore)
Docker and Kubernetes
The official Mockarty Docker image includes postgresql-client (pg_dump, pg_restore, psql), so backups work out of the box in Docker and Kubernetes environments.
Mount a persistent volume for the backup storage directory:
docker run -v /host/path/data:/app/data mockarty:latest
SQLite Backups
For SQLite deployments, Mockarty creates backups by copying the database file after a WAL checkpoint. The same Admin Panel interface is used — no additional tools are required.
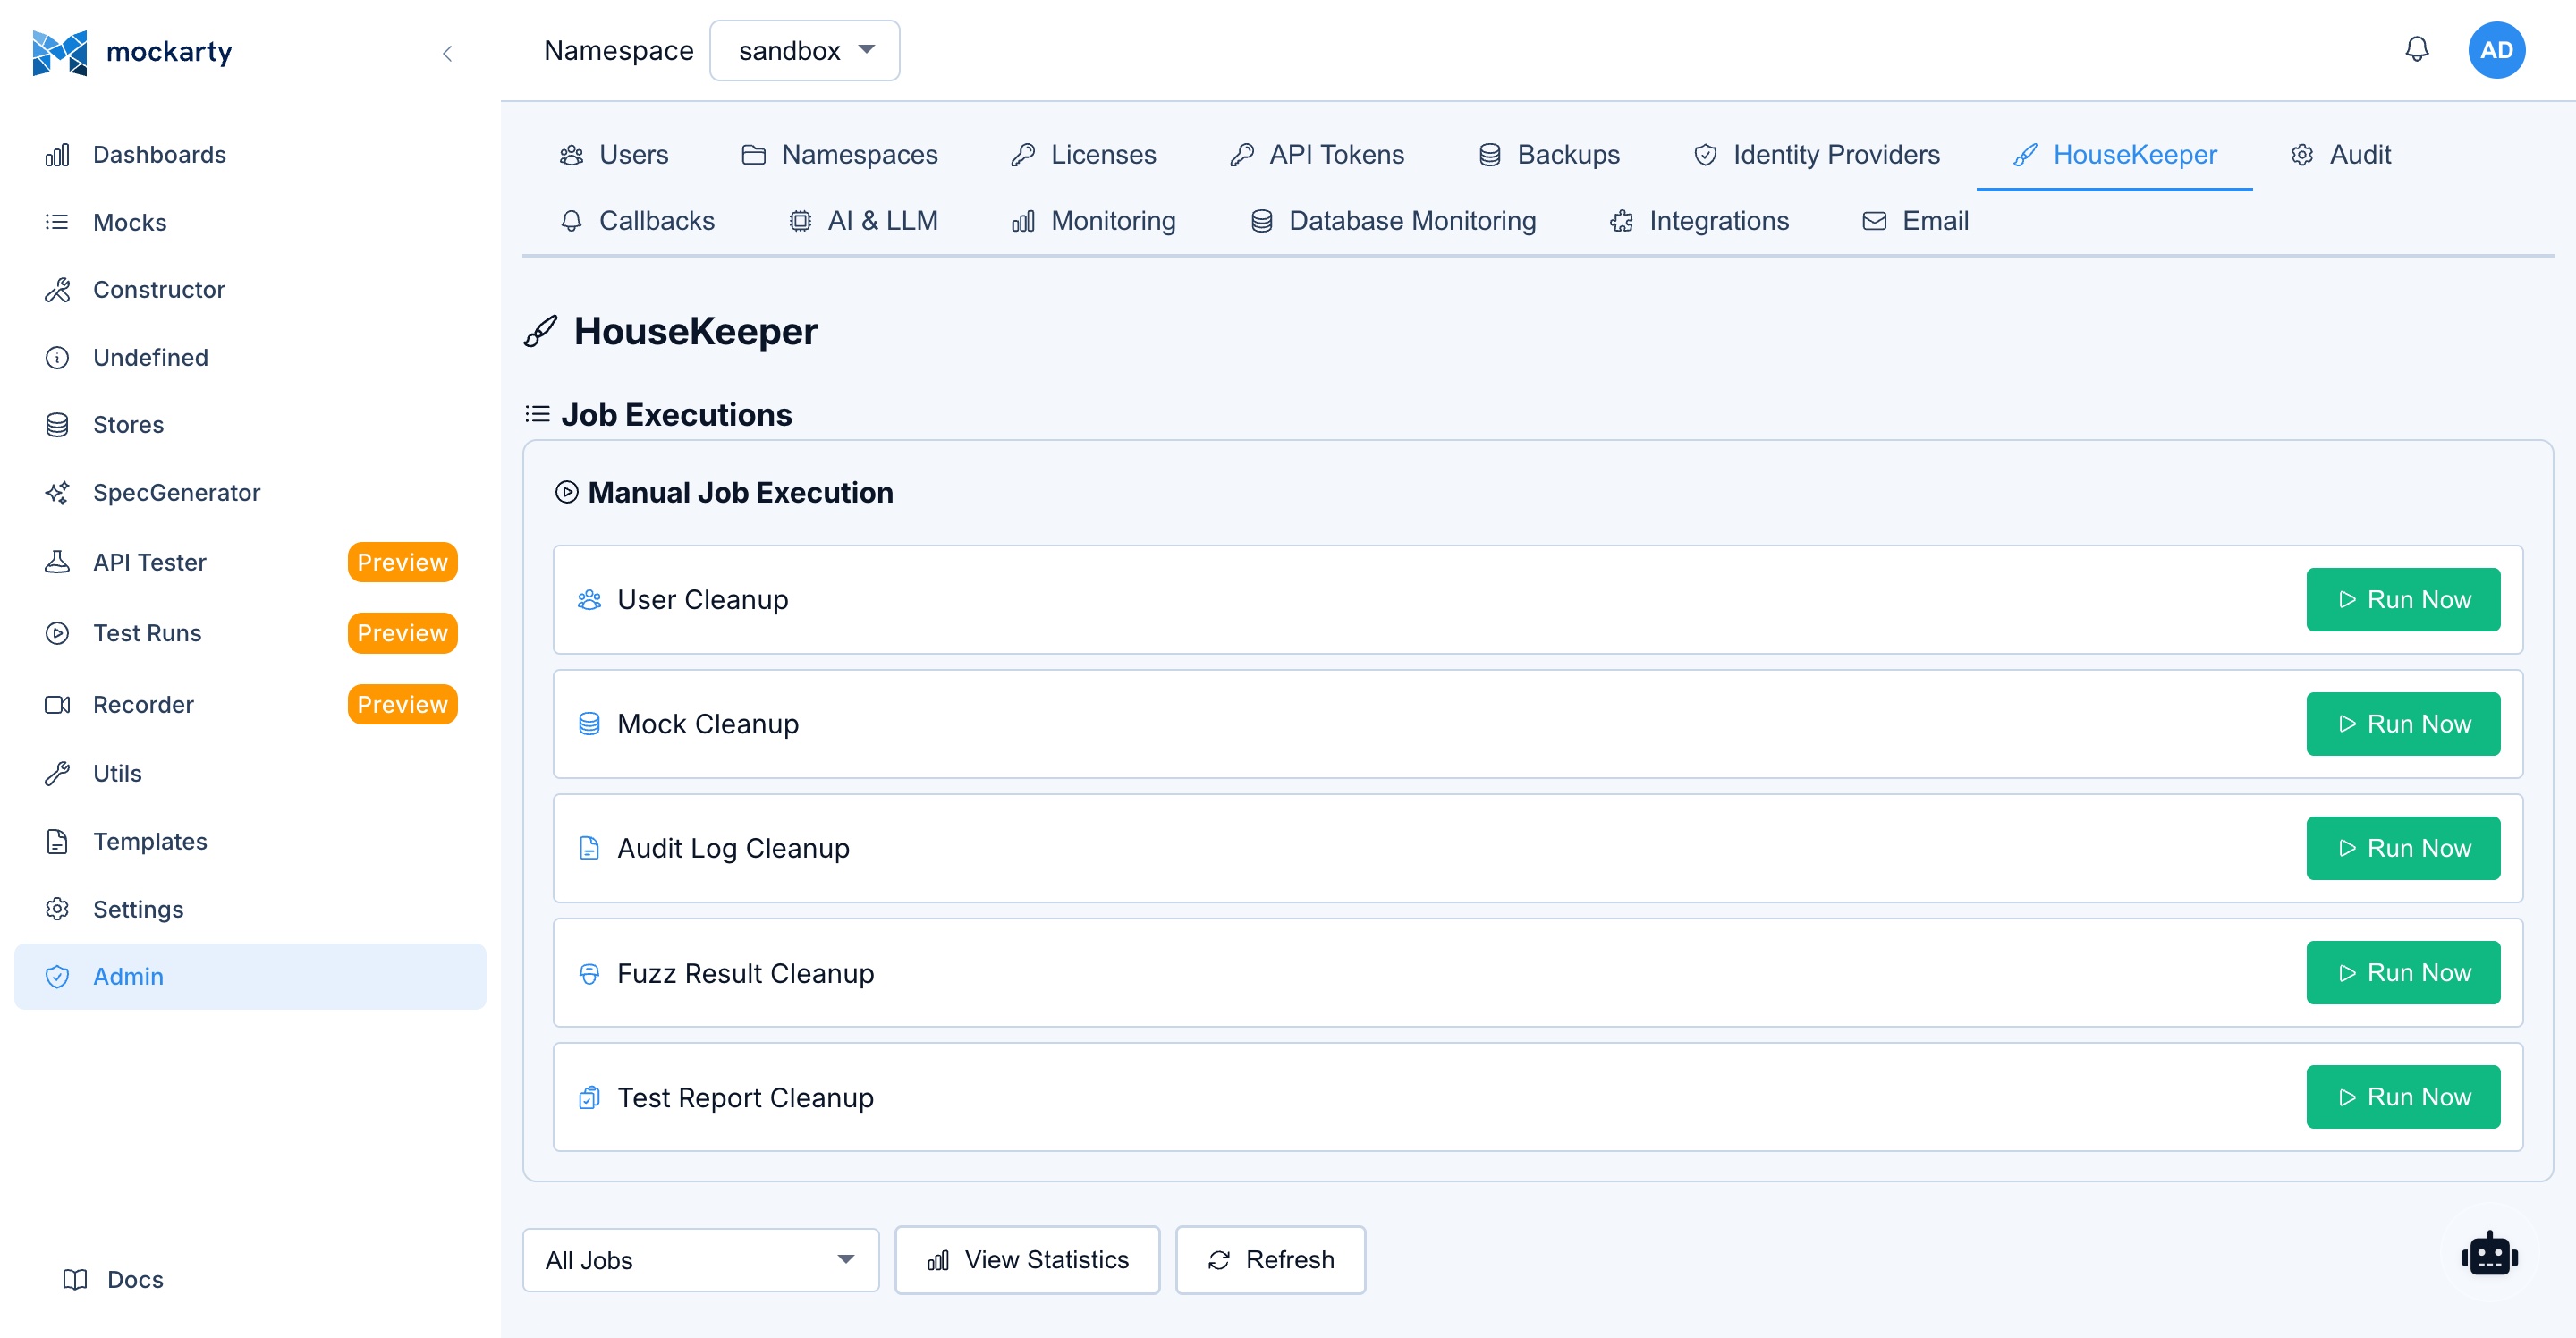
Cleanup Policies
Cleanup policies control how long historical data is retained. Configuring these prevents the database from growing indefinitely.
Configuring Cleanup
Navigate to Admin Panel > Cleanup or Settings > Cleanup within a namespace.
Available Policies
| Policy | Description | Default |
|---|---|---|
| Request logs retention | How long to keep recorded request/response logs | 30 days |
| Undefined requests retention | How long to keep logs of unmatched requests | 14 days |
| Test report retention | How long to keep test run reports | 90 days |
| Expired mock handling | What to do with mocks that have passed their TTL | Archive |
Expired mock handling options:
- Archive — Mark expired mocks as inactive. They stop matching requests but remain visible in the UI for reference.
- Auto-delete — Permanently remove expired mocks after a configurable grace period.
- Do nothing — Leave expired mocks as-is (not recommended for production).
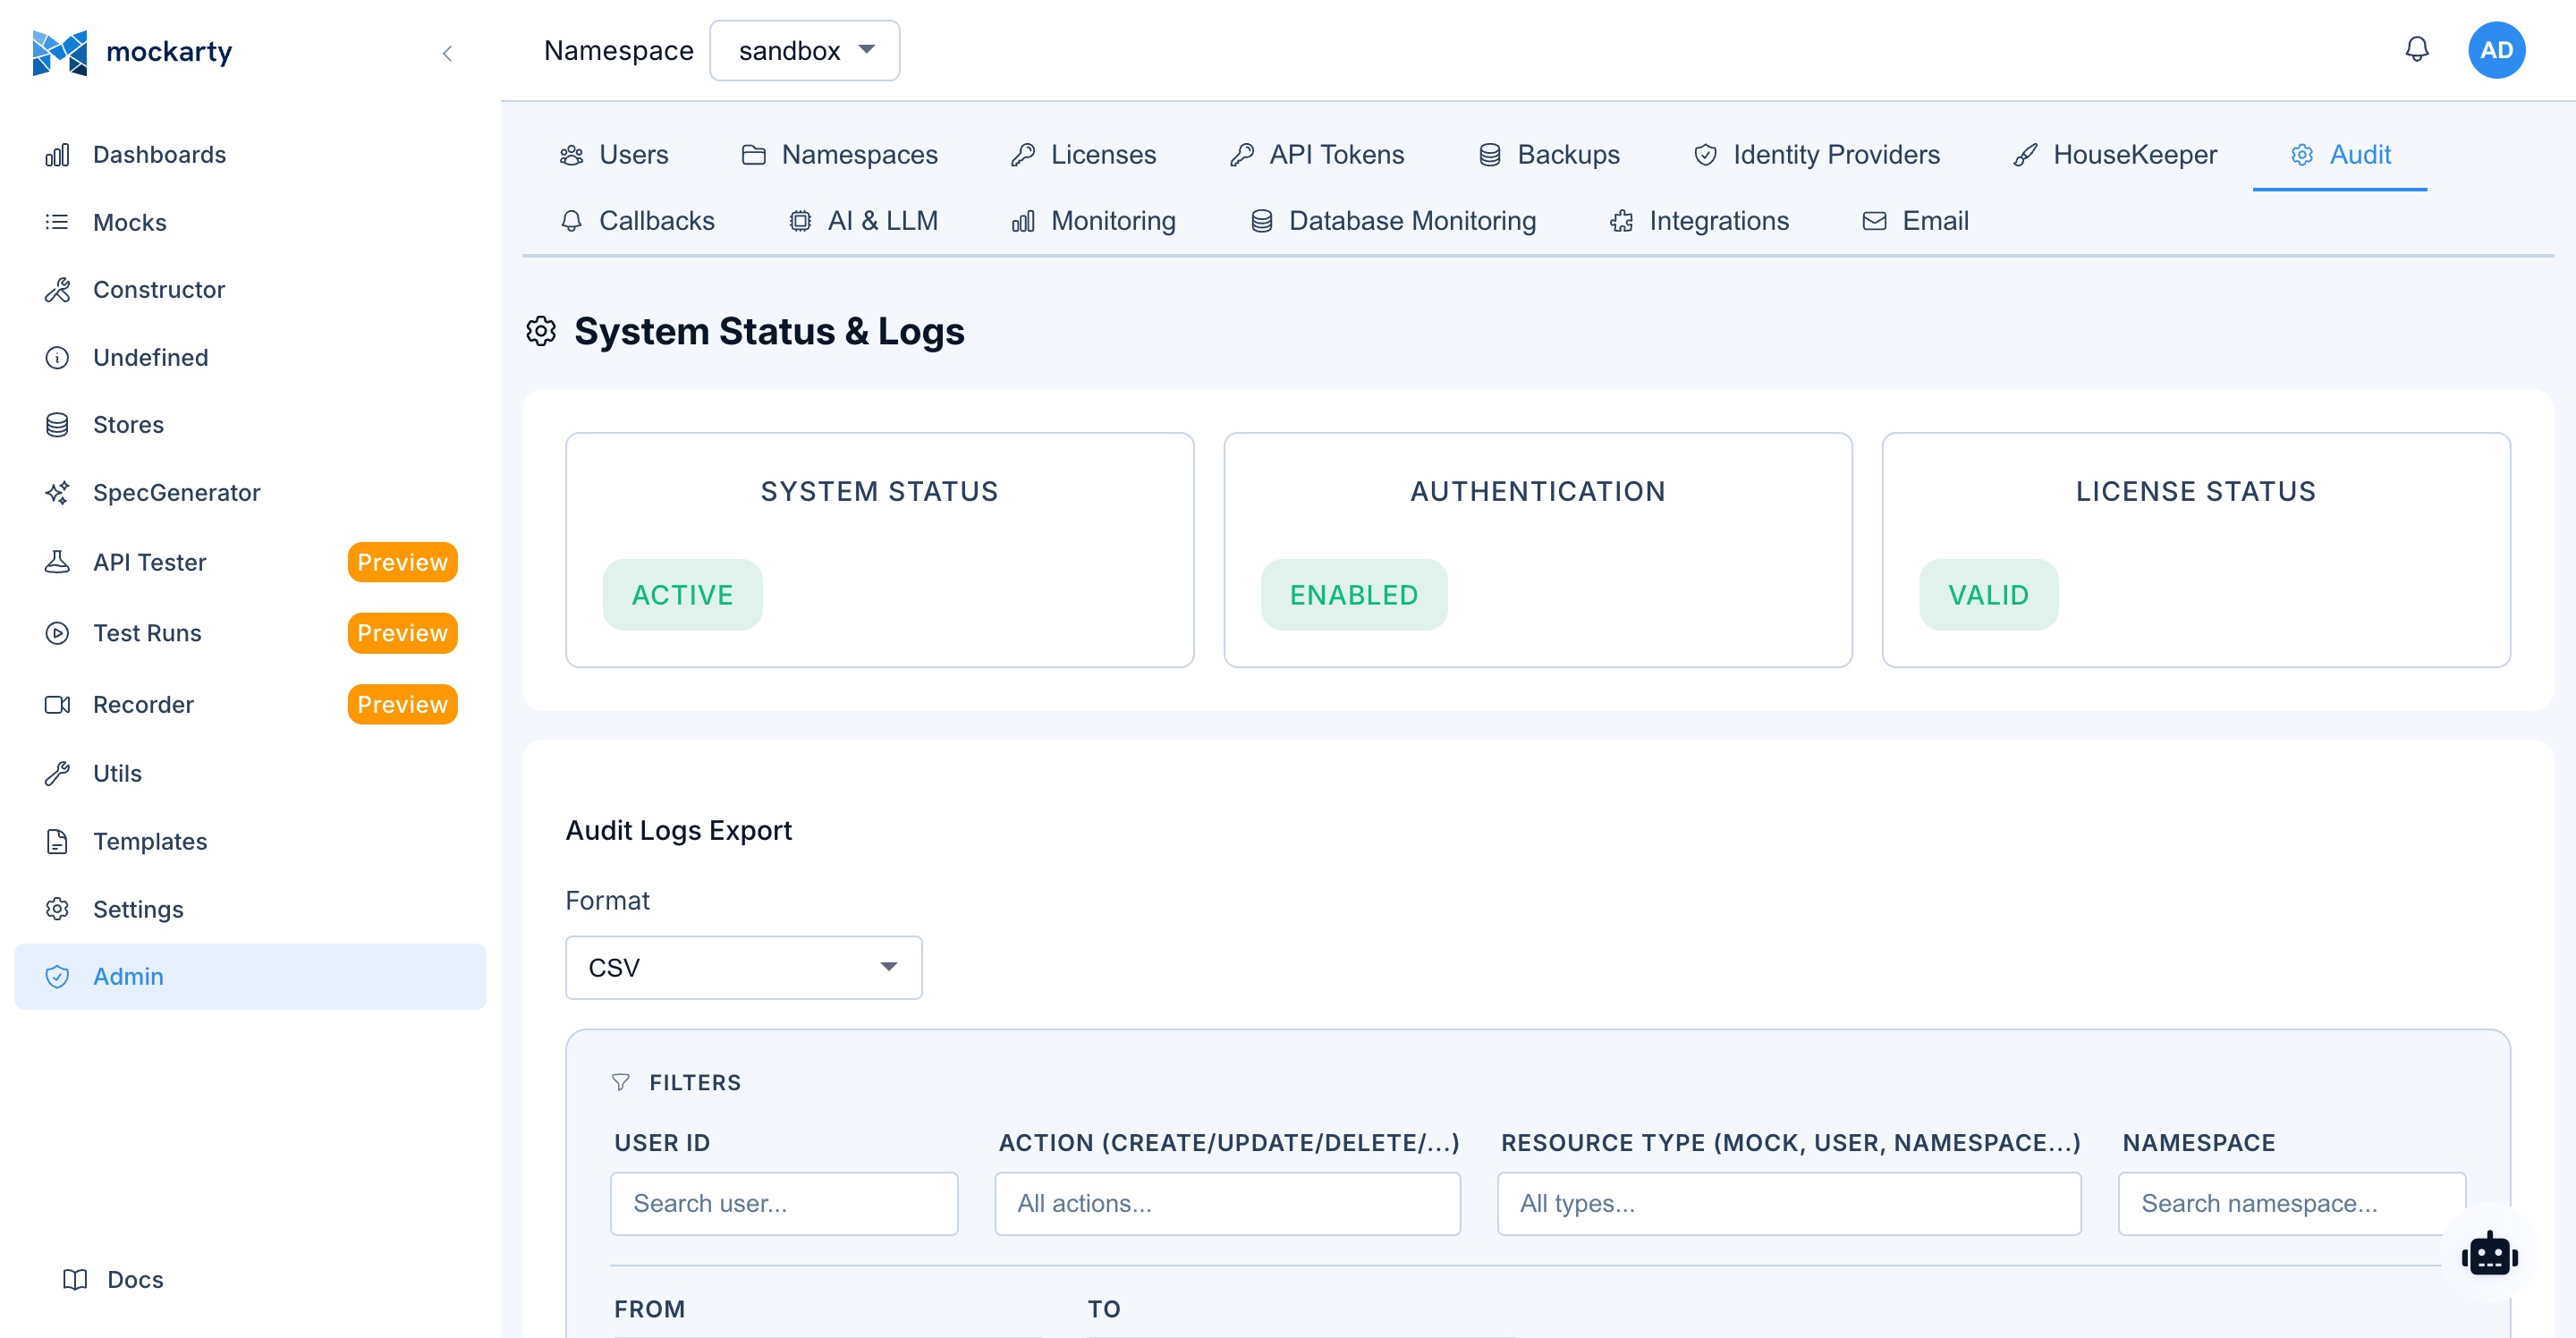
Audit Logs
Audit logs provide a detailed record of all significant actions performed in the system.
What Is Logged
- Authentication events — User logins (success and failure), logouts, 2FA challenges.
- Mock operations — Create, update, delete, import, export.
- Namespace changes — Create, delete, user role assignments.
- Admin actions — User management, system settings changes, backup/restore.
- API token usage — Token creation, deletion, and usage patterns.
- Store operations — Global store modifications.
Viewing Audit Logs
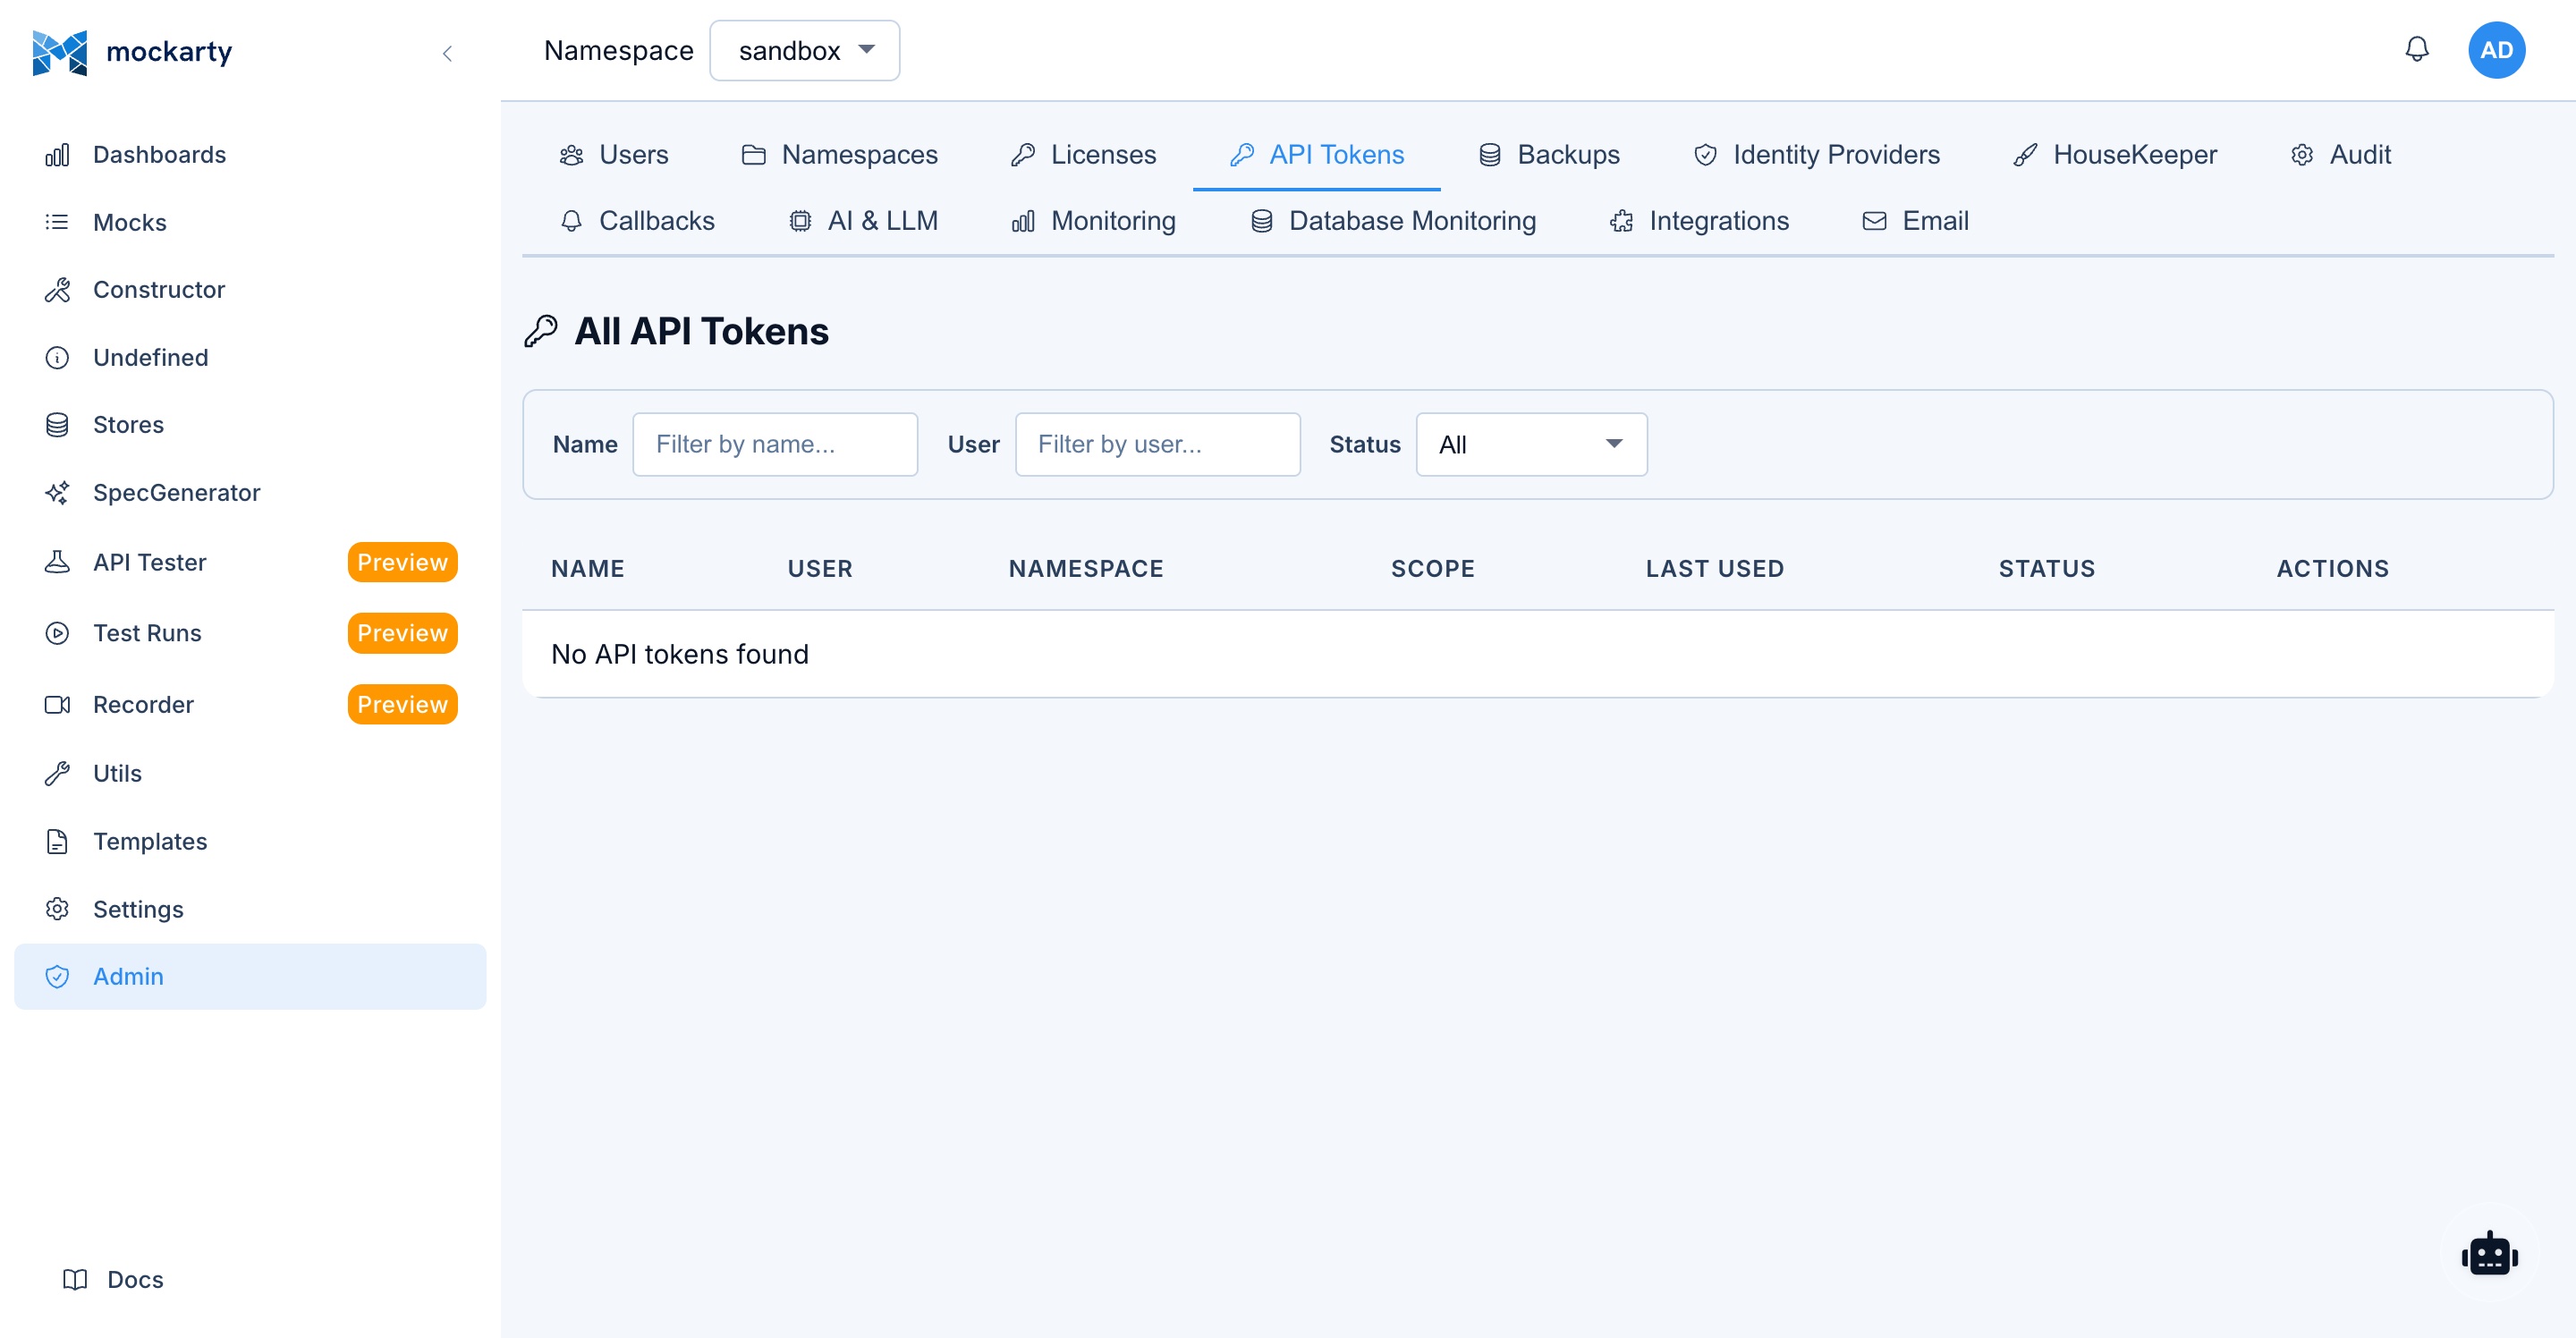
- Navigate to Admin Panel > Audit Logs.
- Browse the chronological list of events.
Filtering
Use the filter controls at the top of the page:
- User — Filter by specific user account.
- Event type — Filter by action type (login, mock.create, namespace.delete, etc.).
- Date range — Specify start and end dates.
- Namespace — Filter by namespace (for namespace-scoped events).
Exporting Audit Logs
- Apply desired filters.
- Click Export.
- Choose format:
- CSV — Comma-separated values, suitable for spreadsheet analysis.
- JSON — Structured data, suitable for programmatic processing.
- The file downloads to your browser.
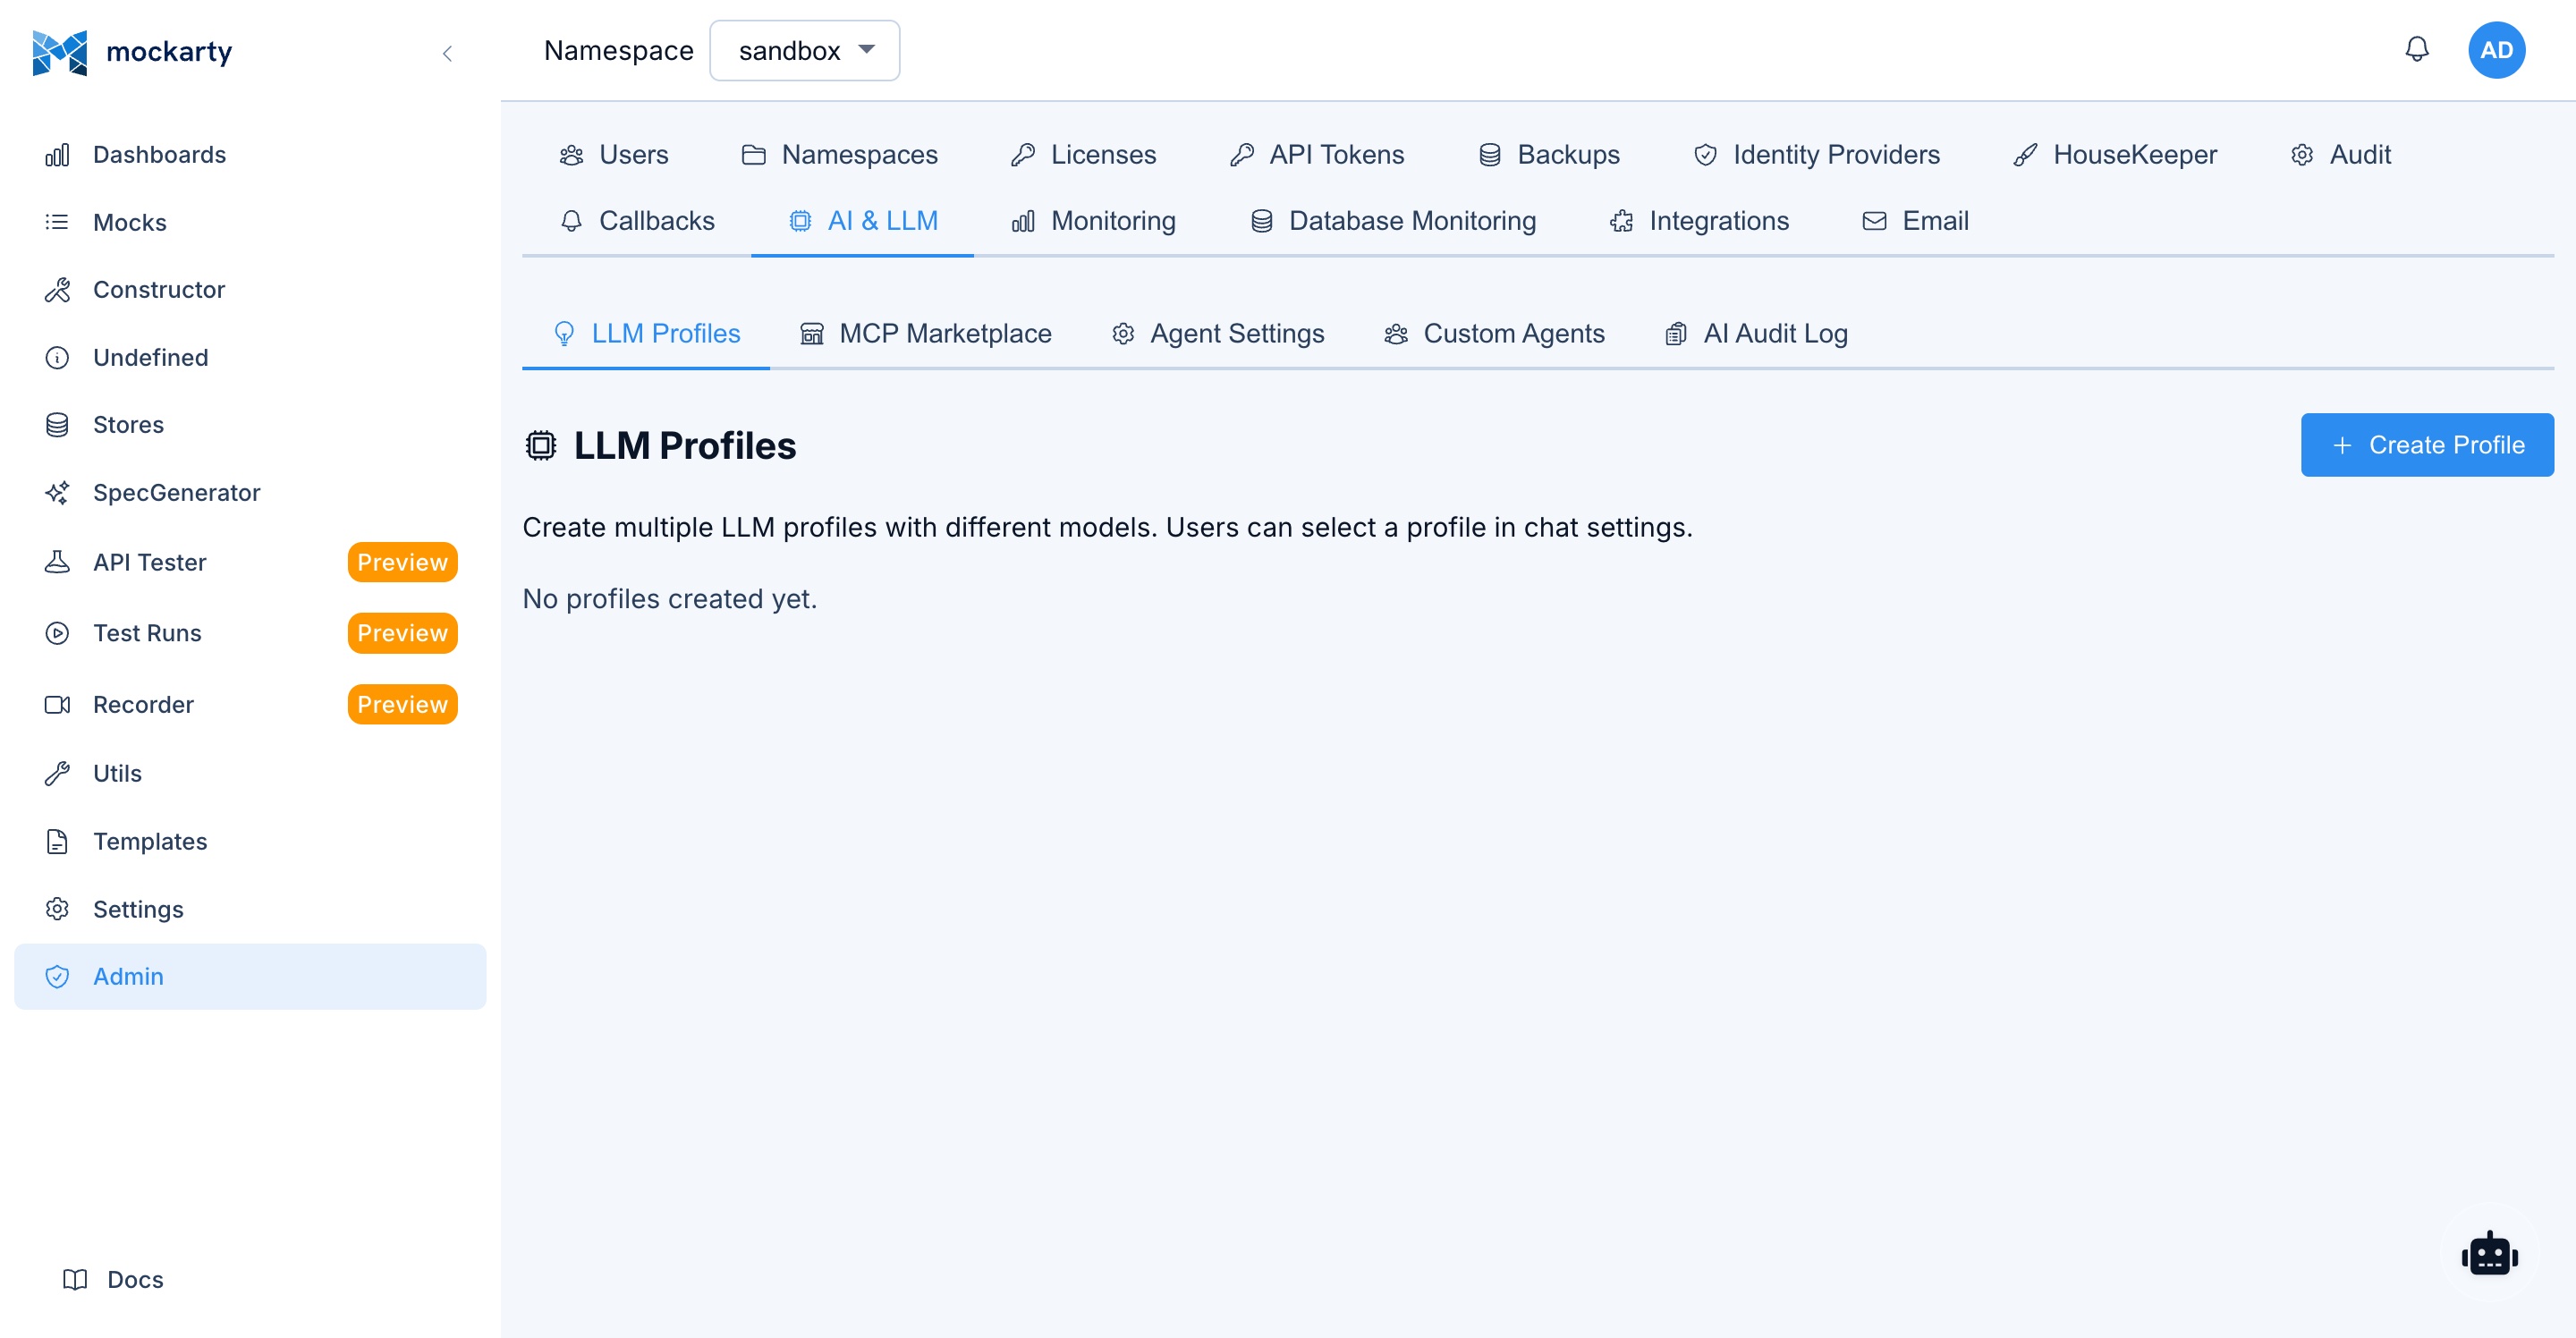
LLM / AI Assistant Configuration
Mockarty includes an AI assistant (Agent Chat) that helps users create mocks, troubleshoot issues, and explore the system using natural language.
Enabling the AI Assistant
Set the following environment variable:
ENABLE_LLM=true
MCP Server
If you want to expose Mockarty tools via MCP (Model Context Protocol) for external AI agents, enable the built-in MCP server:
ENABLE_MCP=true
| Environment Variable | Description | Default |
|---|---|---|
ENABLE_MCP |
Enable MCP server | false |
MCP_PORT |
MCP server port | 5772 |
Agent Concurrency
The AI agent subsystem (ADK) controls how many agent tasks can run simultaneously and how long sessions last:
| Environment Variable | Description | Default |
|---|---|---|
ADK_ENABLED |
Enable the ADK agent subsystem | true |
ADK_MAX_CONCURRENT_TASKS |
Max concurrent AI agent tasks | 3 |
ADK_SESSION_TTL_HOURS |
Agent session lifetime in hours | 24 |
ADK_MAX_TOOL_ITERATIONS |
Max tool call iterations per request | 50 |
A2A_ENABLED |
Enable A2A (Agent-to-Agent) protocol | true |
Default Configuration
When enabled without additional configuration, Mockarty connects to a local Ollama instance:
| Setting | Default value |
|---|---|
| Provider | Ollama |
| URL | http://localhost:11434 |
| Model | qwen3:1.7b |
Local Ollama (for Developers)
Ollama lets you run open-source LLMs locally. This is useful for development and testing when you do not want to use a cloud LLM provider.
Install Ollama:
# macOS
brew install ollama

# Linux
curl -fsSL https://ollama.com/install.sh | sh
Start Ollama and pull a model:
# Start the Ollama server
ollama serve &

# Pull a model (choose size based on available RAM)
ollama pull qwen3:0.6b   # ~1 GB RAM — smallest, fast
ollama pull qwen3:1.7b   # ~2 GB RAM — balanced (default)
ollama pull qwen3:4b     # ~3.5 GB RAM — better quality
Configure Mockarty to use Ollama:
Set ENABLE_LLM=true and create an Ollama profile in Admin Panel > LLM Profiles with:
- Provider: Ollama
- URL:
http://localhost:11434 - Model: the model you pulled (e.g.,
qwen3:1.7b)
Alternatively, pass the Ollama URL and model as environment variables at startup — they serve as defaults if no LLM profile is configured:
ENABLE_LLM=true OLLAMA_URL=http://localhost:11434 OLLAMA_MODEL=qwen3:1.7b ./mockarty
Note: For production deployments, configure LLM providers through the Admin Panel UI. Environment variables
OLLAMA_URLandOLLAMA_MODELare convenience defaults and are overridden by the active LLM profile.
Configuring LLM Profiles
You can configure multiple LLM profiles via the Admin Panel:
- Navigate to Admin Panel > LLM Profiles.
- Click Create Profile.
- Fill in:
- Name — Display name for this profile.
- Provider — OpenAI, Anthropic (Claude), OpenRouter, Google (Gemini), Mistral, Groq, Ollama (local), or Custom (any OpenAI-compatible endpoint).
- URL — API endpoint URL.
- API Key — Authentication key (if required by provider).
- Model — Model identifier.
- Click Save.
- Set one profile as Default for all users.
Client-Side LLM
Users can also connect their own LLM provider directly from the browser, without routing API calls through the Mockarty server. This is useful when:
- Users have their own API keys for OpenAI, Claude, or other providers
- You want to avoid LLM traffic passing through the Mockarty server
- Different users need different LLM providers
When client-side mode is active, LLM API calls are made directly from the browser to the provider, while tool execution (mock creation, store updates, etc.) still happens server-side.
To use client-side LLM, users select a custom profile in the Agent Chat settings with their own API key and provider URL.
Per-Namespace Rate Limits
To prevent excessive LLM usage, configure rate limits per namespace:
- Navigate to Admin Panel > LLM Profiles.
- Under Rate Limits, set:
- Requests per minute per namespace.
- Requests per day per namespace.
- Click Save.
Agent Chat
When the AI assistant is enabled, a floating chat button appears on every page of the Web UI. Users can:
- Ask questions about how to use Mockarty.
- Request mock creation using natural language descriptions.
- Get help with JsonPath expressions, Faker functions, and conditions.
- Troubleshoot mock matching issues.
Auto-Approve Mode
By default, the Agent Chat requires manual approval for each tool call (Accept/Decline buttons). You can enable auto-approve mode to automatically execute tool calls without confirmation:
- Open the Agent Chat.
- Find the Auto Approve dropdown at the top of the chat panel.
- Switch from Manual to Auto Approve.
This setting is stored locally in the browser and persists across sessions. Use auto-approve when you trust the AI agent to execute operations without review — for example, during rapid mock prototyping in a sandbox namespace.
Caution: In production namespaces, consider keeping manual approval enabled to review each tool call before execution.
Security Best Practices
Follow these recommendations to keep your Mockarty installation secure.
Immediate Actions After Installation
-
Change the default admin password. The
admin/admincredentials are publicly documented. Change the password before exposing the instance to any network. -
Enable 2FA for admin accounts. Two-factor authentication adds a critical layer of protection for privileged accounts.
Network and Transport Security
-
Use HTTPS. Set up TLS certificates (auto-generated or custom) to encrypt all traffic. Set
COOKIE_SECURE=true(this is the default) to ensure session cookies are only sent over HTTPS. -
Keep SSRF protection enabled. The
ALLOW_PROXY_TO_PRIVATE_IPSsetting defaults tofalse, which prevents proxy/testing modules from reaching internal network services. Do not change this unless you understand the risks. When Mockarty runs in the same cluster as the services it tests, preferMOCKARTY_TARGET_ALLOWLISTover the blunt flag: it permits only the ranges/hostnames you list (comma/space-separated CIDRs like10.0.0.0/8and host suffixes like.svc.cluster.local), keeping every other private address blocked. Cloud-metadata and link-local addresses stay blocked regardless of either setting. -
Restrict network access. Use firewalls or network policies to limit who can reach the Mockarty ports:
Port Protocol Purpose Expose to 5770 HTTP Web UI, REST API, mock traffic Users / teams 5771 HTTPS Encrypted Web UI, REST API, mock traffic Users / teams (recommended) 5772 HTTP/SSE MCP server (only if ENABLE_MCP=true)AI agents / trusted clients 5773 gRPC Coordinator (resolver/runner registration) Internal: resolver and runner nodes only
Access Control
-
Use namespace isolation. Assign each team its own namespace with appropriate roles. This prevents accidental interference between teams.
-
Follow the principle of least privilege. Assign the lowest role that meets each user’s needs. Most users should have the User system role with the namespace User or Viewer role.
-
Rotate API tokens regularly. API tokens provide programmatic access. Rotate them periodically and revoke tokens that are no longer needed.
-
Review audit logs. Regularly check audit logs for unexpected activity, especially failed login attempts and admin actions.
Operational Security
-
Keep Mockarty updated. Apply updates promptly to receive security fixes.
-
Back up regularly. Configure automatic backups in Admin Panel > Backup. Periodically verify that backups can be restored.
-
Monitor system health. Use the health check endpoints (
/health/livefor liveness,/health/readyfor readiness) to monitor the system’s status. -
Enable contract testing. Use contract testing to detect mock drift and breaking changes. This ensures your mocks stay in sync with API specifications and prevents test environments from silently diverging from production behavior.
-
Test resilience with chaos engineering. Use chaos engineering to validate that your systems handle failures gracefully when Mockarty-dependent services experience faults (PRO license required).
Rate Limiting
Rate Limiting: API rate limits are configured through the database. Default limits: 10 requests/second, 60/minute, 1000/hour per scope (user/namespace/global), with burst of 20. Rate limit configuration can be managed via the admin API.
Environment Variable Summary
Security hardening (recommended production values):
| Variable | Recommended | Purpose |
|---|---|---|
COOKIE_SECURE |
true (default) |
HTTPS-only session cookies |
ALLOW_PROXY_TO_PRIVATE_IPS |
false (default) |
Prevent SSRF via proxy/webhook outbound calls (blunt override — opens all private ranges) |
MOCKARTY_TARGET_ALLOWLIST |
empty (default) | Scoped SSRF exception: comma/space-separated CIDRs + host suffixes (e.g. 10.0.0.0/8,.svc.cluster.local) allowed as targets without opening every private range |
MCP_TLS_INSECURE_SKIP_VERIFY |
false (default) |
Verify TLS certificates for MCP client calls |
HTTPS_ENABLED |
true (default) |
Enable HTTPS listener on port 5771 |
HTTP / HTTPS listener:
| Variable | Default | Description |
|---|---|---|
HTTP_PORT |
5770 |
Main HTTP API/UI port |
HTTP_BIND_ADDR |
localhost |
Interface to bind HTTP listener to. Set to 0.0.0.0 for external access |
HTTPS_ENABLED |
true |
Enable HTTPS listener |
HTTPS_PORT |
5771 |
HTTPS port |
HTTPS_BIND_ADDR |
"" |
Interface to bind HTTPS listener to. Empty = same as HTTP_BIND_ADDR |
HTTPS_CERT_FILE |
"" |
Path to TLS certificate. If empty, Mockarty auto-generates a self-signed cert under HTTPS_TLS_DIR |
HTTPS_KEY_FILE |
"" |
Path to TLS private key |
HTTPS_TLS_DIR |
.mockarty/tls |
Directory for auto-generated self-signed certs |
HTTP_REQUEST_BODY_SIZE_LIMIT_MB |
5 |
Maximum request body size (MB). Increase for large mock imports |
Database:
| Variable | Default | Description |
|---|---|---|
DB_USE |
pg |
Database driver: pg (PostgreSQL, recommended for production), sqlite (single-file, dev/desktop), mysql (experimental) |
DB_DSN |
— | Database connection string (required for pg/mysql) |
DB_ENABLE_AUDIT |
true |
Enable audit log table (required for compliance — leave true in production) |
DB_ENABLE_VERSIONING |
true |
Enable mock version history |
DB_MAX_OPEN_CONNS |
25 |
Size of the main PostgreSQL pool (mock matching, admin queries). In a cluster, total connections ≈ nodes × this value — keep it under the PostgreSQL max_connections budget. |
BOOTSTRAP_DB_MAX_OPEN_CONNS |
auto (max(16, 4 × CPU)) |
Size of the admin/bootstrap PostgreSQL pool (license status, schedulers, notifications). The default scales with CPU cores; override in multi-node clusters to stay under the PostgreSQL max_connections budget. |
Cache:
| Variable | Default | Description |
|---|---|---|
USE_CACHE |
true |
Enable cache layer for mock resolution |
CACHE_TYPE |
inmemory |
Cache backend: inmemory (in-memory, single-node) or redis (multi-node) |
CACHE_REDIS_POOL_SIZE |
auto (max(20, 10 × CPU)) |
Redis connection pool size. Raise for >100 K concurrent users; lower when Redis maxclients is the bottleneck. |
CACHE_REDIS_MIN_IDLE_CONNS |
auto (max(4, CPU)) |
Minimum warm Redis connections. Trades idle-resource cost for lower first-request latency after quiet periods. |
MOCKARTY_SECRETS_CACHE_TTL_SECONDS |
60 |
TTL for the in-process secret value cache used by TCM steps that resolve {{secret.X}}. Avoids saturating upstream secret stores (Vault, AWS SM, GCP SM, Azure KV) under high-concurrency test plan runs. Set to -1 to disable caching entirely. Rotation / update / delete events from secrets invalidate immediately across the cluster via PG NOTIFY. |
MOCKARTY_SECRETS_CACHE_MAX_ENTRIES |
4096 |
LRU cap for the secret value cache. Past this, the oldest entries are evicted. Raise for deployments with many distinct namespaces × secret keys; lower to bound RAM. |
MOCKARTY_PREVIEW_ALLOW_PRIVATE_HOSTS |
(unset, refuse) | Set to 1 (or true) to allow the TCM preview-step-request endpoint to dispatch HTTP requests to loopback / RFC1918 / link-local / cloud-metadata addresses. Default is OFF because a preview that targets internal services is the classic SSRF vector. Enable ONLY in single-host dev environments where the upstream is intentionally on 127.0.0.1. |
PDF report engine (Test Plan run export, optional):
The Test Plan run export endpoint can produce PDF files when an external rendering engine is available. Mockarty looks for the wkhtmltopdf binary on startup and uses it automatically — there is no env var to set in the common case. When the binary is not installed, the endpoint returns 501 Not Implemented with a JSON envelope explaining how to install it.
| Variable | Default | Description |
|---|---|---|
MOCKARTY_PDF_ENGINE |
auto |
Which renderer to use for /test-plan-runs/:id/export?format=pdf. Values: auto (try wkhtmltopdf on PATH; fall back to disabled stub if missing — recommended); none / stub (PDF deliberately disabled — endpoint returns 501); wkhtmltopdf (explicit — same as auto but logs a warning instead of an info note when the binary is missing); chromium (Chromium-quality CSS / emoji / CJK fonts, but requires the Chromium-enabled Mockarty build variant — see below). |
MOCKARTY_PDF_WKHTMLTOPDF_BIN |
wkhtmltopdf |
Path to the wkhtmltopdf binary. Pass an absolute path (e.g. /usr/local/bin/wkhtmltopdf) or a PATH-resolvable name. If the binary cannot be located at startup, Mockarty logs a notice and falls back to PDF disabled (no startup failure). |
MOCKARTY_PDF_CHROMIUM_BIN |
chromium-headless |
Path to the Chromium / Chrome binary. The selector falls back through chromium-headless → chromium → google-chrome, so common distribution names work without override. Only consulted when MOCKARTY_PDF_ENGINE=chromium AND you are running the Chromium-enabled Mockarty build. |
MOCKARTY_PDF_MAX_BYTES |
26214400 (25 MiB) |
Maximum PDF output size. If the renderer produces more than this, the request returns 413 Request Entity Too Large with code pdf_too_large. Raise for plans with many embedded screenshots; lower to protect admin-node RAM. |
MOCKARTY_PDF_TIMEOUT_SECONDS |
60 |
Hard timeout for one PDF render. If exceeded, the request returns 504 Gateway Timeout with code pdf_timeout. Raise for very large plans, lower if exporters hang behind a stuck binary. |
Chromium-enabled build. The default release binary is distroless-friendly and ships only the
wkhtmltopdfpath. Chromium-quality PDFs require the Chromium-enabled Mockarty build variant — request it from your Mockarty vendor — and a Chromium binary available on PATH (or viaMOCKARTY_PDF_CHROMIUM_BIN). For most operators thewkhtmltopdfengine is the simpler choice — install it via your distribution’s package manager and you are done.
Installing wkhtmltopdf:
The renderer is a single static binary published by wkhtmltopdf.org. Pick the command that matches your platform:
- Debian / Ubuntu —
sudo apt-get update && sudo apt-get install -y wkhtmltopdf - Alpine —
apk add --no-cache wkhtmltopdf(also needsttf-dejavuif you embed non-ASCII text) - macOS —
brew install --cask wkhtmltopdf(brew install wkhtmltopdfworks on older Homebrew installs) - CentOS / Rocky / RHEL — download the matching RPM from the official release page and install with
rpm -i …. The distro-packaged version is often older than 0.12.6 and trips on flex CSS. - Windows — download the
.exeinstaller from the official release page, then pointMOCKARTY_PDF_WKHTMLTOPDF_BINat it.
After installing, restart Mockarty. The startup log will print test-plan PDF engine selected engine=wkhtmltopdf when detection succeeds. The PDF download button in the test-plan run report will work immediately — no env var required.
Troubleshooting: when the export still returns 501 after installing the binary, double-check it is on the admin-node user’s $PATH (which wkhtmltopdf) and that the binary is executable (wkhtmltopdf --version). If you installed it under a non-standard path, set MOCKARTY_PDF_WKHTMLTOPDF_BIN=/full/path/to/wkhtmltopdf and restart. Set MOCKARTY_DEBUG=1 to write the failing HTML payload to /tmp/mockarty-pdf-*.html for local re-rendering.
Cluster mode (multi-node deployments):
| Variable | Default | Description |
|---|---|---|
CLUSTER_MODE |
false |
Enable leader election via PostgreSQL advisory locks. Set to true when running more than one admin node. When false, each node acts as its own leader (singleton jobs would duplicate) |
NODE_ID |
auto | Unique node identifier. Auto-generated if empty. Set explicitly only when you need stable node identity in logs/metrics |
Multi-node rule.
CLUSTER_MODE=truerequires PostgreSQL (DB_USE=pg). SQLite does not support the advisory locks used for leader election.
Event bus (async event processing):
| Variable | Default | Description |
|---|---|---|
EVENT_BUS_QUEUE_SIZE |
1000 |
In-memory queue depth for async events |
EVENT_BUS_RETRY_MAX |
3 |
Maximum retries per event |
EVENT_BUS_WORKER_COUNT |
2 |
Number of background workers draining the queue |
Analytics (opt-in, anonymous):
| Variable | Default | Description |
|---|---|---|
ANALYTICS_ENABLED |
false |
Opt-in anonymous usage metrics. Collects aggregate counts only — no PII, no mock content, no user IDs |
ANALYTICS_LEVEL |
full |
full — all metrics; minimal — resource counts only |
ANALYTICS_REPORT_HOUR |
1 |
UTC hour (0–23) for the daily aggregation |
ANALYTICS_DATA_DIR |
"" |
Directory for air-gapped export files (default: ./data) |
Test Plans (live logs and durable archive):
The Test Plans engine writes every item log line through a sink that fans out to two destinations: the primary store (the test_plan_item_logs table — used for replay in the UI) and an optional secondary archive (a local file or an S3 bucket — used for long-term retention or external SIEM ingestion). When secondary writes are unavailable the primary path keeps working — logs are never lost just because S3 is briefly down.
| Variable | Default | Description |
|---|---|---|
TESTPLAN_LOGSINK_SECONDARY |
"" (off) |
Secondary archive backend. Set to file to mirror logs into a directory, or s3 to mirror into an S3-compatible object store. Empty disables the secondary entirely. |
TESTPLAN_LOGSINK_FILE_BASE |
"" |
Required when TESTPLAN_LOGSINK_SECONDARY=file. Absolute path to the directory where one log file per run is appended. The directory must be writable by the Mockarty process. |
TESTPLAN_LOGSINK_S3_BUCKET |
"" |
Required when TESTPLAN_LOGSINK_SECONDARY=s3. Name of the S3 bucket. AWS credentials are read from the standard environment / IRSA chain. |
TESTPLAN_LOGSINK_S3_PREFIX |
"" |
Optional key prefix prepended to every uploaded object (e.g. mockarty/prod/). Useful for tenant or environment scoping inside a shared bucket. |
Air-gapped tip. Leave
TESTPLAN_LOGSINK_SECONDARYempty in air-gapped installations. The primary database sink still keeps every log line and the live UI tail keeps working.
General:
| Variable | Default | Description |
|---|---|---|
ENV |
development |
Environment name (development or production). Affects log format and default behaviors |
LOG_LEVEL |
info |
debug, info, warn, error |
Kubernetes Administration
When running Mockarty on Kubernetes, the admin node can manage the cluster lifecycle directly through the Admin API and CLI. The operator watches a MockartyCluster Custom Resource and reconciles resolvers, runners, and integrations automatically.
K8s Management Environment Variables
| Variable | Default | Description |
|---|---|---|
K8S_MANAGEMENT |
auto |
auto — detect if running in-cluster; true — force enable; false — disable |
K8S_NAMESPACE |
(empty) | Namespace where the MockartyCluster CR lives. Empty means use the namespace from the in-cluster ServiceAccount |
K8S_CLUSTER_NAME |
mockarty |
Name of the MockartyCluster Custom Resource |
K8S_KUBECONFIG |
(empty) | Path to kubeconfig file. Empty means use the in-cluster ServiceAccount |
K8S_MAX_RUNNERS_PER_NS |
5 |
Maximum number of runner pods per namespace (resource quota) |
K8S_MAX_RESOLVERS_PER_NS |
3 |
Maximum number of resolver pods per namespace (resource quota) |
Admin API Endpoints
All Kubernetes endpoints require authentication and are scoped to the admin node.
| Method | Endpoint | Description |
|---|---|---|
GET |
/api/v1/k8s/status |
Returns cluster status: pods, versions, health, resource usage |
POST |
/api/v1/k8s/scale |
Scale a component (resolver/runner) to a desired replica count |
POST |
/api/v1/k8s/upgrade |
Upgrade component images to a target version |
POST |
/api/v1/k8s/restart |
Perform a rolling restart of a component |
GET |
/api/v1/k8s/pods/:name/logs |
Stream logs from a specific pod (supports follow and tailLines query params) |
POST |
/api/v1/k8s/integrations |
Create a new namespace integration |
DELETE |
/api/v1/k8s/integrations/:name |
Remove a namespace integration by name |
GET |
/api/v1/k8s/integrations |
List all configured integrations |
Scale example:
curl -X POST http://localhost:5770/api/v1/k8s/scale \
  -H "Authorization: Bearer $TOKEN" \
  -H "Content-Type: application/json" \
  -d '{"component": "resolver", "replicas": 5}'
Upgrade example:
curl -X POST http://localhost:5770/api/v1/k8s/upgrade \
  -H "Authorization: Bearer $TOKEN" \
  -H "Content-Type: application/json" \
  -d '{"component": "runner", "version": "1.3.0"}'
RBAC
- Cluster operations (
scale,upgrade,restart,status,logs) are restricted to users with the Admin or Support role. - Namespace integrations (
/api/v1/k8s/integrations) are available to Namespace Owners for their own namespaces, and to Admins for any namespace.
CLI Shortcuts
The CLI provides shorthand commands that call the Admin API under the hood:
# View cluster status
mockarty-cli cluster status

# Scale a component
mockarty-cli cluster scale resolver --replicas 5

# Upgrade cluster image tag (upgrades all components at once)
mockarty-cli cluster upgrade --tag 1.3.0

# Rolling restart
mockarty-cli cluster restart resolver

# Stream pod logs
mockarty-cli cluster logs <pod-name> --follow --tail 100
Audit Log Export & SIEM Integration
Mockarty keeps an immutable audit log of every authentication event, configuration change, and administrative action. The log can be exported from the Admin Panel or via the REST API in four formats, picked to match the ingestion pipelines of major SIEM platforms.
Authentication vocabulary. The following verbs are emitted automatically by the authentication subsystem and land in the exported stream without any extra configuration:
| Verb | Fires on |
|---|---|
failed_login |
Invalid credentials, locked account |
account_lockout |
Transition into locked state (emitted exactly once per lockout) |
oauth_login |
Successful OAuth / SSO sign-in |
oauth_login_failed |
OAuth exchange / user-info / auth failure |
ldap_login |
Successful LDAP / AD bind |
ldap_login_failed |
LDAP bind failure |
totp_enabled |
First successful TOTP verify (state transition) |
totp_disabled |
Self-service 2FA disable |
totp_verify_failed |
Invalid TOTP code (enable, disable, step-up) |
recovery_codes_generated |
Backup-code set regenerated |
password_changed |
Password rotation or initial setup |
session_regenerated |
Session promoted after 2FA step-up |
audit_logs_exported |
Audit trail exported (csv / json / syslog / cef). Metadata carries the format, byte count, and effective filters so the SOC can reconstruct exactly what left the system. |
audit_legal_hold_applied |
Retention freeze placed on the audit trail (SOX §802 / 719-П §6.4). Metadata carries the window (from_ms, to_ms), optional namespace, and the filter summary supplied by the operator. |
audit_legal_hold_released |
Active legal hold lifted; the previously-held rows fall back under the normal retention policy. Metadata carries the same window plus released_by and released_ms. |
| Format | Content-Type | Typical use |
|---|---|---|
csv |
text/csv |
Spreadsheet review, manual compliance audits |
json |
application/json |
Structured archive, downstream ETL |
syslog |
text/plain (RFC 5424) |
Forward to syslog-ng, rsyslog, or any SIEM collector |
cef |
text/plain (CEF 0) |
ArcSight, QRadar, Splunk, MaxPatrol SIEM, KUMA, RuSIEM |
REST API
# CSV dump for the last 24 hours (milliseconds since epoch)
curl -H "Authorization: Bearer $TOKEN" \
     "$MOCKARTY_URL/api/v1/admin/audit/export?format=csv&from=$(date -u -d '1 day ago' +%s000)" \
     > audit.csv

# Syslog RFC 5424 — pipe directly into a SIEM collector
curl -H "Authorization: Bearer $TOKEN" \
     "$MOCKARTY_URL/api/v1/admin/audit/export?format=syslog" \
     | nc -u siem-collector.example.com 514

# ArcSight CEF for ingestion into an existing SIEM parser
curl -H "Authorization: Bearer $TOKEN" \
     "$MOCKARTY_URL/api/v1/admin/audit/export?format=cef" \
     > audit.cef
Supported filters: user_id, action, resource_type, resource_id, namespace, from, to, limit.
CLI
# Hourly syslog dump for SIEM ingest
mockarty-cli audit export \
    --format syslog \
    --from $(date -u -d '1 hour ago' +%s000) \
    --to   $(date -u +%s000) \
    > audit-$(date +%s).log

# CEF to file
mockarty-cli audit export --format cef --output audit.cef

# Filter by user
mockarty-cli audit export --format json --user-id u-42 --action login
Wire formats
- Syslog (RFC 5424) — one record per line, facility 13 (security/authorization). Structured-data block
[audit@<PEN> key="value" ...]carries the full record. The default private-enterprise number is a placeholder; the value is set at build time for production deployments. - CEF 0 —
CEF:0|Mockarty|Mockarty|<version>|<action>|<name>|<severity>|<ext>. Extensions use the CEF dictionary (suser,src,act,rt,requestMethod,requestUrl,externalId, plus customcs1/cs2/cs3with labels for namespace/resource).
Both SIEM formats escape reserved characters (|, =, \, ", ], newlines) to guarantee one record per line and safe ingestion into any RFC- or CEF-compliant parser.
RBAC: audit export requires the
adminorsupportrole. Thesupportrole can export but not alter records.
Audit log retention
Audit log retention is driven by the scheduled audit_log_cleanup job in Admin Panel → Cleanup Policies. The default retention is configurable per deployment; beyond that value rows are hard-deleted to keep the table size bounded.
For regulated deployments (banks under 719-П ЦБ РФ §6.4, government systems under ФСТЭК приказ №17 п.4.2) Mockarty accepts a compliance floor expressed as an environment variable. When set, the cleaner silently raises any shorter retention configured via the UI up to the floor — an operator cannot accidentally shorten retention below a legally mandated minimum.
| Variable | Default | Example | Description |
|---|---|---|---|
MOCKARTY_AUDIT_RETENTION_MIN_DAYS |
(unset) | 1095 |
Minimum audit retention in days. Any UI value below the floor is clamped to it. |
Typical values: 1095 for 719-П ЦБ РФ (3 years), 1825 for extended ФСТЭК policies (5 years). Leave unset for non-regulated deployments.
The floor is enforced on every cleanup tick and logged at WARN level whenever it raises the effective retention.
Audit legal holds
A legal hold is a retention-blocking freeze placed on the audit trail while a regulatory inquiry, incident investigation, or litigation is in progress. While at least one hold is active, the retention cleanup job preserves every audit row whose timestamp falls inside the hold’s window — even if the normal retention has already expired.
Legal holds satisfy three concurrent requirements:
- SOX §802 / 18 USC §1519 — destroying records under an active preservation notice is a criminal offence in the United States.
- 719-П ЦБ РФ §6.4 — bank operators must be able to freeze audit trails on demand for ЦБ inspections.
- ФСТЭК приказ №17 п.4.2 — audit integrity during security-incident investigations.
Each hold is a range — from a start timestamp to an optional end timestamp (open-ended holds are allowed) — and can be scoped to a single namespace or applied globally. Placing or releasing a hold is itself audited via the audit_legal_hold_applied and audit_legal_hold_released verbs.
REST API
# Place a hold covering the last 7 days for namespace "prod"
curl -X POST -H "Authorization: Bearer $TOKEN" -H "Content-Type: application/json" \
     -d '{
       "reason": "INC-42 preservation",
       "from_time": "2026-04-12T00:00:00Z",
       "to_time":   "2026-04-19T23:59:59Z",
       "namespace": "prod",
       "filter_summary": {"ticket": "INC-42"}
     }' \
     "$MOCKARTY_URL/api/v1/admin/audit/legal-holds"

# List all holds (status: active|released, limit 1..1000)
curl -H "Authorization: Bearer $TOKEN" \
     "$MOCKARTY_URL/api/v1/admin/audit/legal-holds?status=active"

# Release a hold (idempotent — repeat calls return 200 with the released row)
curl -X DELETE -H "Authorization: Bearer $TOKEN" \
     "$MOCKARTY_URL/api/v1/admin/audit/legal-holds/<hold-id>"
Behaviour
- While any hold is active, the retention cleaner skips rows covered by it. The baseline DELETE plan is unchanged when no hold exists, so unregulated deployments pay zero overhead.
- Namespace-scoped holds protect only rows inside that namespace. A hold with
namespaceomitted covers every namespace. - An open-ended hold (
to_timeomitted) covers every row fromfrom_timeonward, with no upper bound. - Released holds are never deleted — they remain in the
audit_log_legal_holdstable as an evidentiary trail of what was held, when, and by whom. - RBAC:
adminonly for POST / DELETE.supportcan list holds (read-only SOC visibility) but cannot place or release them.
Safety
If the database is unreachable at cleanup time, the cleaner aborts the current tick rather than risk deleting held rows. The scheduler retries on its next interval.
Compliance build: pure-Go SQLite
Release binaries embed a pure-Go SQLite engine — they link no native (libc) code, which is what makes them safe for distroless / scratch images and air-gapped audits. The Software Bill of Materials (SBOM) published with every release lets auditors confirm the full dependency set of the binary they run.
Field-level PII encryption at-rest
For regulated deployments under 152-ФЗ УЗ-3 / УЗ-4 (personal-data protection law of the Russian Federation) and 719-П ЦБ РФ §6.5 (bank customer-data protection), Mockarty can encrypt high-volume personal-data columns at the application layer. Covered columns: audit log user_agent (stable PII fingerprint written on every authenticated request), user email, and user full_name (ФИО).
The feature is off by default — leaving the env variables unset keeps the columns in plaintext, which is the correct behaviour for dev and non-regulated deploys. Enabling it is a zero-downtime operation: existing plaintext rows continue to read correctly through a transparent passthrough, and new rows are written as encrypted envelopes.
| Variable | Default | Example | Description |
|---|---|---|---|
MOCKARTY_PII_ENCRYPTION_KEY |
(unset) | base64(32 random bytes) |
Turns on field-level encryption for PII columns. Must be exactly 32 bytes decoded. |
MOCKARTY_PII_HMAC_PEPPER |
(unset) | base64(32+ random bytes) |
Pepper for deterministic search indexes used by the login flow and admin search. Required to enable email and full name encryption. Must be different from MOCKARTY_PII_ENCRYPTION_KEY — defence in depth. |
MOCKARTY_PII_DECRYPT_CACHE_ENTRIES |
10000 |
50000 / disabled |
In-memory LRU size for repeat reads (audit pagination, SIEM export). Set to disabled to turn off. |
Generating the secrets (on any trusted workstation; keep both values in your secrets manager as independent entries):
# AES-256 encryption key (exactly 32 bytes)
openssl rand -base64 32
# HMAC pepper for blind index (32 bytes minimum — longer is fine)
openssl rand -base64 32
Why two separate secrets. The encryption key protects confidentiality of the stored envelopes; the pepper keyes deterministic hashes used for equality lookups (login by email, OAuth / SAML account matching) and substring search. A compromise of one must never automatically compromise the other, so both are stored as distinct entries in your secrets manager and rotated independently.
What is encrypted. Applying both env vars encrypts: audit user_agent, user email and user full_name. All lookups required by the system (login by email, OAuth/SAML account matching, admin search) continue to work transparently — Mockarty maintains deterministic search indexes so functionality is fully preserved. An attacker who obtains a copy of the database cannot derive the underlying email or name without the pepper.
Rotation:
- Never swap the key on a running cluster while encrypted rows still exist with the old key. Rotate by deploying the new key alongside the old one, running the backfill to re-encrypt all rows, then removing the old key after the backfill completes.
Backfilling legacy plaintext rows
After you turn encryption on for the first time, rows written before that point remain in plaintext. The read path handles them transparently, so there is no outage; to convert them to encrypted envelopes, run the backfill subcommand during a maintenance window:
# audit_logs.user_agent — count candidate rows (no writes)
./mockarty --pii-backfill audit_logs --pii-backfill-dry-run

# audit_logs.user_agent — re-encrypt in 1000-row batches
./mockarty --pii-backfill audit_logs --pii-backfill-batch 1000

# users.email + users.full_name + hmac + trigrams (requires MOCKARTY_PII_HMAC_PEPPER)
./mockarty --pii-backfill users --pii-backfill-dry-run
./mockarty --pii-backfill users --pii-backfill-batch 500

# Cap total work for a rehearsal on a large table (10 batches × 500 rows)
./mockarty --pii-backfill audit_logs --pii-backfill-max-batches 10
The users target encrypts email and full_name together with their associated search indexes. A malformed row aborts only that row — the rest of the batch is unaffected.
Properties:
- Idempotent. Already-encrypted rows are skipped, so re-running after a crash or pod restart is safe.
- Non-blocking. Batches are committed independently — reads and writes continue at normal throughput throughout the backfill.
- Signal-safe.
SIGINT/SIGTERMstops after the current batch; the next run picks up where the previous one left off. - Requires both keys. The subcommand fails immediately if
MOCKARTY_PII_ENCRYPTION_KEYis missing or malformed. Theuserstarget additionally requiresMOCKARTY_PII_HMAC_PEPPER.
Run against the main database (same DB_DSN, DB_USE as the admin node). The command exits 0 on success and prints a summary line: PII backfill complete: table=audit_logs column=user_agent scanned=... encrypted=... skipped=... batches=... dry_run=false.
KeyStore Backend: software or HSM (PKCS#11)
For gov-sector deployments (ФСТЭК приказ №17 п.21, УЗ-2 and above) and bank-sector deployments (ЦБ РФ 719-П §5.1), storing long-lived AES / HMAC keys as environment variables is insufficient — the regulator requires the key material to live on certified hardware (FIPS 140-2 Level 2+ or ФСТЭК КС2/КС3). Mockarty abstracts key sourcing behind a single KeyStore interface with two interchangeable backends.
| Variable | Default | Values | Description |
|---|---|---|---|
MOCKARTY_KEYSTORE |
software |
software | pkcs11 |
Selects the key-material backend. Unset = software (historical env-var flow). |
MOCKARTY_PKCS11_LIB |
(unset) | /usr/lib/softhsm/libsofthsm2.so |
Absolute path to the HSM vendor’s PKCS#11 shared object. Required for pkcs11. |
MOCKARTY_PKCS11_SLOT |
(unset) | 0 |
Slot number of the token that holds the KEK. Required for pkcs11. |
MOCKARTY_PKCS11_PIN |
(unset) | 1234 |
User PIN. Prefer MOCKARTY_PKCS11_PIN_FILE in production (env vars leak into ps). |
MOCKARTY_PKCS11_PIN_FILE |
(unset) | /run/secrets/hsm-pin |
Path to a file containing the PIN. Takes precedence over MOCKARTY_PKCS11_PIN. |
MOCKARTY_PKCS11_KEK_LABEL |
(unset) | mockarty-pii-kek |
CKA_LABEL of the symmetric key-encryption key on the HSM. |
MOCKARTY_PKCS11_WRAPPED_PII_KEY |
(unset) | base64 ciphertext | AES-256 DEK wrapped under the KEK. Unwrapped once at boot. |
MOCKARTY_PKCS11_WRAPPED_PEPPER |
(unset) | base64 ciphertext | HMAC pepper wrapped under the KEK. |
MOCKARTY_PKCS11_UNWRAP_MECHANISM |
aes-cbc-pad |
aes-cbc-pad | aes-gcm |
Wrapping mechanism used when the wrapped ciphertext was produced. |
How it works. The key-encryption key (KEK) never leaves the HSM. At startup, Mockarty authenticates to the PKCS#11 token and uses the KEK to unwrap the data-encryption key — the unwrapped material is kept only in process memory and zeroed on graceful shutdown. Revoking HSM access (rotate the PIN, revoke the user, power-cycle the token) is sufficient to lock every running and future Mockarty instance out of the encrypted data.
PKCS#11-enabled build. The default Mockarty binary is CGO-free (distroless-compatible) and does not link any PKCS#11 library. HSM integration requires the PKCS#11-enabled Mockarty build variant — request it from your Mockarty vendor, specifying your HSM model so the correct vendor PKCS#11 library is linked.
Selecting MOCKARTY_KEYSTORE=pkcs11 on a binary that does not include the backend fails fast at startup with keystore: PKCS#11 backend is not compiled in, so a misconfigured deployment never silently downgrades to software keys.
Key provisioning (example with SoftHSMv2 for staging — replace with your certified HSM in production):
# 1. Create a token and set a user PIN (done once per HSM / slot).
softhsm2-util --init-token --slot 0 --label mockarty --pin 1234 --so-pin 5678

# 2. Generate the KEK on the HSM. The key never leaves the token.
pkcs11-tool --module /usr/lib/softhsm/libsofthsm2.so --slot 0 --login --pin 1234 \
    --keygen --key-type AES:32 --label mockarty-pii-kek --usage-wrap --usage-decrypt

# 3. Generate a fresh DEK out-of-band, wrap it under the KEK, export base64:
openssl rand 32 > /tmp/dek.bin
pkcs11-tool --module /usr/lib/softhsm/libsofthsm2.so --slot 0 --login --pin 1234 \
    --encrypt --mechanism AES-CBC-PAD --iv $(printf '%.0s00' {1..16}) \
    --input-file /tmp/dek.bin --output-file /tmp/dek-wrapped.bin --label mockarty-pii-kek
base64 -w0 /tmp/dek-wrapped.bin    # → value for MOCKARTY_PKCS11_WRAPPED_PII_KEY

# 4. Same flow for the HMAC pepper (32 random bytes wrapped under the same KEK).
# 5. Delete the plaintext DEK and pepper from the operator's workstation.
shred -u /tmp/dek.bin
Health reporting. The /health endpoint includes a keystore section with the active backend kind (software or pkcs11), the pkcs11_compiled_in flag, and the result of the PKCS#11 session probe (C_GetSessionInfo). A dropped HSM session surfaces as an unhealthy pod; the operator rotates the deployment to re-authenticate.
Compliance mapping. ФСТЭК приказ №17 п.21 (УЗ-2+ hardware key protection), ЦБ РФ 719-П §5.1 (payment-infrastructure HSM requirement), 152-ФЗ УЗ-3 (separation of key custodian from data custodian — the HSM is the custodian of the KEK, Mockarty is the custodian of the data).
See Also
- Quick Start Guide — Get up and running in 20 minutes
- Installation & Deployment — Docker deployment, environment variables, and TLS configuration
- Integrations Guide — Set up resolver nodes, runner agents, and webhooks
- Contract Testing — Validate mocks against OpenAPI specs and detect mock drift
- Chaos Engineering — Fault injection experiments for resilience testing (PRO)
- UI User Guide — Comprehensive guide to the Web UI
- API Reference — Full REST API documentation for programmatic access